]]>
]]>

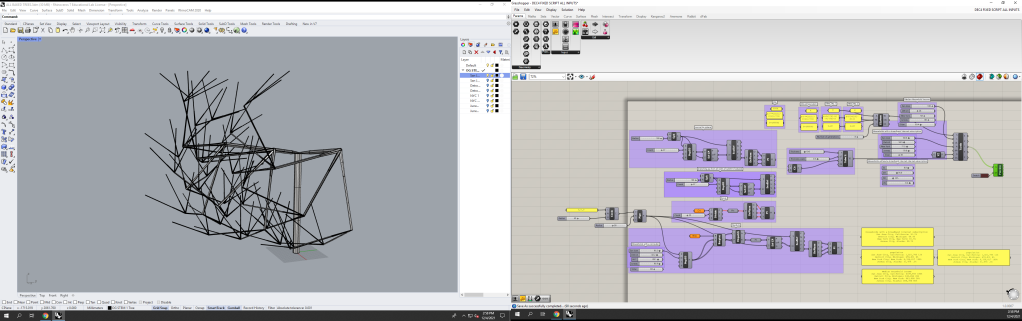
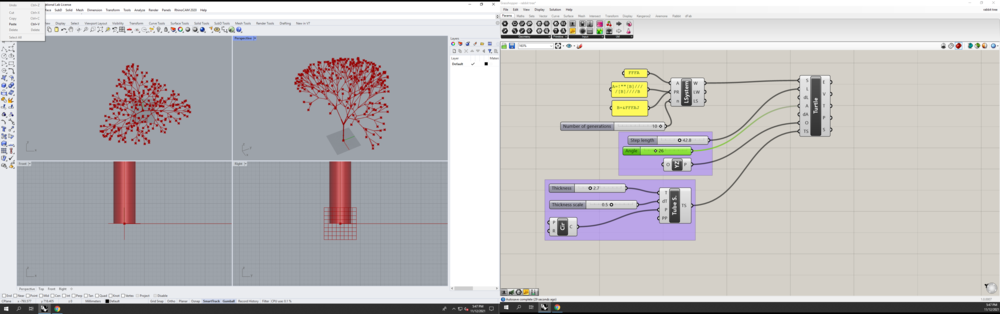
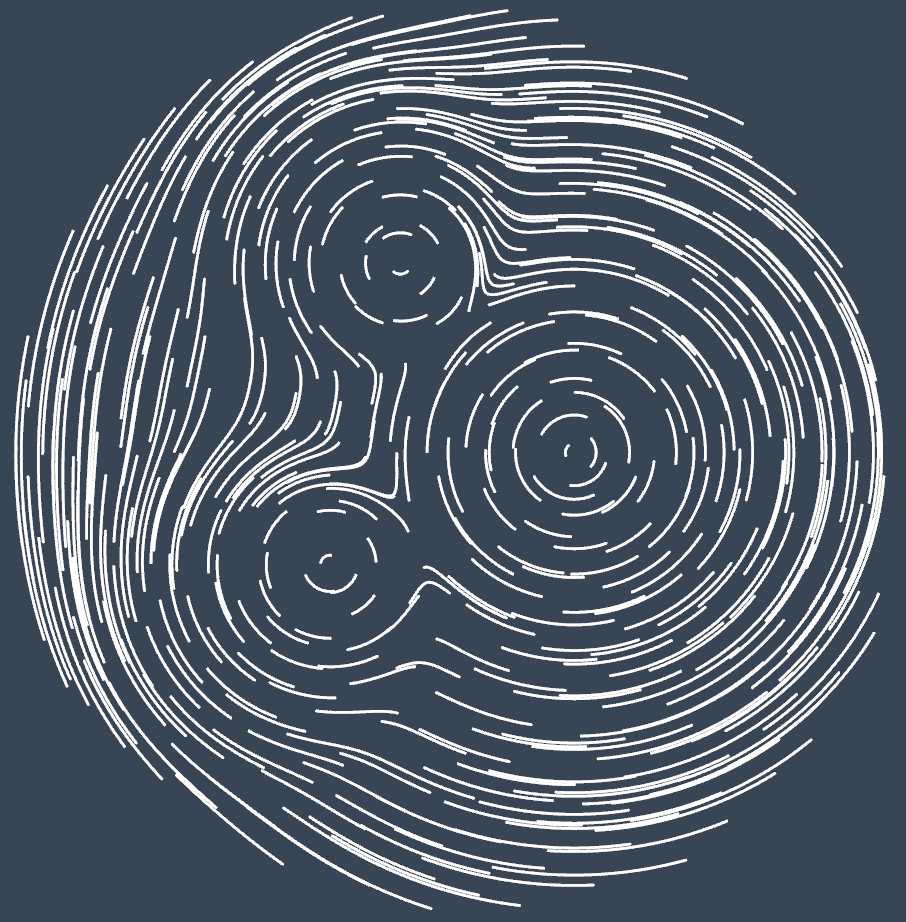
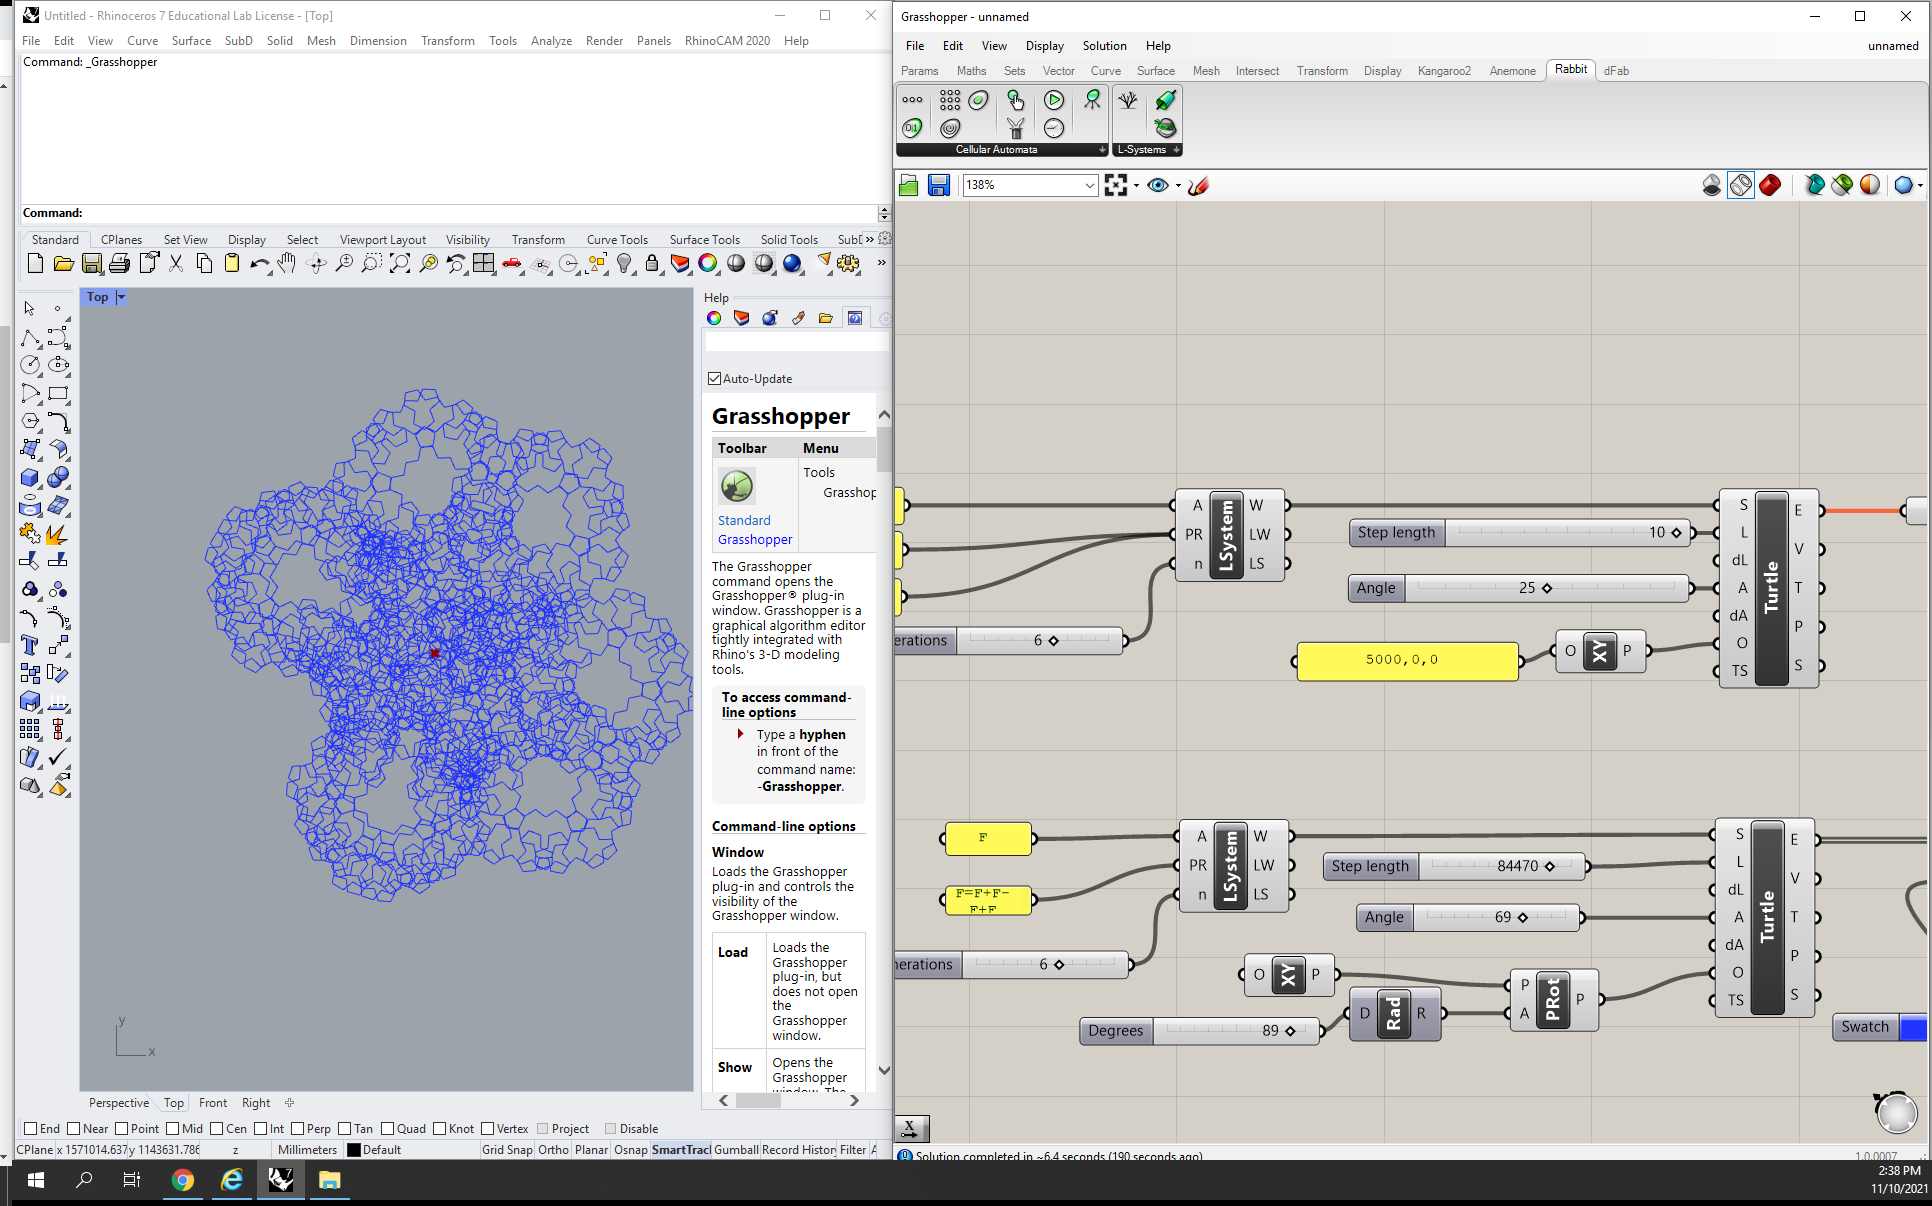
After experimenting with multiple scripts, Julian and I decided the Rabbit plug-in L-System tree was our best bet and decided to start experimenting with it.

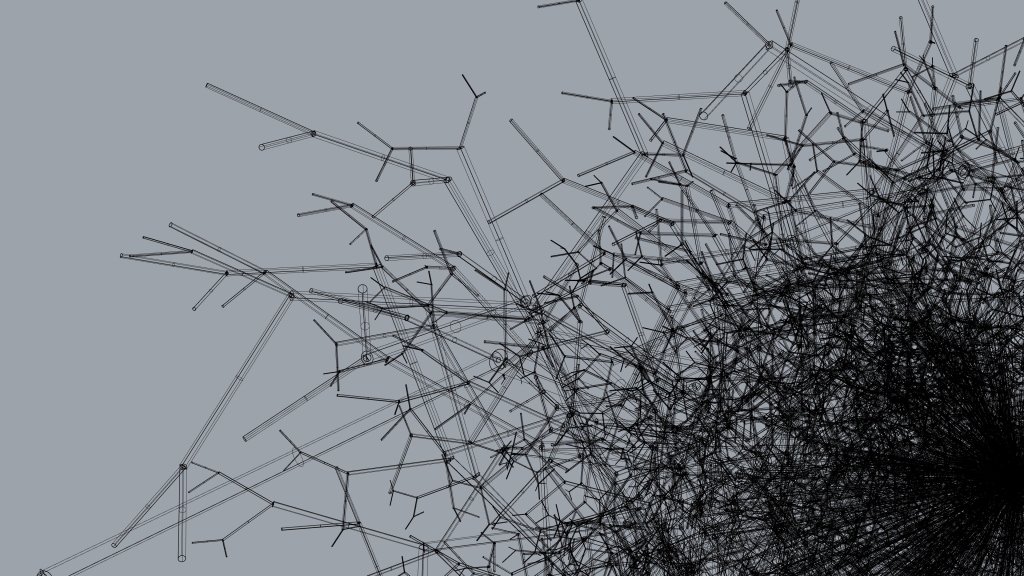
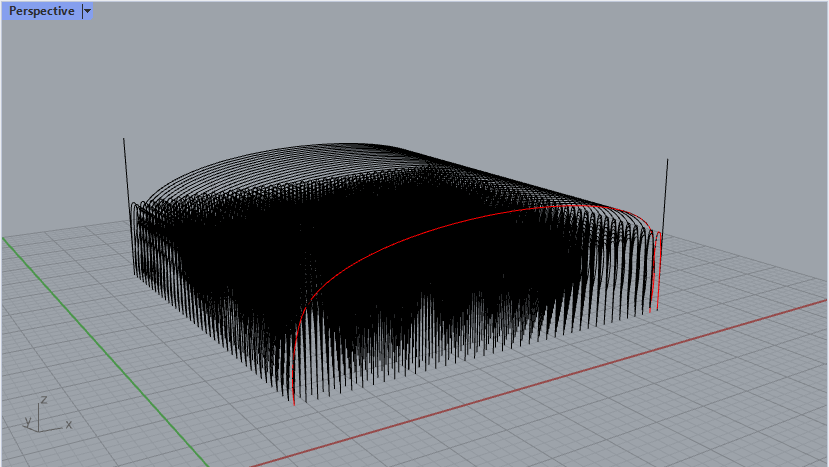
We first tried to replicate the tumbleweed structure we made in the hand-built L-system by centering the planes, normal to the surface with the help of Ryan, around a sphere and found this form incredibly intriguing.

We decided we really enjoyed the sphere but wanted to connect the individual trees together at the base. We had the thought of using Julian’s Shortest Walk script and having the first point of this script start on the final point of the Shortest Walk, and this is where everything went wrong.
Due to heightened frustration and franticness, there is a lack of documentation of this dark period in our project. We suffered through hours of the script working, then breaking, then crashing and/or freezing our computers.
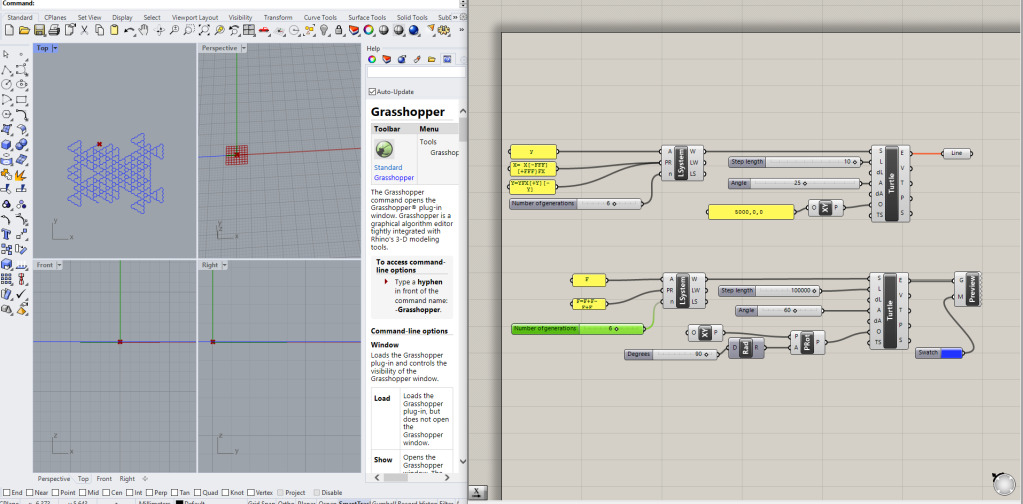
We eventually gave up on the Shortest Walk script, but wanted a more interesting shape to center our plant around. After experimenting with a few shapes, we decided on a torus. We had a few more issues regarding starting points and plane orientation but eventually figured it out after playing with pop3d and dividing segments on the surface.

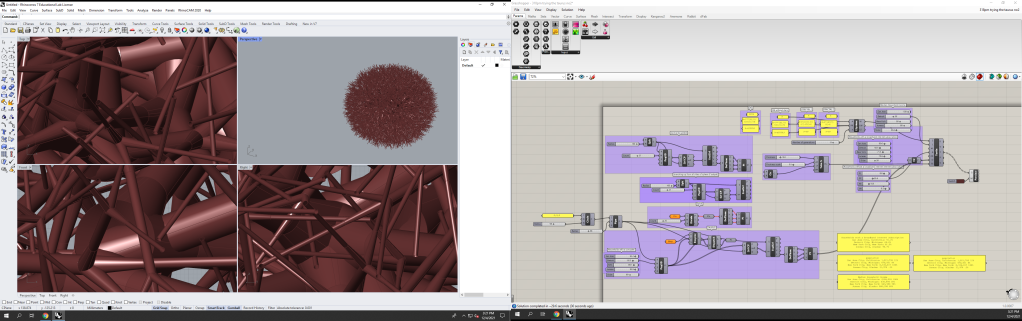
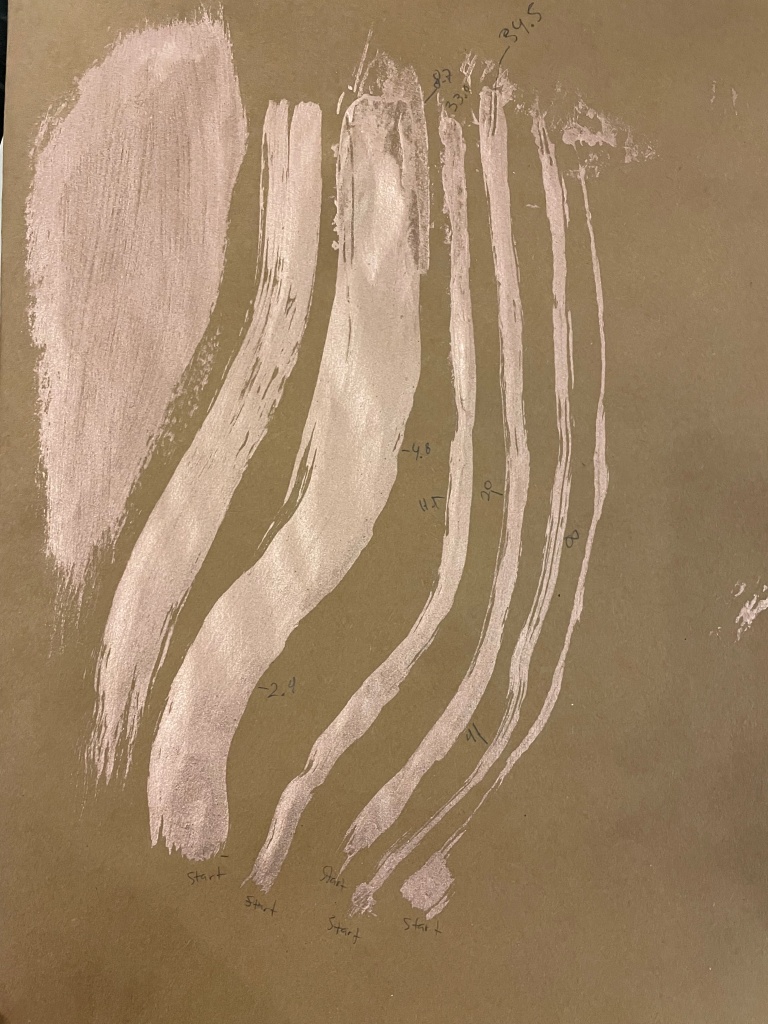
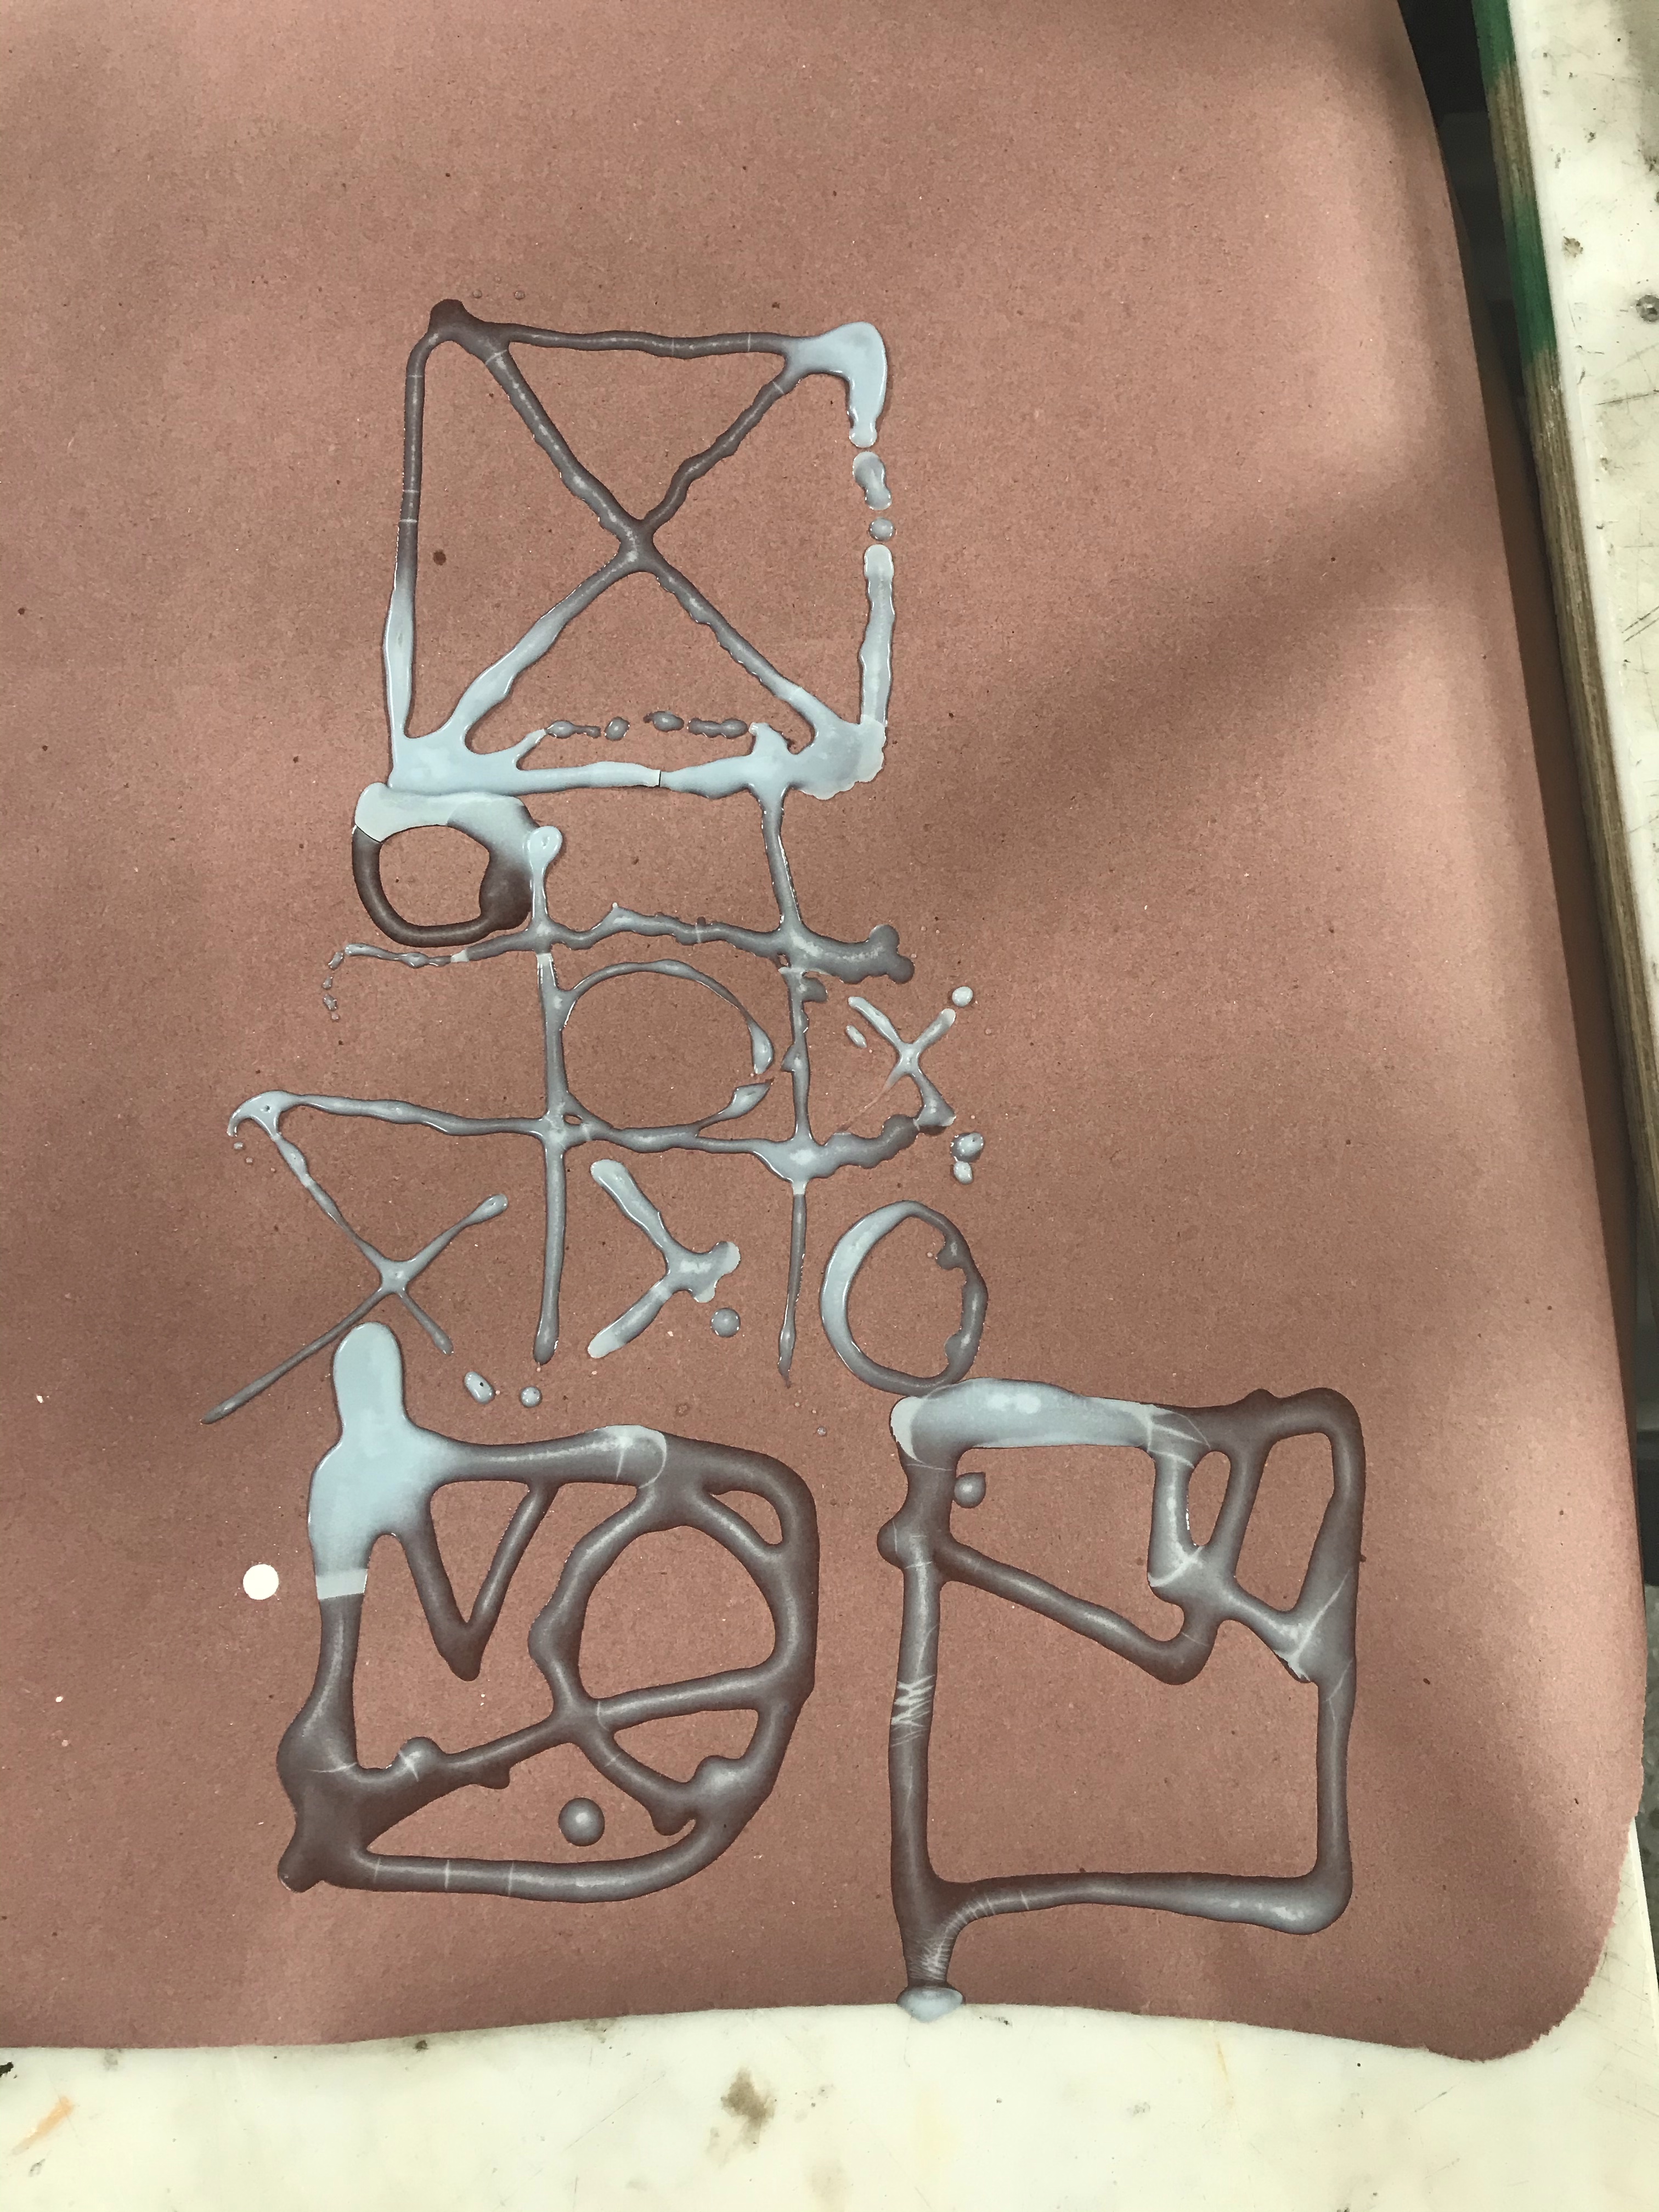
Then we could finally input data! We decided to measure internet access in 4 different cities across the U.S. and first output ordinary trees to ensure we had something at all. The angle of the branches represent the percentage of households in the city without access to internet and the height of the branches correlate to the relative mean household income within the city. Our 4 cities were Detroit, New York, San Jose, and Juneau.


Then we started outputting them on the torus. Here, we included an input of % of households with a computer correlating to the number of trees branching off of the torus.


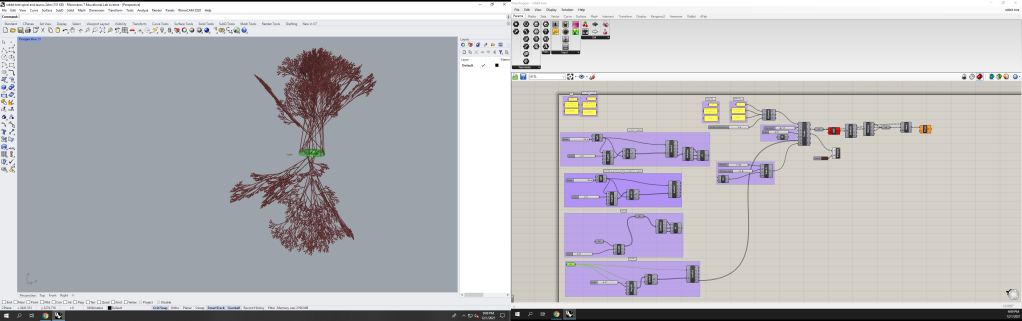
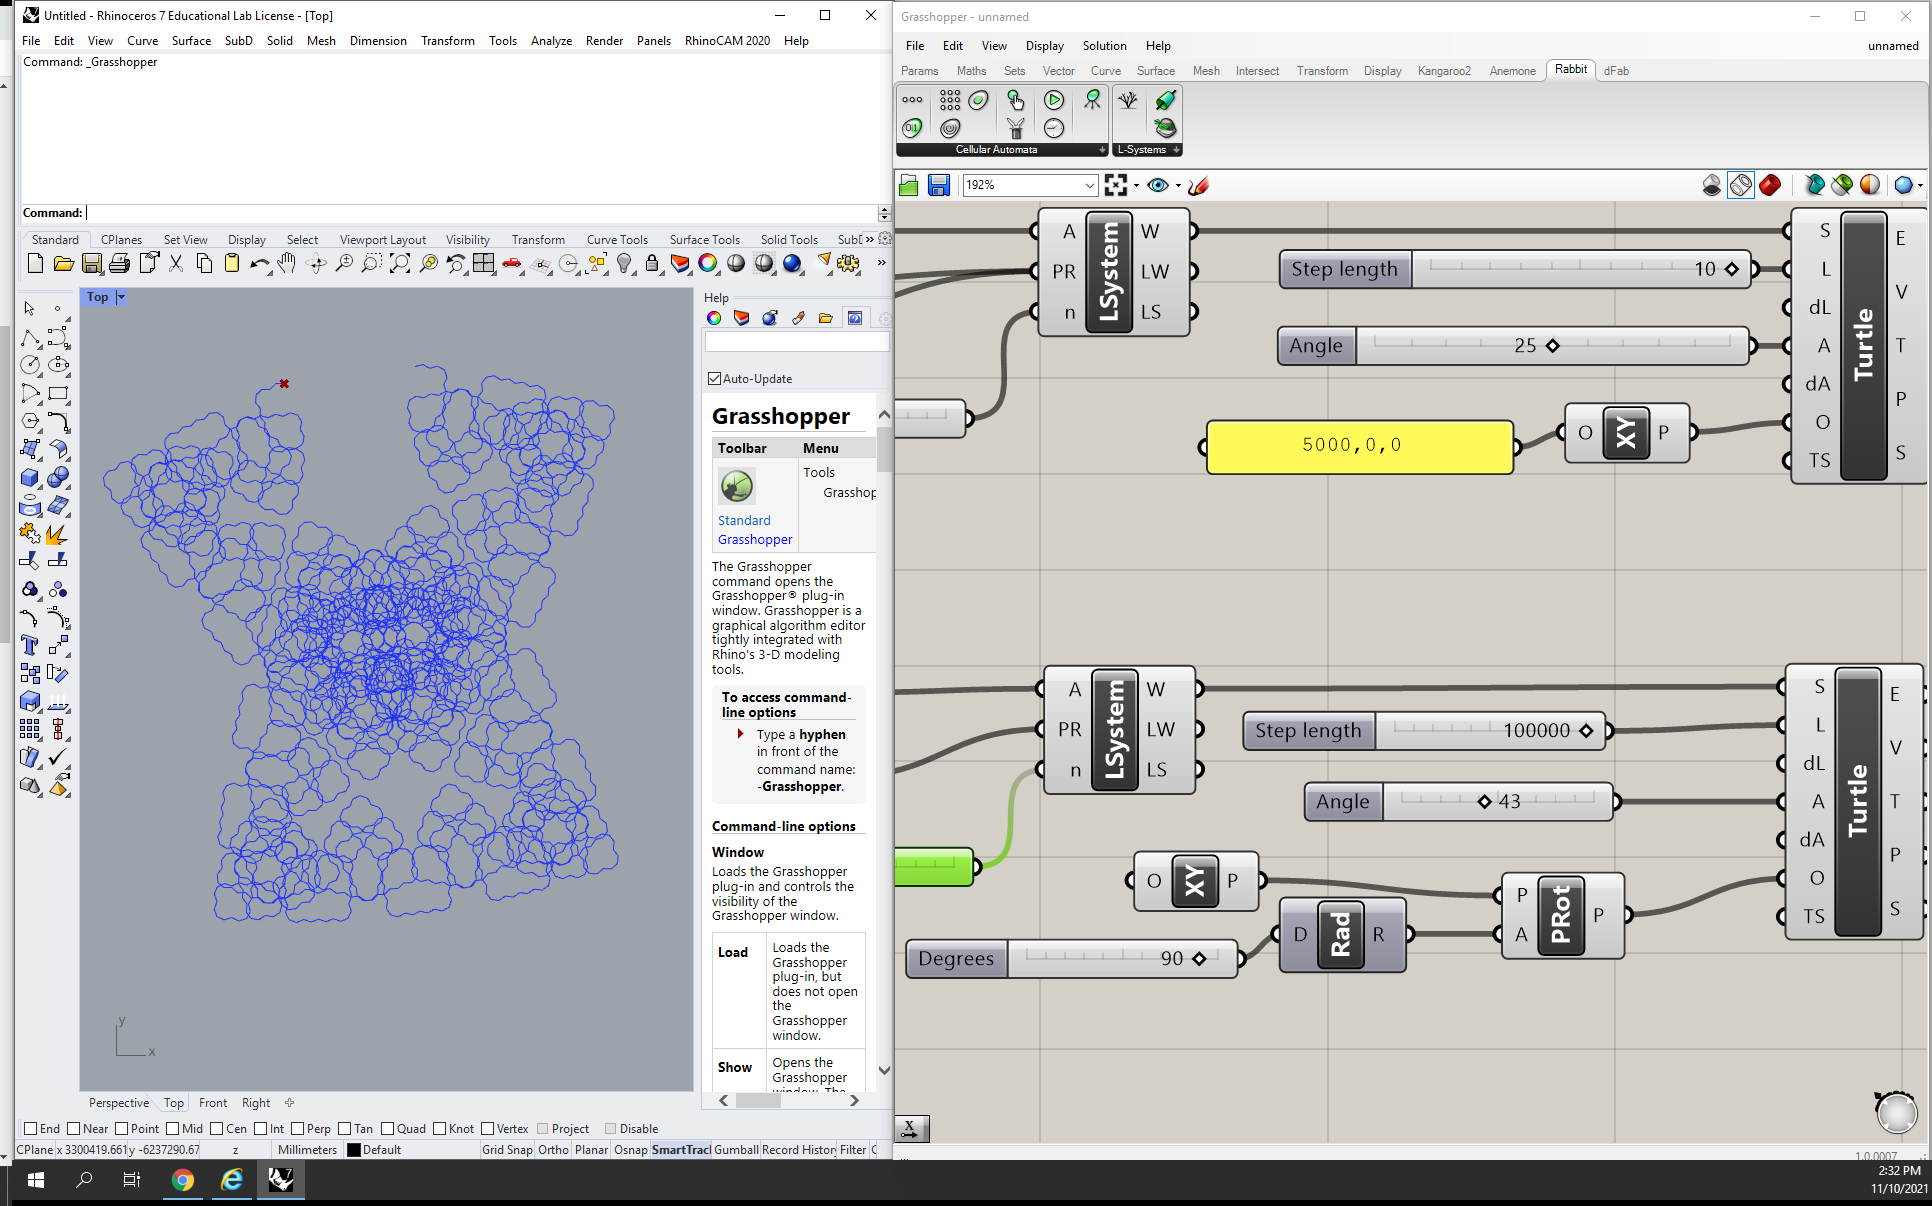
Finally, we also wanted to output different L-system fractals I had experimented with earlier, and input our data into the new form.


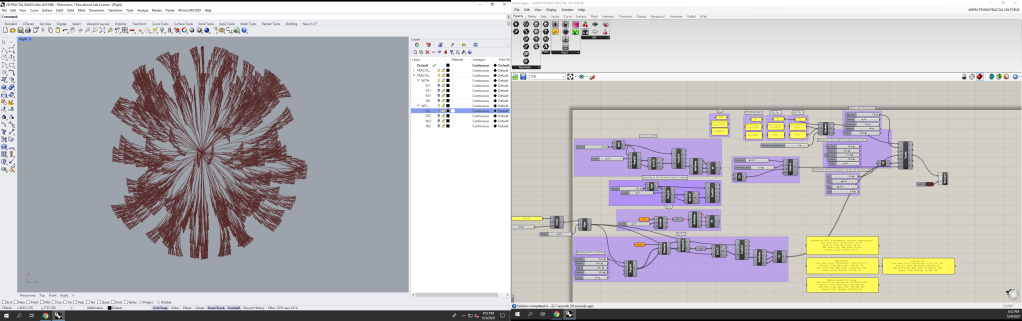
We also tried these on the torus but decided not to continue with this path!


Thank you! I appreciate you checking it out!
]]>LikeLike
]]>Talking with Margaret we came up with a couple ideas that appealed to me re: the exhibition. One was to bring all the posters I printed and have them as takeaways for the show. This is great, as my initial thought was to cut them all down into notebook covers and make notebooks from them to be given out at the show. However, leaving them as full sheets is a lot less work in a week already quite full of work. Plus, it will hopefully give people a sense of the scope of what I created better than a notebook might. Additionally, we agreed that it might be interesting to design some simple graphics to break down the labor involved in this project.
I set about attempting to total the labor up; I am guessing it’s probably a bit of an “underestimate”, but tentatively it looks like about 60 hours worth of work that went into a relatively simple looking 35 second video. The simplicity of the video actually reinforces the idea of the hidden labor of things; it certainly looks easy to make. Looking forward to hearing the reception to it.

 ]]>
]]>


 ]]>
]]>

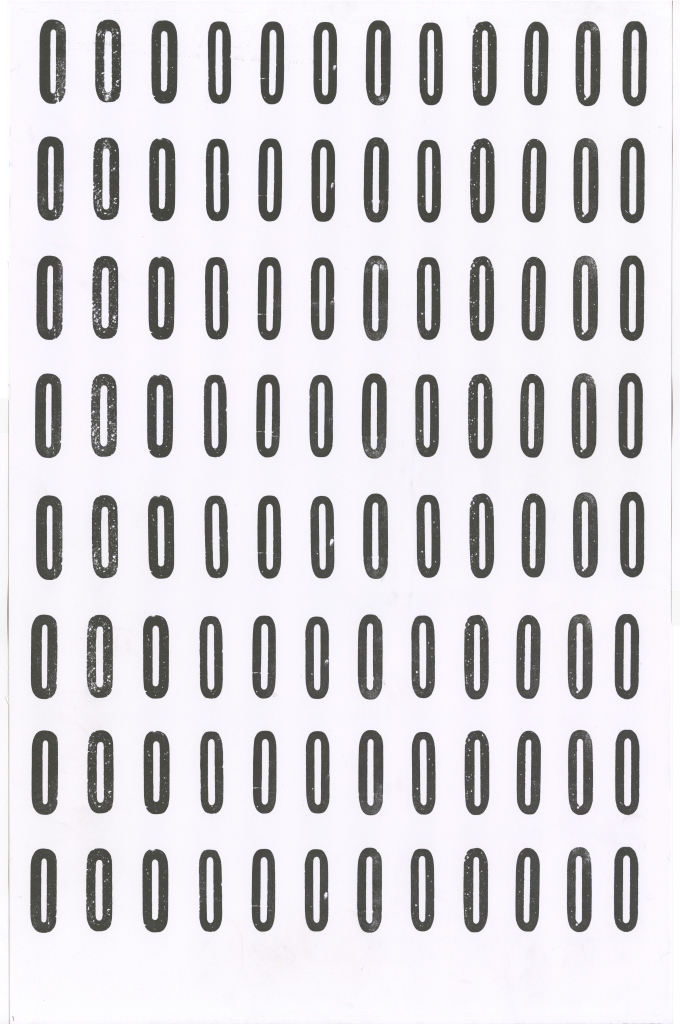
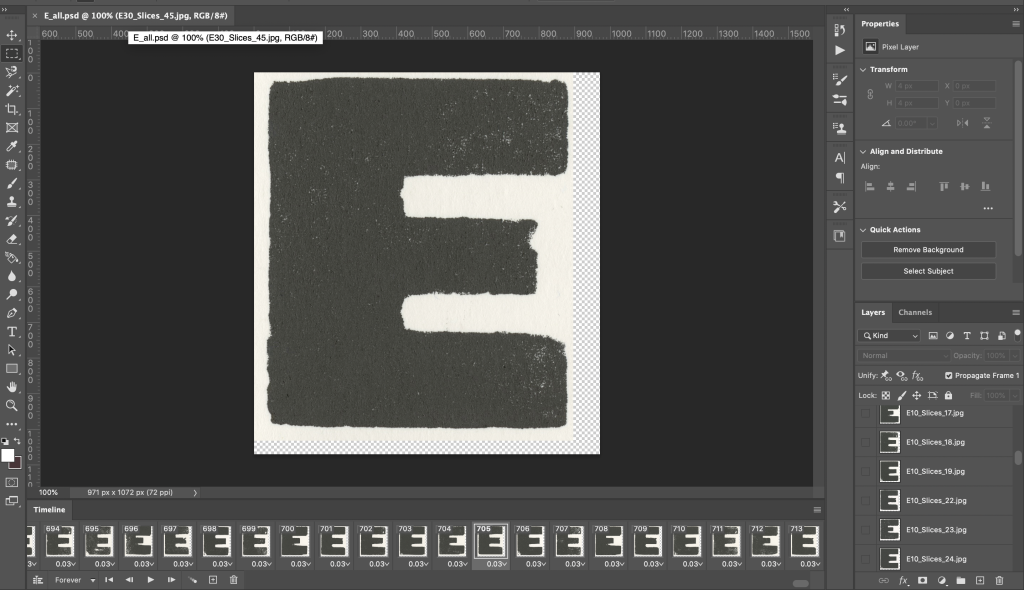
Not only did that save me time, but so did the ability to record and play actions in PS. Earlier attempts with this weren’t very useful, because of the closeness of the characters on the page as well as the variation between them. Adding a decent amount of white space all around the characters enabled me to record an action that would slice the page both vertically and horizontally. So now, instead of having to do all the slicing of each page by hand due to the closeness and shifting nature of the sheets, I was able to do it with essentially 3 clicks of the mouse. SUCH A TIME SAVER. Granted, these prints are still not perfect, and so the results are most certainly NOT 900 characters, all with the same amount of white space around them, cropped to the exact same dimensions. But it is 900 characters, cropped with SOME white space around them, done about 2 minutes after opening the photo in PS. This is a drastic improvement in efficiency from where I first started, which is pretty neat.


This project has definitely been a push and pull between efficiency, artfulness, and technology. It has been fun to try to balance all these things in a way that still feels good to me and true to my practice and beliefs as a maker. It has enough inefficiency to feel “real,” enough “dumbness” to feel in line with my practice, but also enough technology to remind me that computers are merely a tool for me to use. In this case, I can use them to give me more time to print and to share the seeming insanity of printing 1000s of the same letter with a larger audience.
]]>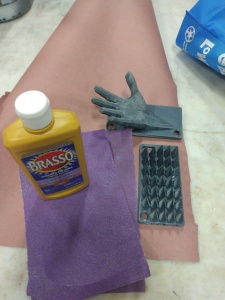
As I’m experimenting with these 3-D printed phone cases, I also wanted to see if it would be possible to paint and add color to the cases themselves without needing to cast them. I read up online and found that finishing the PLA plastic for prints consists of 3 stages:
The surface of the prints is striated with little lines that are characteristic of 3-D printed objects. The Internet suggested lots of sanding and rubbing with metal polish in order to smooth out these lines. After 20-30 of sanding and polishing I did notice that the prints were quite a bit smoother to the touch and the lines less noticeable.
Next I needed to add my base coat. Unfortunately the hardware store was out of plastic primer, so I tried a multi-purpose primer that didn’t stick as well as I wanted. After a few coats though I got some good coverage. I think I will do a few more coats to get an even smoother effect.
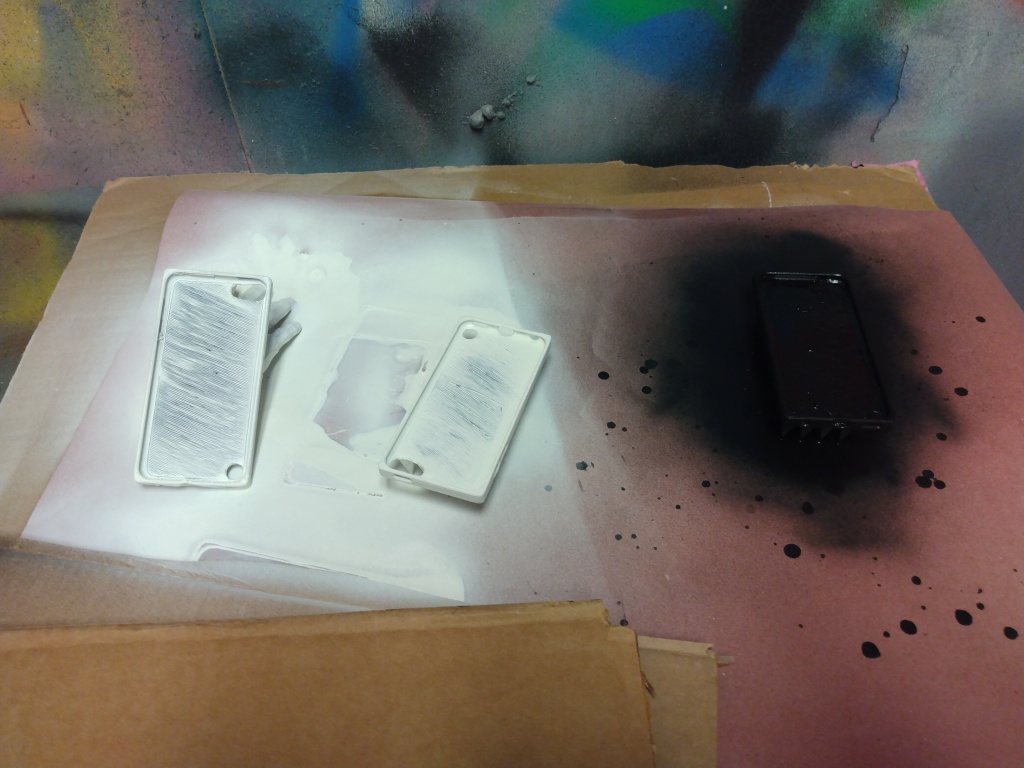


As an experiment I also wanted to try Plasti-Dip, which is used to coat the handles of tools with liquid rubber that dries and hardens. Usually this comes in a dip, but the hardware store had a spray on version. After I few coats I did notice a glossy and smooth surface starting to emerge. Although I ran out of time I think applying a few coats will achieve an interesting effect.
The last steps are to paint the object and finish it with a clear enamel to protect the paint coat. I didn’t get to this yet while I was waiting for paint to dry but I’m excited to see what the final effect will be!
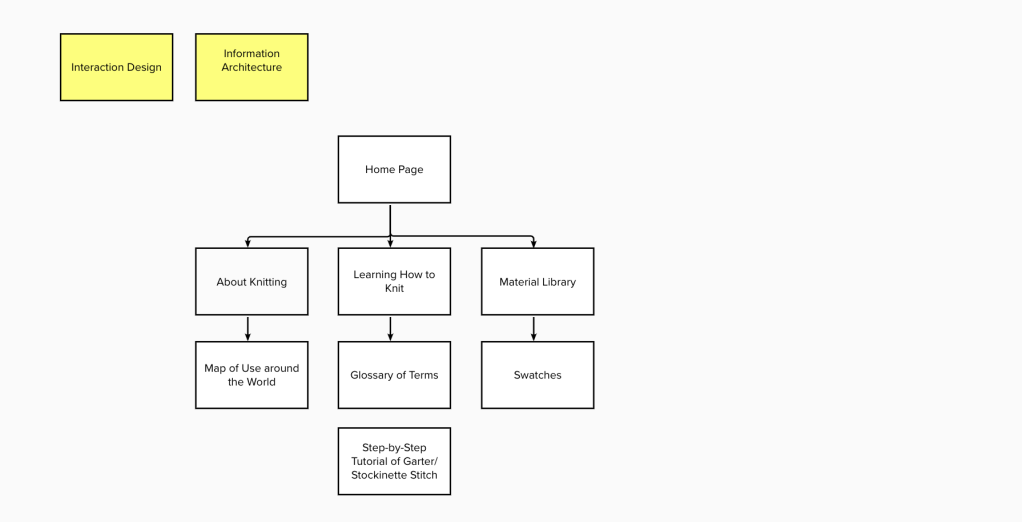
]]>I’ve been working on building the web space for my project while trying to do as little coding as possible. I am using Webflow as my platform of choice. I have taken some photographs, played around with the layout and interactions as well as continued to write the content for each page. I plan on scanning all my swatches early this week and continuing to fill the site. In terms of the final show, I’ll most likely need an iPad or monitor for use although a laptop/iPad size one would be preferred as that is the scale I focused my web design in. I have also designed a survey to integrate into the site to gather data and information from visitors about their own perceptions. The survey asks visitors to choose words that they associate with “knitting” it also asks them if they know how to knit as well as their location.
Here are some screenshots of my progress (they are all still being worked on).


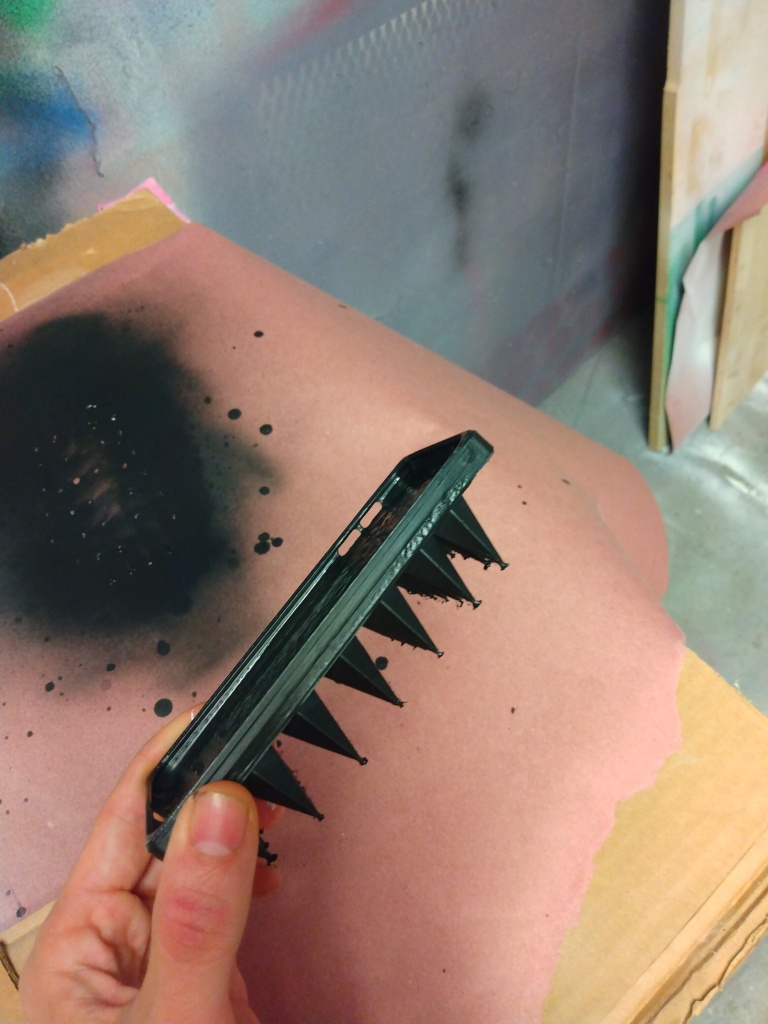
My cone phone case is a simple cone with a place for a phone to rest cut out at the base of the shape. Because of its inverted shape, this case forces the person interacting with the case to hold it like an ice cream cone. Because the sharp end of the cone is not stable, once someone picks up this phone they will be unable to put it down.

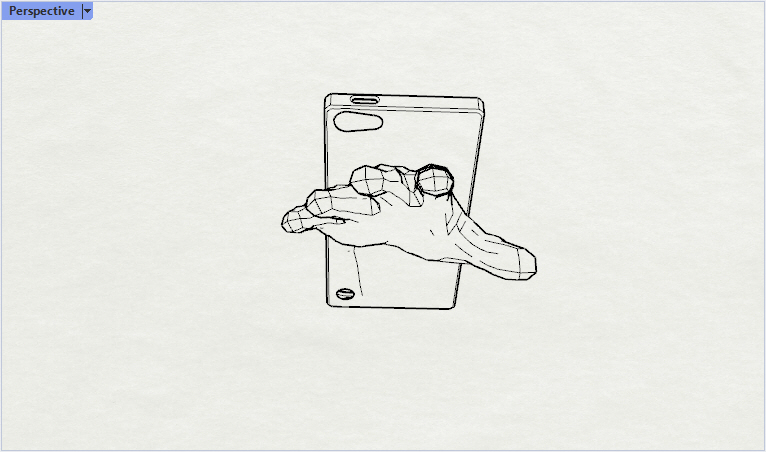

Meanwhile, the hand phone has a human hand printed on its backside, fingers reaching out. In order to pick up the phone, the subject must interact with the fake hand, making their own hand conform so that fake and real are grasping one another.
Both of these prototypes reach out towards the subject. By being unable to be put down easily, the cone phone plays a trick on its user. This same trick, I hope, is reminiscent of other motions of control embedded in the phone design that manipulate people into an addictive relationship with their phone.
The hand phone literally grasps the user, placing them in the uncomfortable realization of the embodiment of their own hand. It also points to the many invisible ways with which phones reach into our lives, measuring and tracking us.
]]>


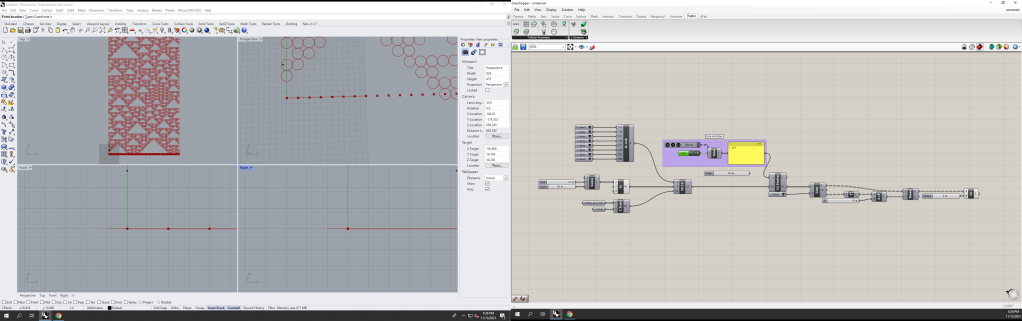
Linah Made a lot of progress investigating a plugin called Rabbit. It allows for a more streamlined use of L-systems - a branching organizational structure - and also grants access to an “excitable cells” program. Both of these logics are generative in nature, and can produce some rather amazing outputs.
Though I did not replicate many of the scripts that I researched, using them and developing an understanding of how the scripts function has aided in being able to repair scripts that I have wanted to replicate.


Despite having a fairly clear project brief, I’ve taken this project as an opportunity to explore many outlets and methods of challenging perceptions. I’ve taken many pivots, some successful and unsuccessful. With the help of many tutorials, I’ve experimented with python scripts to sort and visualize data, 3D modeling a knitting animation, and started building my digital story.

During my research, I discovered a new interest in data visualization and how it can be used to tell a story. We all tell stories with our work and I found that adding interpretations/visualizations of data is one way to add more depth to a narrative. This spurred my interest in exploring python scripts. Even after running a few basic scripts successfully, I decided to abandon this method as I felt the learning curve was too steep with the time I had left.


Instead, I chose to explore other methods including more abstract methods of building and visualizing data. The colored dots above and the spreadsheet to the right show my first attempt at creating a data visualization for this project. I am familiar with mapping, so this was a fun exercise to do. Each of the colored dots represents a hex code for a photo of “knitting.” I entered the term “knitting” into Google and extracted each color from the top 100 images that came up in the search results.
As the term “perceptions” can include many subcategories, narrowing down my research and narrative has been a little difficult. I’ve been continuing to talk with friends, mentors, and do research on how to best tell my narrative. This narrative is an important step that will guide the 2nd phase of this project which involves taking the materials and knit structure and exploring their use within speculative futures.
Other Updates:
I followed a tutorial to create a procedural knitting animation in Blender and was able to build most of it before I ran into some difficulties with one of the add-ons used to build it. For time purposes similar to the python scripts I put this aside to come back to if I have extra time (See top image).
I also spent time working on my 100-word statement and compiling more copies for the site. I decided to create a brief historical overview as mentioned in my earlier project plan. I decided to focus it primarily on the “strange” or lesser-known history of knitting as I think it adds a layer to the new perception I’m trying to share.
plastic bags. I also recently thought of exploring ways to reuse old paper masks as I have quite a few. I’ve also started compiling a shot list and what equipment I will need to photograph all these swatches and how to film a few videos of hands knitting within the next two weeks (I’m looking for models of all skill levels).
I have also started building my website and the branding guide. (See top image) I have been thinking about how every aspect of this site can influence visitors, including colors, animations, typography, and imagery.
Moving forward, I will be continuing to map out the website. I’d like to do a quick sketch of the narrative flow, finalize the branding guide, continue writing the copy, and potentially create more data visualizations with data or research that already exists. It was also suggested to me that I could use the site to gather more data by asking visitors what comes to mind when they hear/see/read the word “knitting” through a fill-in-the-blank pop-up window on the landing page. I’m intrigued by this idea and was to explore it further.

LikeLike
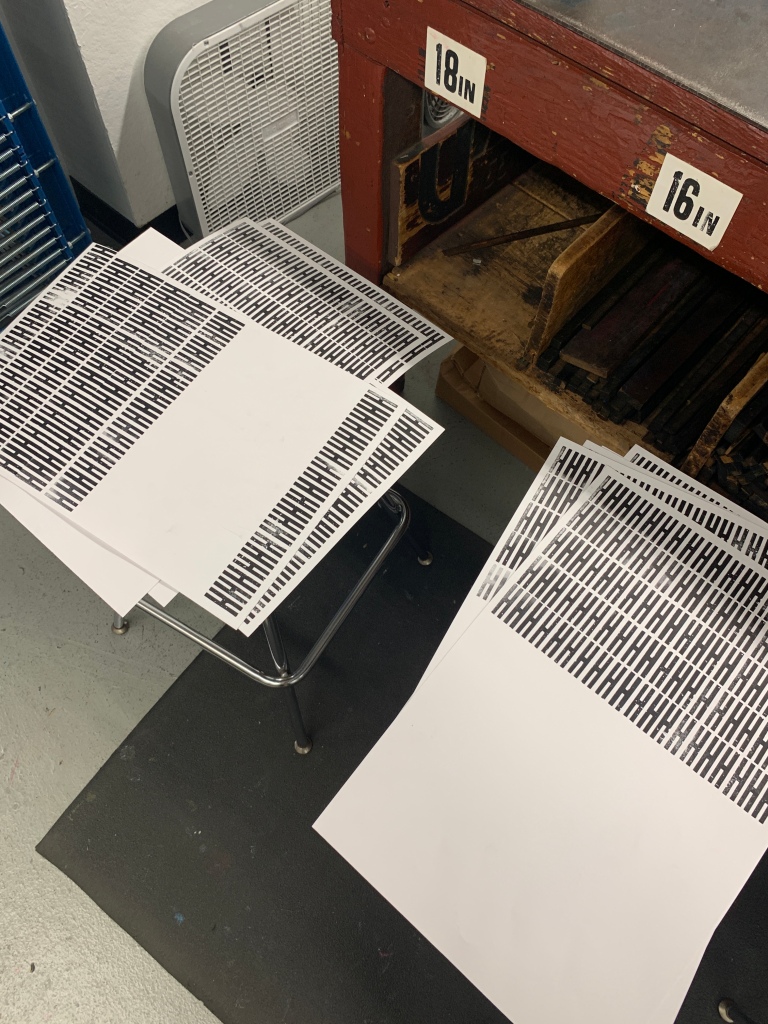
]]>So, I did two letters this week, to see how long it would take and if I could run out of ink, so I only inked at the start of printing. I learned that 1. it didn’t take that long – about 10 minutes to print 1 line of letters on 16 sheets of paper, and then to move it down one line on press. And 2., these prints don’t eat up ink as much as I expected and am used to; there is a slight noticeable decrease in coverage, but not as drastic as I would have guessed.

Tradeoffs are always present in any project. It will be interesting to see if we can figure out a way to speed up the “post-printing” process, because it will ultimately just mean I can print even more characters and have to worry less about how long it will take for me to crop them all. But even in this aspect I think it’s important to note that part of this whole project is the act of repetition; the time it takes to do things. I wonder if I will miss the hours of cropping the same letter? Will it affect my appreciation of the medium, or instead enhance it by allowing me to do more printing (read: less computer time), while still producing visually interesting work that can exist digitally. While I certainly use digital tools to facilitate my print practice, I haven’t worked with it as integrally as I am proposing here. And of course, this is hardly integral compared to what is possible, but as someone who spends most of their time surrounded by old, heavy, antique objects, it feels pretty significant!

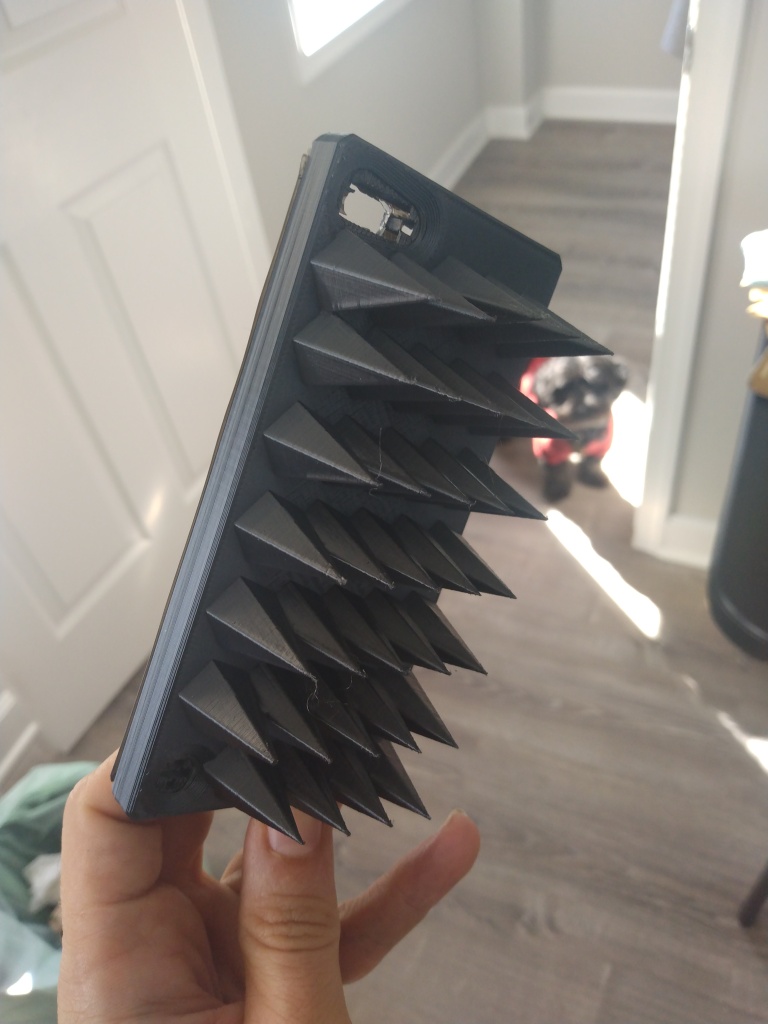
I started working in Rhino, with the case for an old iPod Touch. Since they cost around $35 on eBay I figured they would be good phones to use for prototyping.
I’m still learning Rhino so I wanted to start with something simple. Picking just a basic geometric shape I was able to make an anti-phone case, too spiky to pick up.

Once printed, the case spikes came out surprisingly very sharp!
With some a lot of help from Ryan we created a two-part mold that we could 3-D print and use to cast our phone case with different materials.
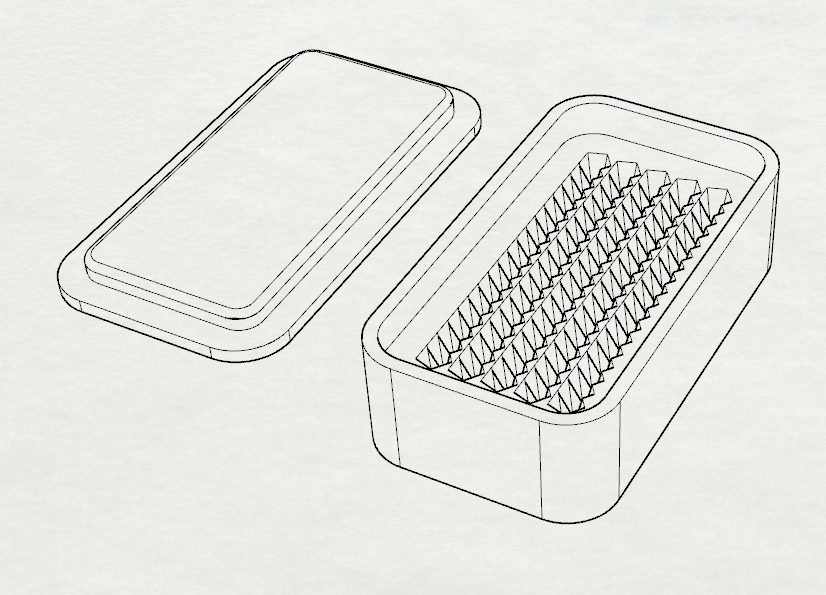
Although the mold printed perfectly, the material I first used for casting didn’t work as expected. The cure time of the resin was only 2 minutes, which didn’t give us much time to remove air bubbles. Once it hardened, the material was too hard and got stuck in the mold…
Next time around I am going to use silicone, which has a longer cure time and is much softer. Hopefully that should do the trick.


I was finding it difficult to arrange times to record other people, but I did get Alfie to read a really lovely haiku that she wrote. For the most part, I have settled into recording myself. I also ordered a new microphone because the one I have been using is trash (it’s from an old karaoke set that broke a long time ago).
I have been recording the following: musical improvisations, reading books (poetry mostly), and reading dating profiles on Tinder. Reading things out loud feels very different than reading things silently. It feels like it forces me to take on the role of the person that did that writing, especially when it’s written in first person. This is a particularly interesting experience with the dating profiles. I feel much more compassionate about the dating profiles when I read them out loud. It can be tough to put yourself out there like that, to ask for what you want, while simultaneously wanting others to like you. It’s a lot to navigate.
Anyway, I’m almost done with my 3rd tape, so that will be an hour of content (20 min per tape, 10 min per side). The rack itself will end up looking fairly sparse, but I like that it indicates this is a start to a more long term project. I think that I’ll end up continuing this project, but I’ll need to pick up another tape recorder so that I can leave one with the work when it’s exhibited. It would be cool to make a sign for this with a little logo that incorporates the name of the project. I’m thinking about doing something that represents sound in some way, like a wave or something like that.

Here’s a picture of where I do some recording. I sit on the floor and lean against my bed. The tape recorder is on the floor so that I can see the counter on the top of it.
]]>

I have now ordered a larger mold as I think I’m ready to progress to the next step of pouring a placemat. I have decided to use the following recipe ratios to do so:

In addition to the placement I became inspired by a book I came across in class called “Soft Shells: Porous and Deployable Architectural Screens” by Sophia Vyzoviti. Inside it discusses examples of ‘cut-stretch’ forms that are augmented with alternating rows of incisions to produce an organic malleable form. I want to explore executing these same kind of cuts in rhino and laser cutting onto a sample of my thermochromic bioplastics.
Lastly I wanted to share a draft of a poem about how touch was affected during the pandemic. Please enjoy my nonsense!
I want to hold your hand
but instead I soften my untouch
seeking out remnants of you
lost amongst my rubble.
We rebuild collectively
slowly a supple construction
as the aperture widens
but we cannot see yet
I change color and so do you.
All touch shifts
to the perennial
our hearts are open
in partial sun
an ocular baptism all the same.
Waiting for someone
to tell me to love myself
as I harvest
these shades of blue.
]]>
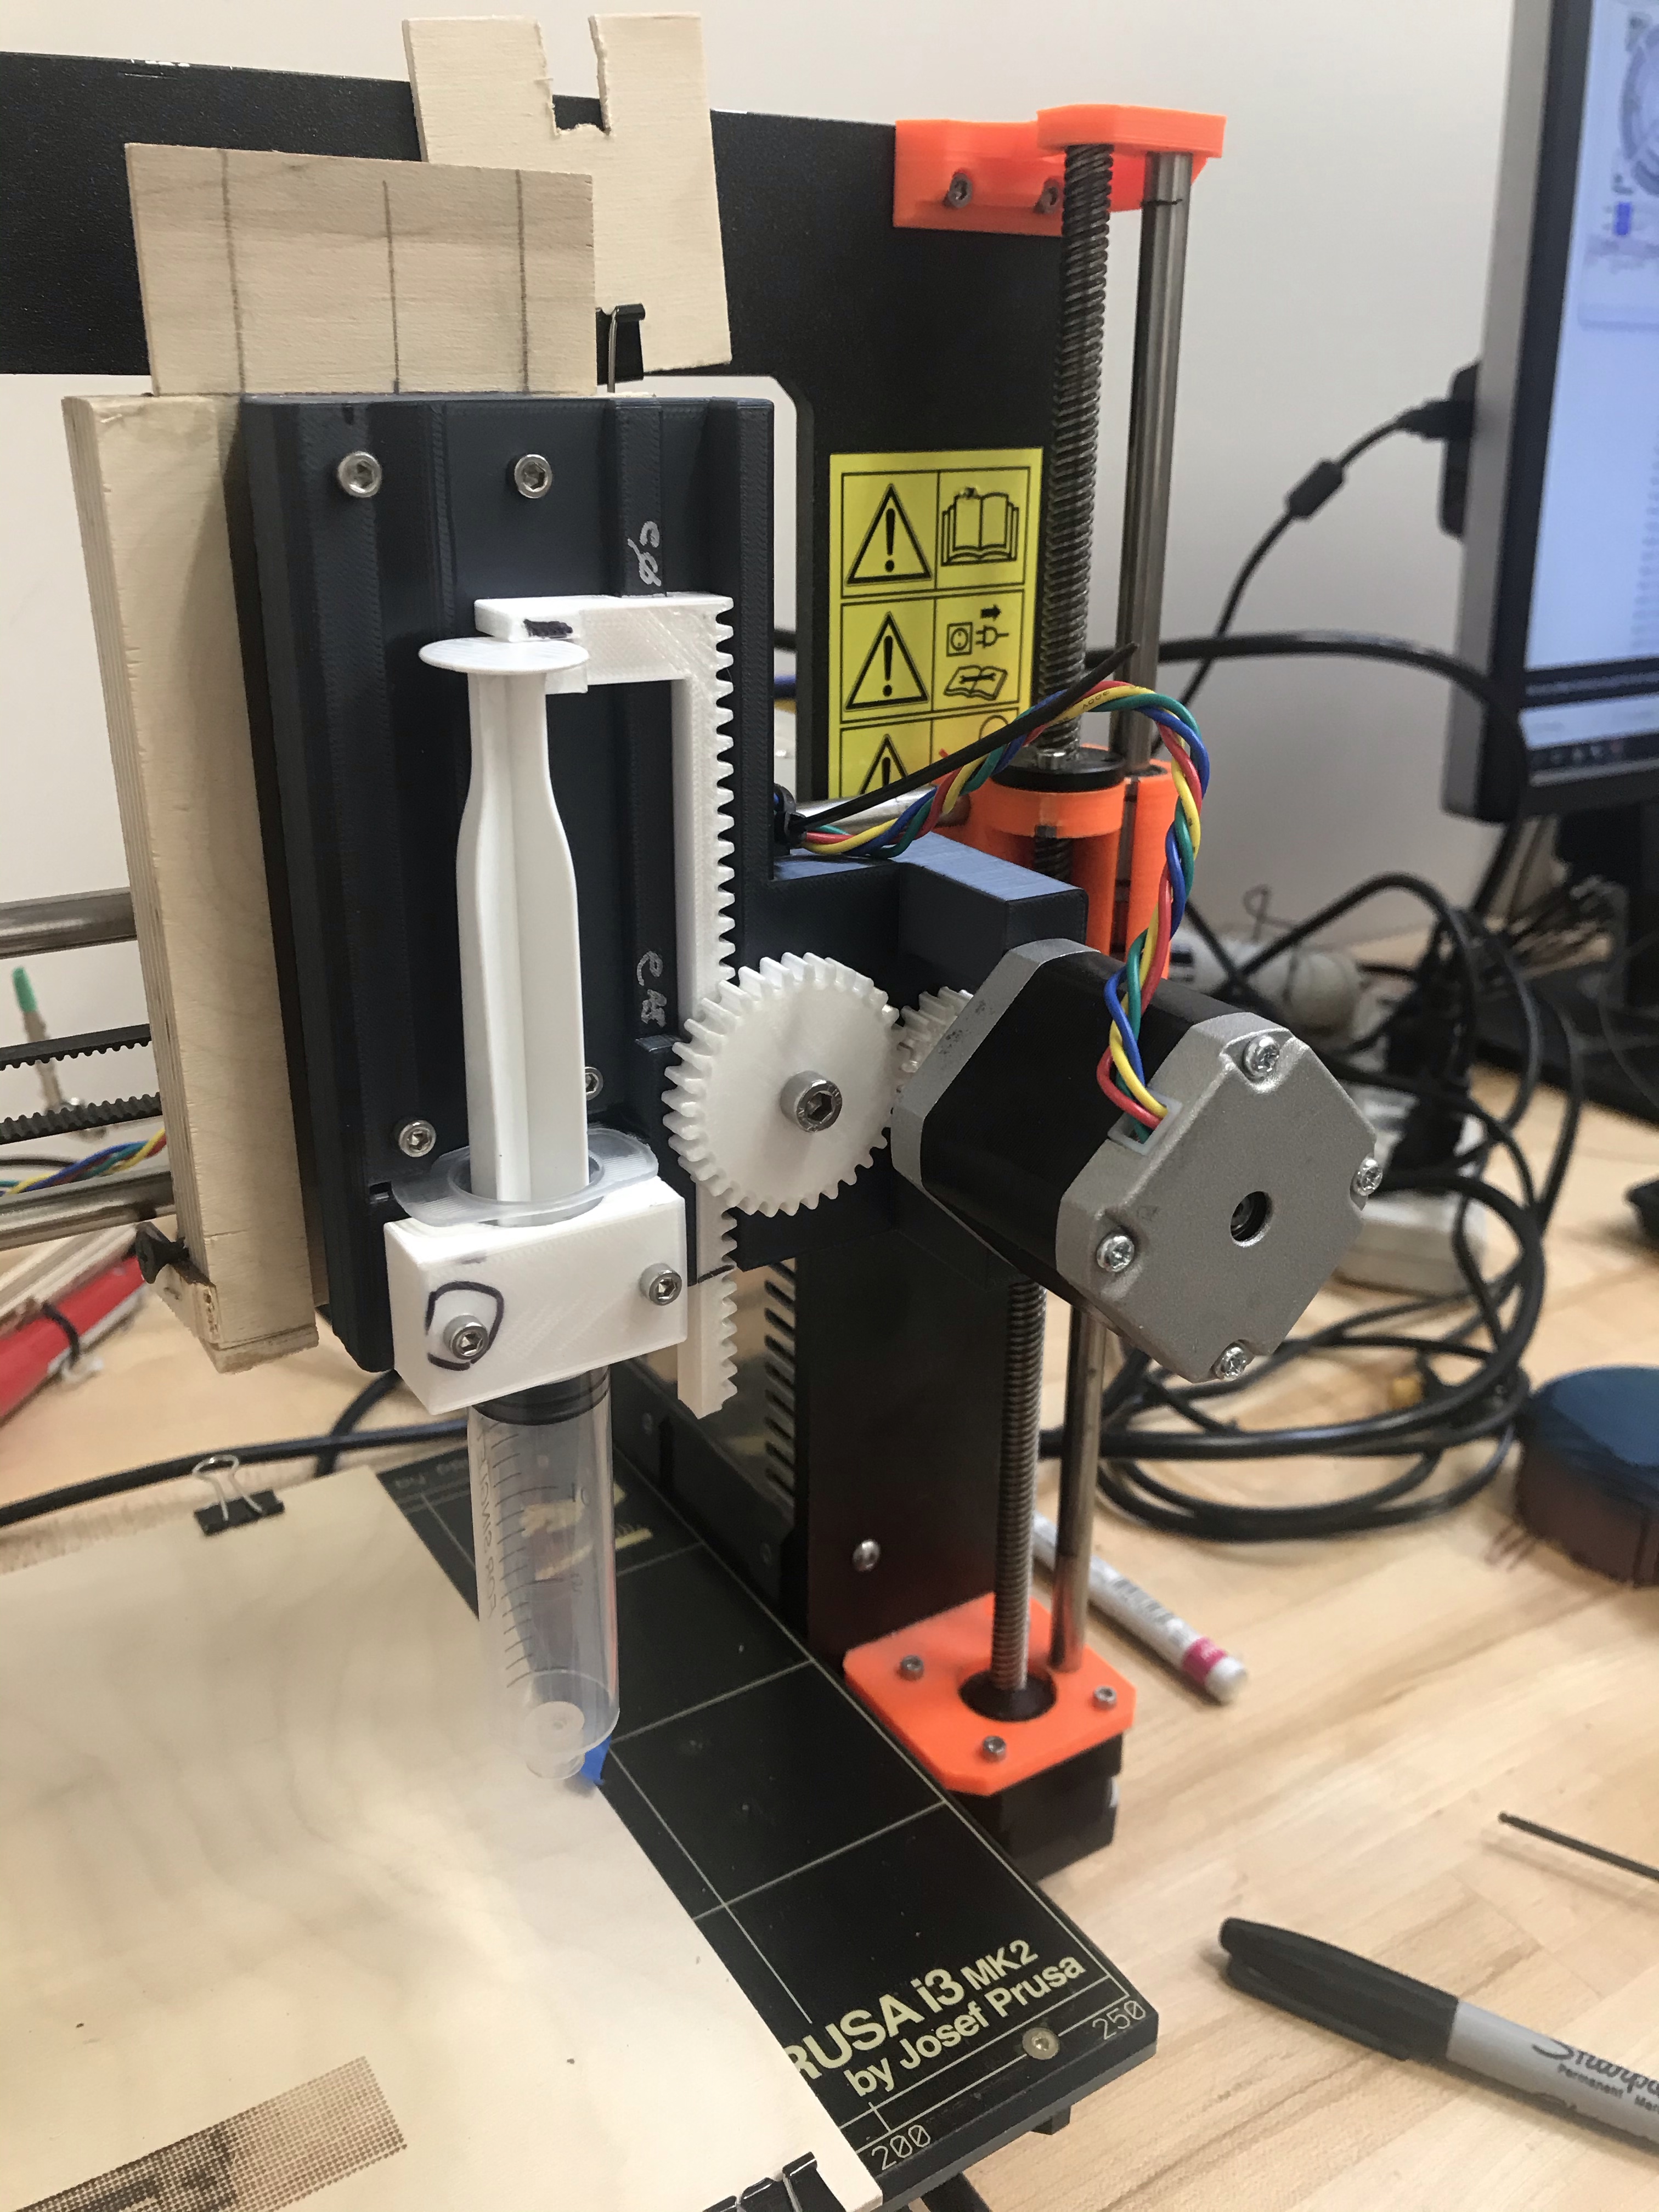
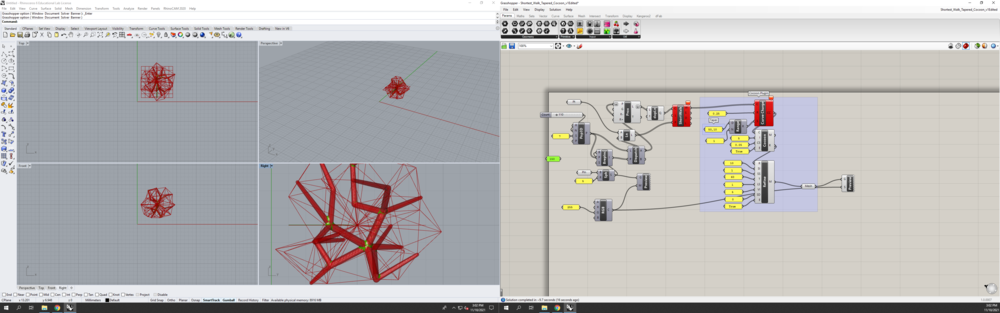
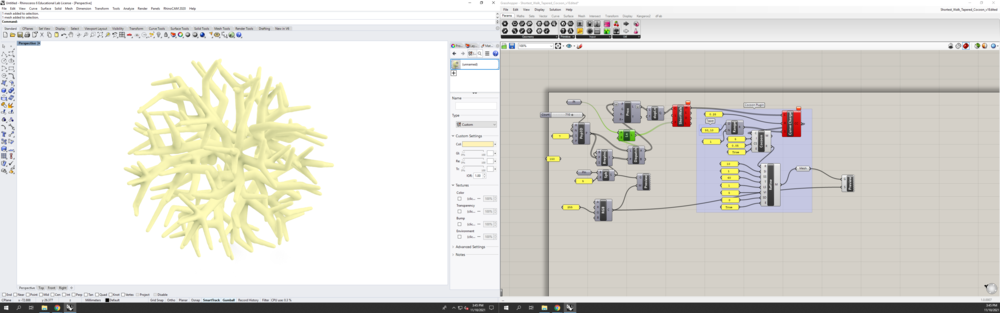
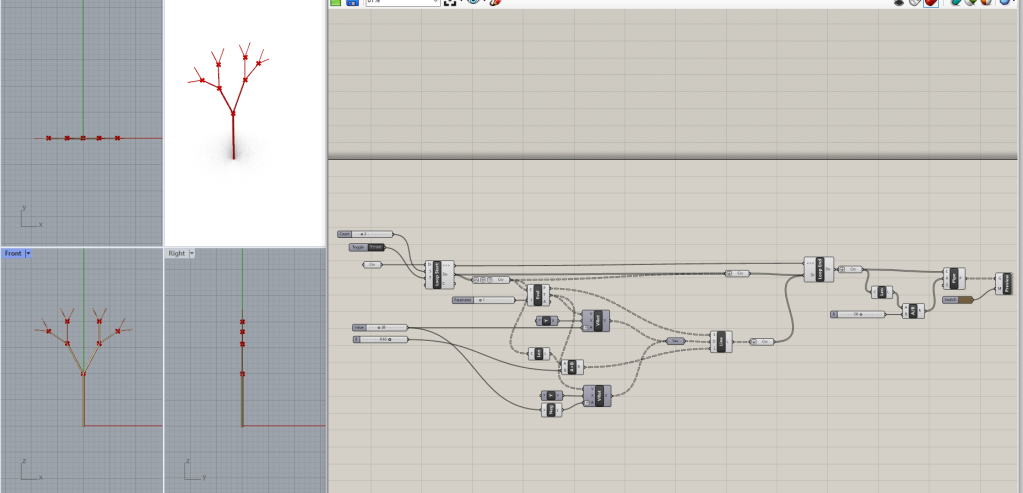
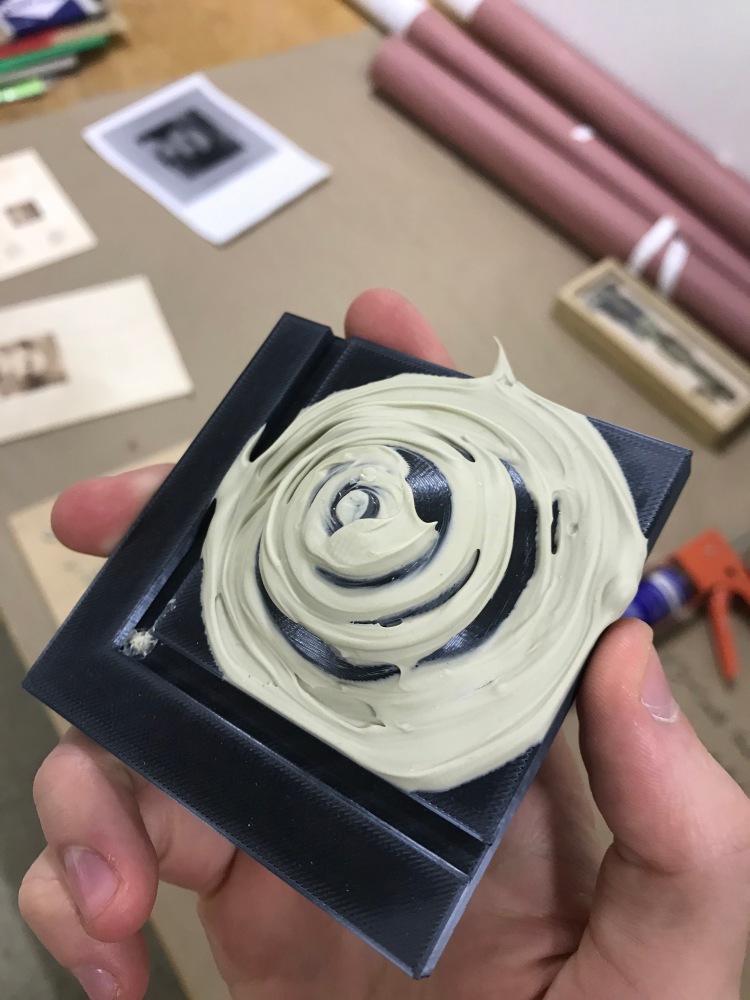
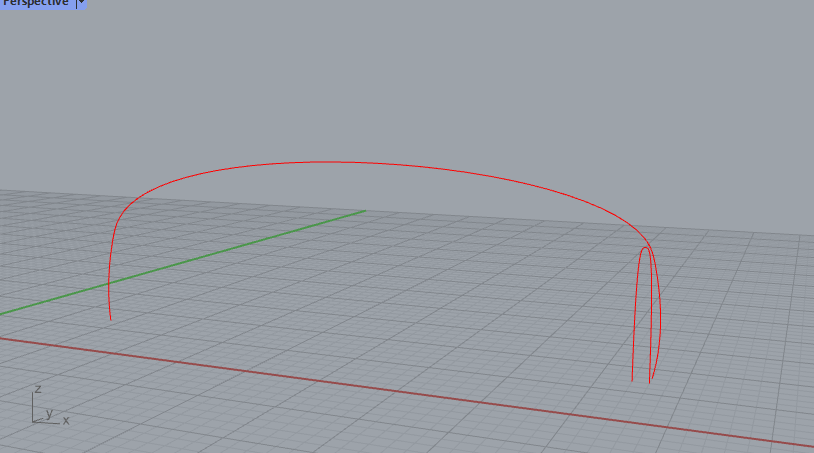
After getting help from Ryan with my branching L-system script, I tried to experiment with it stemming from a circle.


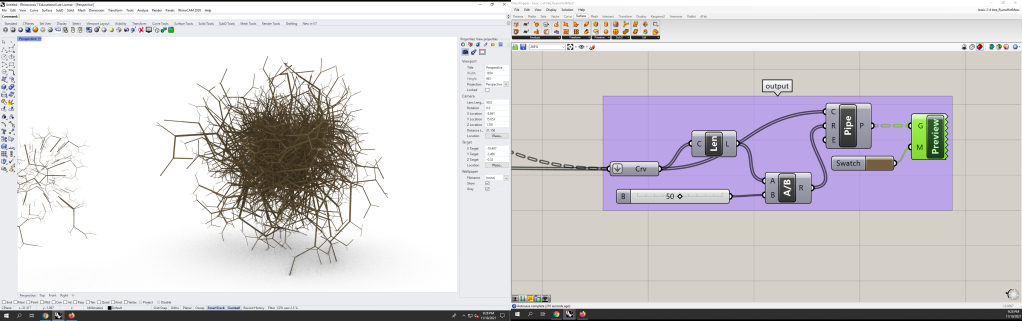


I then tried to use Rabbit, a plug-in that simplifies L-Systems. Below are my trials with a basic script that changes output based on a string of letters that symbolize the following:


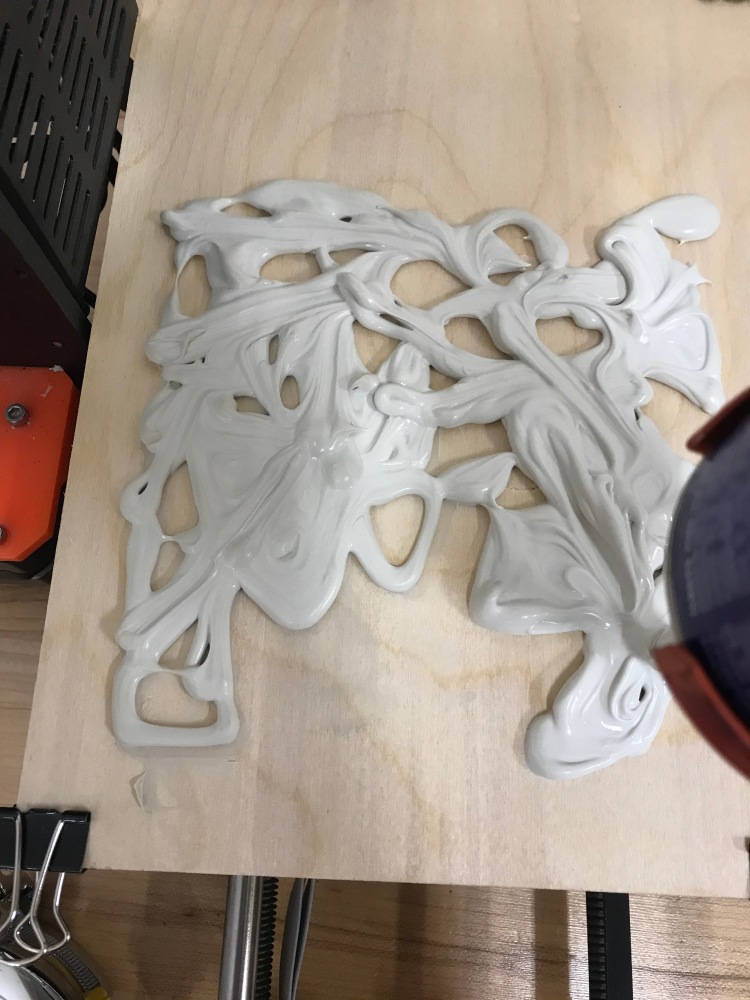
Julian and I were very intrigued by this output specifically and decided to add a piping component to this script.


Following this, I decided to try a tree script with Rabbit to compare to my original branching script. I think this one came out much more organic! I want to experiment with it more and possibly have it stem from a sphere like with my first script.


The last script I’ve attempted so far is a 1D cellular automation script that activated new cells based on if cells around it are ‘alive’ or ‘dead’. Although this one does not branch or look anything like a plant, I’m interested to see if I can mash it with one of our other scripts some way.


The first script I tried I found on a website called “generative landscapes” which has been extremely helpful in this process. This one manually built out the entire L-system. The script output came out as intended, a 2-D structure that branches out in the X and Y directions. However, when I messed with the number sliders, the output started getting funky. Rather than changing the angles of each branch and the segments that branch off of them, the branches began disconnecting from each other, not registering that the generations below have changed location. I’m unsure how to fix this.
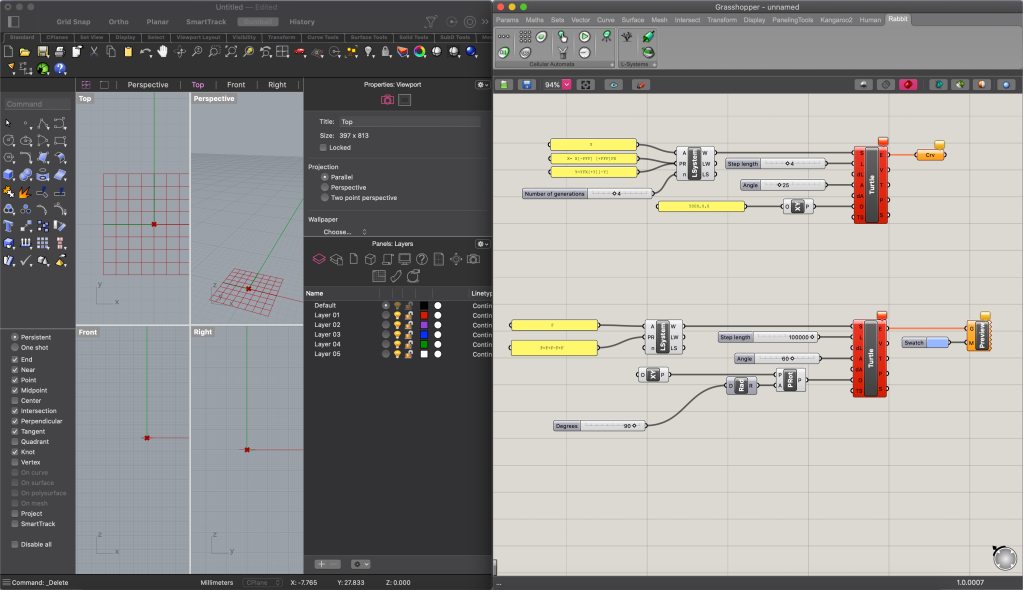

I then moved on to Rabbit, a Grasshopper plugin that has an L-Systems component, making the script much shorter. I was hoping this would solve my problem with the previous script disconnecting, but unfortunately I kept getting an error message on the ‘Turtle’ component, saying it could not load file or assembly. I’ve done some googling and cannot find a solution for macs and am currently at a dead end. I’ve tried re-writing the script on a PC but am unable to download Rabbit for some reason, but I will keep trying.
I think there’s a lot of opportunity with this, as I can start basing my branching off of other shapes besides lines.
]]>I began to brainstorm for new projects and landed on an idea to create a generative Grasshopper script with an input of location data (e.g. % of bike users in cairo, New York, etc.) and an output of abstract/alien plants. I’m interested in how they might differ by location based on these data sets that don’t typically affect plant life in the same way it might on Grasshopper.
After discussing with Alan, Julian and I realized we had parallel paths and decided to merge our projects to work together on the generative part of the script.
We’ve also been interested in bringing this project into Blender to experiment with its simulation properties.
]]>
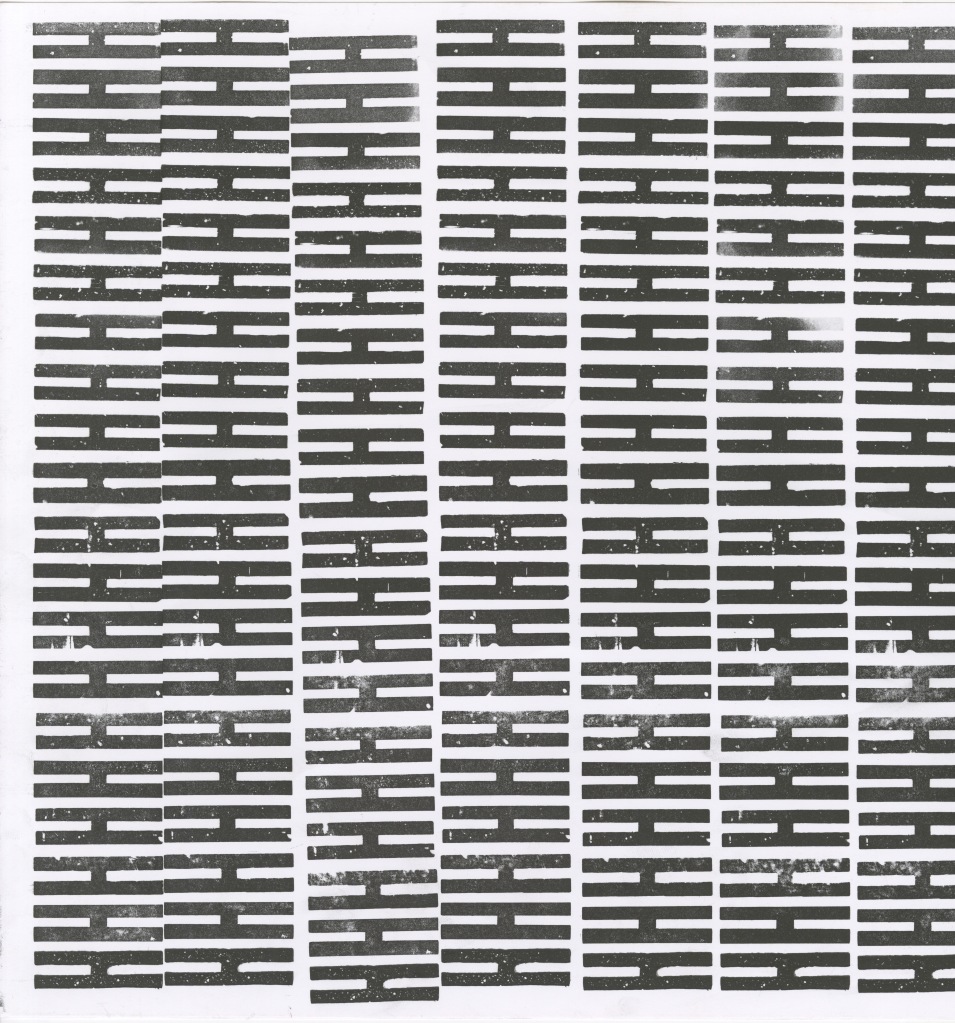
So, each line had 20 H in it, and I was able to print 11 roughly evenly spaced lines per page, meaning there are 220 Hs per page, assuming they are spaced out enough to allow me to use them. Multiply that by at least 6 “good” pages and maybe another 2-3 worth of misprints, and we are looking at roughly 1980 specimens of 10-51 wood type H. A whopping 1 minute of video at 30 frames per second. Of course, this time I was able to work faster, so the time input : video length output ratio should be better. Or, will it remain the same as I have 3 times as many characters to cut out?
After spending about 30 minutes troubleshooting this silly camera, I think I was able to get it running, taking time lapse photos every two seconds. It remains unclear how I get the photos off the camera onto my computer to look at them – I think I need to hunt around my apartment for a microSD card adapter and then an SD card reader. Hopefully I can find mine! I am curious to see if the weird 360 degree photo looks or reveals anything interesting, or if it just is some bizarre looking, hard to decipher photos.


As far as the process of digitizing goes, I definitely think it might be worth it to investigate Premier, especially if I end up printing more than 700. Even with this many, my computer had a slight struggle to deal with it. It might be more sensible to make several shorter ones, and then piece them together seamlessly. Someone also said this would be relatively easy to do in After Effects? So, maybe I will try those other two workflows to see if it is any faster. Ideally, I will space the letters a slight bit more in the next run of prints, so that I am able to create a photoshop action to cut them out. And, that the prints remain consistent enough for said action to work for all the scans.

Project Plan – Phase 01: Digital Platform + Workshop
11/01 – Scoping & Mapping out Project
Goal:
-Research into Perceptions, History, and Teaching
-Map Out Digital Platform
-Start Material Swatches
-Learning: How will I teach knitting?
What did I actually do?
Checked out books from library on Perceptions, History & Teaching
-marked sections to read
Map Out Digital Platform
-Information Architecture, Features
-Content Needs – will need to photograph, 3D models?
-Decided on Platform: Cargo Website – Need a name!
Start Material Swatches
-finished Cotton Yarn & Jute (will redo)
-Collected plastic bags from classmates
-Listed other potential materials
11/08 – Continue Scoping & Making Progress
Goal:
Research into Perceptions, History, and Teaching
-Read Books on Knitting, Nature + Design, Craft
Map Out Learning Tools
-Steps, Content Needs, Copy
-How will I teach? – Do I need to check out equipment for video or recording
-Research the idea of teaching ‘problem solving’ instead of just following steps/instructions
*These will need to be tested with a group for effectiveness
Continue Material Swatches
-Cut up Plastic Bags – Photograph Process
-Other Materials?
What did I actually do?
Checked out books from library on Perceptions, History & Teaching
-marked sections to read, started reading, compiling bibliography
Got a grant to fund the website hosting & compensate ‘users’ to test out learning tools
More to come…


Machine in action video (Google drive Link)
]]>
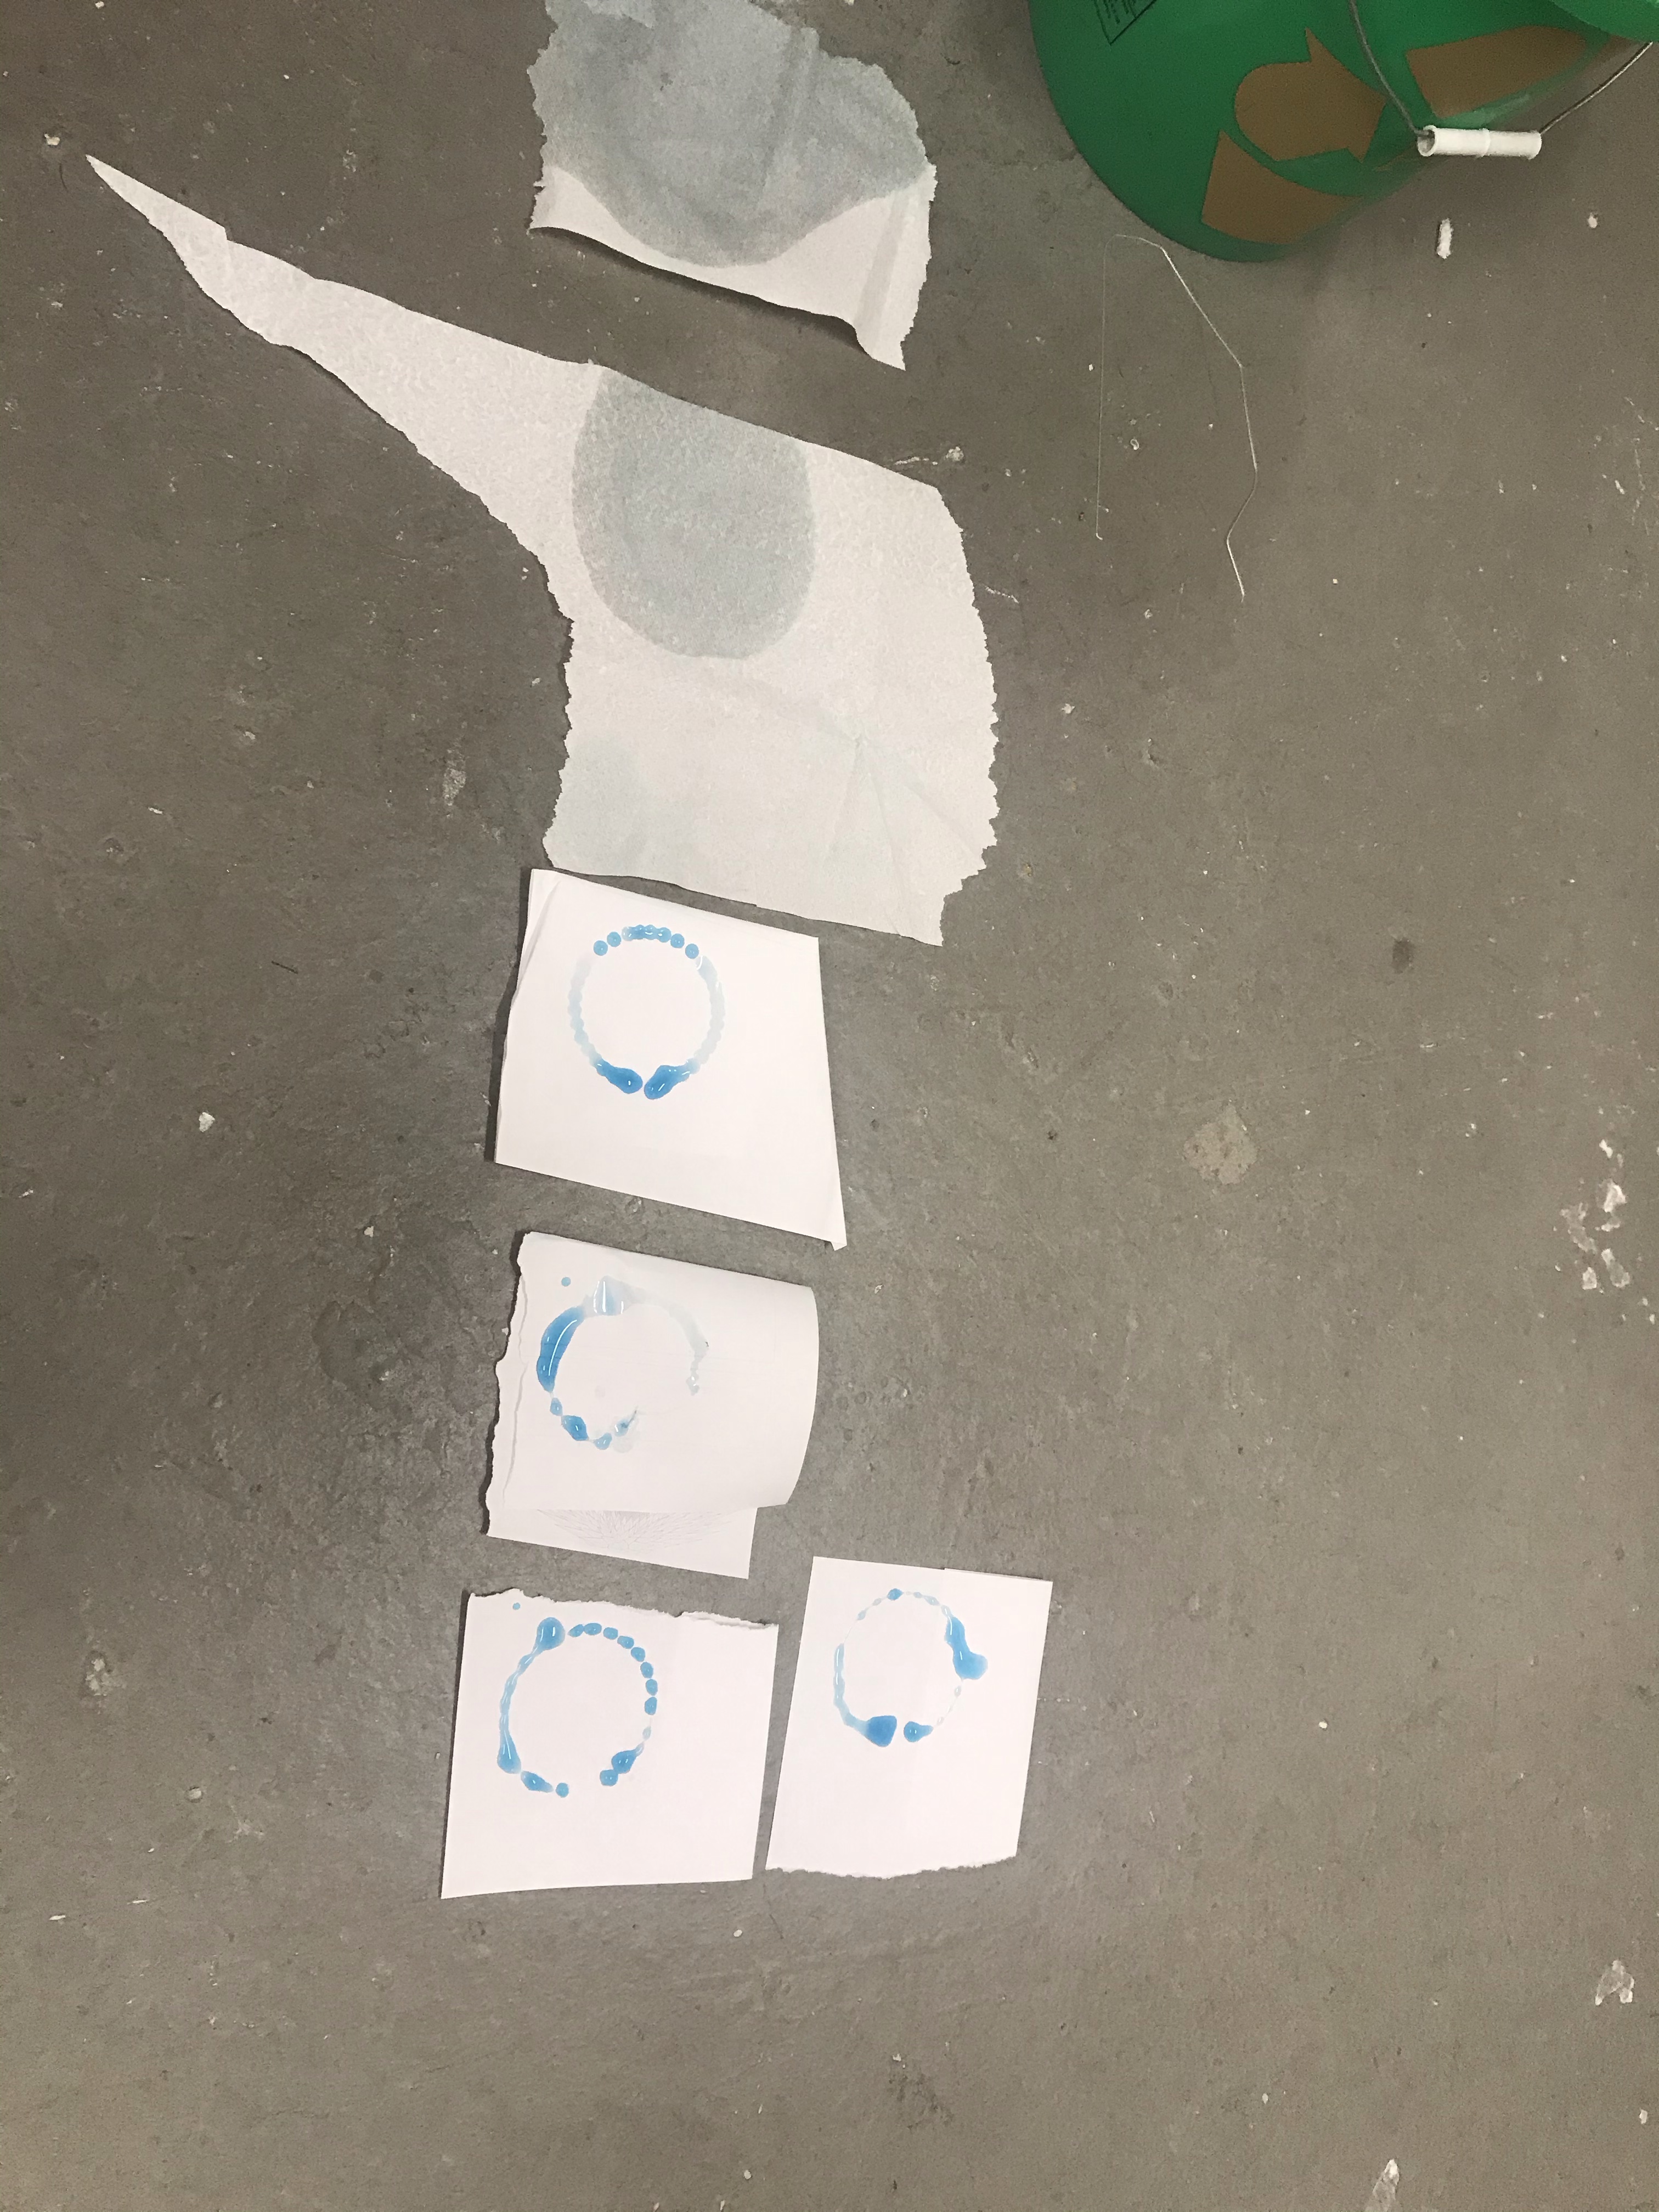
My initial tests prints worked but left a lot to be desired. First and foremost I had to change the movement. The hand drawn arcs were nice but a hassle to reconfigure when I wanted to change the size, or the order that the machine draws the dots. So I dove into grasshopper, drawing the movement structure with an algorithm that could be both more efficient and adaptable to different circumstances. The difference looks a little like this…


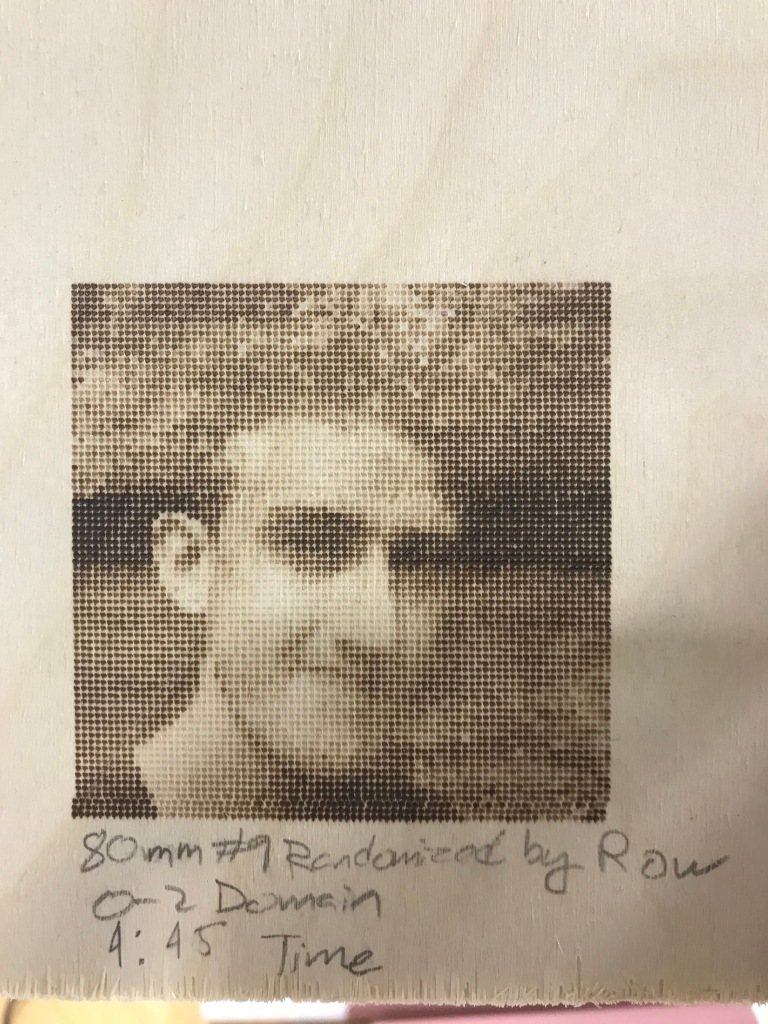
The next challenge was addressing the visible lines occurring as a result of heat cycling. While I couldn’t get the aluminum heat sink replacement tip to work, I found another solution, randomization. By randomizing the drawing order, the heat cycling becomes less apparent. However, since I am trying to ‘collaborate’ with the machine and utilize some of the unexpected elements that come out of the experiments, I came to a compromise which softens the cycling but does not eliminate it completely. I did this by randomizing each row individually instead of the entire image at once. This preserves the charming quirks of the machine while adding some intentionality and polish. See details below.


Most of my work has been online – lots of mapping, laying out content plans, taking to different people about best website hosting, 3D scanners, and potential school partners. I made a list of possible materials and I am working on grouping them by organic, manufactured, and repurposed (categories to be workshopped). I put out a call for recycled materials including plastic bags and plastic bottles. I knit a swatch out of cotton yarn and attempted to knit one out of jute twine. Lots of incremental progress across the project and its many components.
I would describe by process thus far as the following image:

Here are some photos that may further explain my process/work thus far.


Visit my Mural Board
]]>
Thus far I have one thermochromic sample that was poured too thick (quarter inch as opposed to previous samples at 1/8th of an inch). I set this sample in the fridge which I think made the water conent higher/firmed it but did not ‘dry’ it so unfortunately the sample split and melted somewhat when I applied heat to demonstrate the thermochromic properties.

Since this mild disaster I have poured two other samples more thinly in their molds, with a lower glycerin content to achieve a stiffer material. Their drying time will be 3 days, unrefrigerated.
At this point the final form is still undetermined. I am torn between an abstract form that retains the beautiful light and shadow play of earlier samples and creating a dinner matt that is more in keeping with my research question.
]]>

Regarding paper, I ended up not having to order more from French Paper, as I was able to find a similar paper stock available locally! Thinking about sheet size, I looked up the specs for the various presses available for use. It appears that the SP-20 has the largest max sheet size (19.5” x 28), and fortunately it is what I used on the first test runs of this process. I think Annet has a good point and that I should try to maximize the sheet size on press, and really push the machine to its limits while I try to push myself too. An important note about cylinder proof presses like these. While the max length of a sheet might be 28”, oftentimes the printing gets less and less good/accurate the further down the press or the longer the sheet you use. So while the first several lines would be nice and consistent, there often is a fall off in quality as you progress down a sheet. There are workarounds, the main one I know is to print half a page, then rotate both the sheet and the form and print the other half. In this way, the type is sort of “upside down” when you look at it, but it is often a good way to get a more evenly inked proof.

Another side note: I didn’t include the press at Globe Collection and Press while researching, because I don’t have regular access to it. It is the main workhorse for that studio, and not really available for student use, at least not for the extended periods that I would likely need it for.
Next steps: figuring out this weird camera I have, and see what it is capable of. Also, start automating a cropping script in Photoshop to cut out individual letters in order to be able to animate them. And, of course, more printing. I think next might be the letter ‘Z’, which is the least commonly used character in the alphabet and thus theoretically will have the least wear and thus print the best? Time will tell.
]]>

With this project, I am promoting the benefits of analog technology. I believe that analog creates an opportunity for intimacy and connection while simultaneously addressing concerns of privacy and security. I do not intend to digitize these recordings at any point. I am also furthering my personal practice which tends to focus on memory, interpersonal relationships, emotional well being, and perception (among many other things).
]]>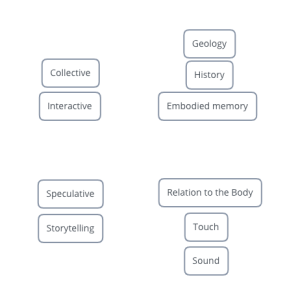
Clearly, it is important to me to create a collective and interactive experience, specifically including the body, perhaps through touch and sound. Additionally, I wanted to motion to be speculative, to imagine new embodiments while maintaining a link to history.
I usually see my phone as a streamlined, precise machine, like this diagram:
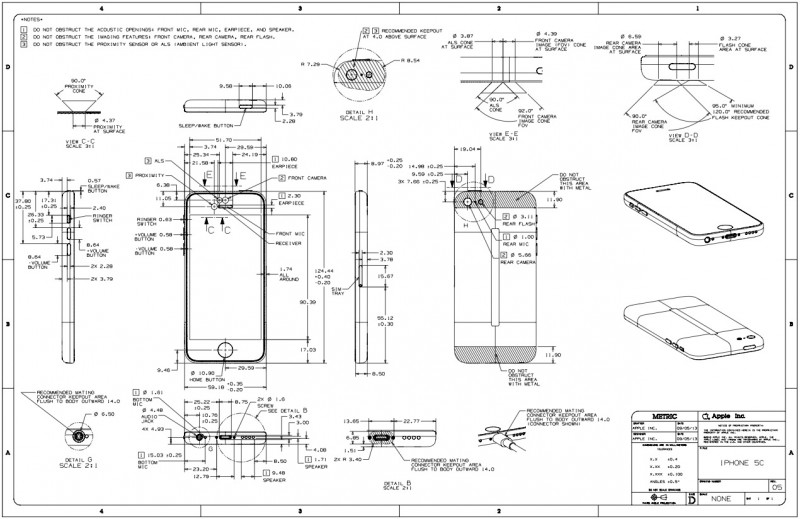
But in reality our phone is much more embodied. We wrap our hands around, we hold it to your face and spit into it when we talk, we take it to the bathroom with us. Some people fall asleep with their phone cradled when they sleep.
This got me thinking of ways to speculate new interfaces of embodiment for phones.


Could we manufacture phone cases that open up new ways of interfacing our phones with our bodies? Can we make a case that forces you to cradle a phone? A case that grasps you back?


Timeline
10/27
Order all materials
Finalize concept
Begin recordings
11/3
Continue recordings
Begin designing logo for library
Begin painting sign for library w/ logo
11/17
Continue recordings
Finish painting library
Make final decision on audio interface (headphones, mic, etc.)
Make webpage (digitize audio?)
12/1
Finish Project
Make presentation (due 12/4)
12/8
Photoshoot (dress snazzy)
Have a drink or something
Celebrate your life
I’m proud of you
12/15
Exhibition
Final Presentations
Materials
100 Tab-In Cassettes
100 Cassette Cases
100 Cassette Storage
Tape Recorder
Paint
Headphones
Microphone
Batteries (6 C)
Strap
*Acquired, Need to acquire
]]>Here is my script and slides. (I made some edits to the script by hand before I gave the presentation, but it’s the same for the most part. Also Slide 4 has a GIF on it that I added in Google Slides. It’s the logo I use for my music. You can see it on the music section of my website if you’re curious.)
View fullsize


Slide 1:
Hello, my name is David. I’m from Kansas City, Missouri. I like interactions, compassion, and exploring feelings.
Slide 2:
I am an artist and a curator with a multi-disciplinary practice. I’ve worked in a wide variety of media and spaces.
I’ve taken instant photos, made dual-projected super 8 films, and created interactive installations.
I’ve hosted crystal growing parties, writing competitions about love, and note passing workshops.
I’ve founded seasonal adventure clubs, potluck publications, and temporary archival offices.
I’ve curated fictitious constellations, aeronautic art programs, and urban creek expeditions.
I’ve organized rare book tours, vacant lot art-shows, and DIY film screenings.
I’ve done more than just these things.
Some of my projects have gone fairly well, while some have not.
Slide 3:
I practice art because I am trying to connect.
I also practice art because I like flipping through family albums, and rummaging through basement boxes.
And because I like seeing the tops of clouds through airplane windows,
and because I like talking to my mom.
I practice art because I remember going to jazz concerts, and baseball games.
And because I like writing letters with carefully chosen stamps.
And because I like holding hands in movie theaters, and drinking beers at swimming holes.
I practice art because I’m excited to meet you
or because I miss you
or because I’m glad to see you again.
I practice art because I loved you
or maybe because I still do.
Slide 4:
You may have noticed that I sometimes enjoy repetition or iteration.
I use an iterative methodology when it comes to my photography, graphic design, archiving, and music.
This practice of repetition, of being a regular isn’t limited to my “art”. I enjoy returning to familiar places, listening to the same albums, and running into people I know. If you ever go with me to my favorite dive bar back home, Chez Charlie, you’ll see what I mean.
Even though I enjoy this repetition, I also regularly engage in exploration, making new friends, and experimenting with the unfamiliar.
I don’t think that these two things, repetition and new exploration, are dualistic, rather they coexist in a nondelineated way. Kind of like a couple of intersecting clouds.
I try to take this both/and approach to my art, my feelings, and other things.
Slide 5:
I know that my subject for this project is repetition, or this loosely defined cloud that I’m calling repetition, but what is the question?
It could be, why do I seek out the familiar?
Or maybe it’s how do I feel, and how do I want to meet myself in that feeling?
Maybe I’m not trying to answer a question at all.
Maybe I just want to know if you ever feel the same. If we connect in our mutual comfort of being in the same place, or saying hello again.
Slide 6:
For the physical component of this project, my plan, as of now, is to create a series of tape loops.
These are tapes that are spliced in a way to create repeating loops of varying lengths.
I want to both record my own and invite others to do the same.
I hope, that by sharing in this experience of recording these loops that we can each have some time to think about what sounds we want to remember or what memories we want to revisit.
Either way I’m looking forward to listening.
If you would like to learn more about me or my work, feel free to look at my website at alpert.online, or reach out to me personally. I am happy to take any questions that you may have at this time.
Thank you.
]]>…..
Timeline
…..
]]>When asked to pitch our ideas to each member of the class my initial research question I proposed was “Can we measure geographical visualization by means of map making in manual and digital methods?”
I am interested in investigating the methodologies of the Marshall people and see if I could apply the same logic to new technologies we learned in class.
I envisioned the process to take shape by having a 2D image of a topographical reference, have the “Encoding the Environment” grasshopper script record the varying color shifts based on elevation or landmark. Then this visualization could then be placed into the AdaCAD software to translate the visual into a weaving format. The saving would then consist of different weaving techniques to demonstrate different landmarks or elevations. The output would be a constructed weave in which someone may be able to read as a map.
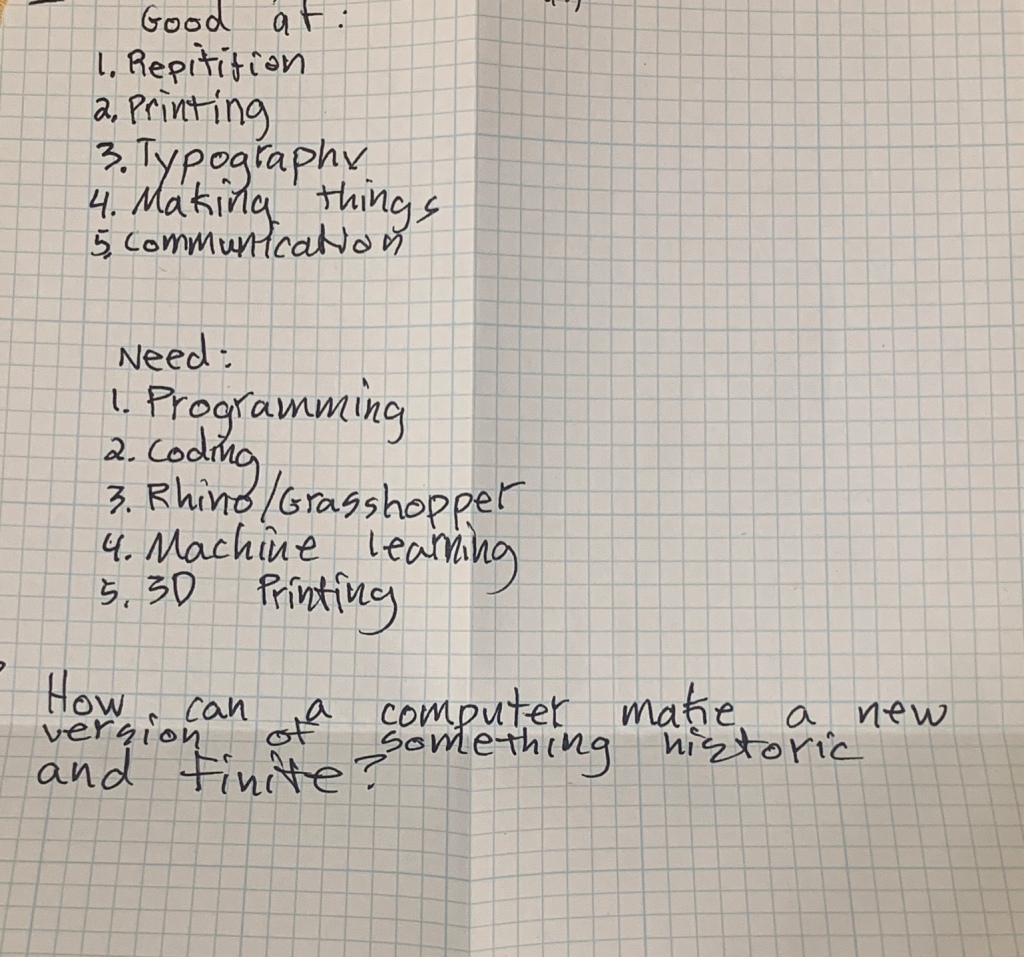
During the speed dating process, we were asked to write skills we had personally and skills we were looking for from our classmates. I noted that i have good rhino skills, rending skills, fiber skills, brainstorming skills and designing skills. I mentioned needed skills on TC2 Training, Floor Standing loom knowledge, coding and sensors skills.
I am interested in generating a multitude of maps and seeing how and if audience members are able to read these maps themselves.
]]>A form I discussed with Annet and Ryan was a pillow. This was a curious item for me because it is an intimate object but I decided I wanted to dig deeper into my work about touch and think about its operative use which can be to a) discover sensation or b) to bring people closer together.
When I think about things that bring people together I reminded of food and meal sharing. Given my passion for cooking I began altering my direction with the help of Ellie and Matt. We discussed a table cloth that is thermochromic and records the movements of consuming a meal. Given the scale of the project this evolved into a place setting mat instead.
My experiments with bioplastics with now involve coating fabric to reinforce the structure. At present my recipes have been focused on flexible and tackiness. They have produced beautiful visuals with fantastic shadow play, which will unfortunately be lost on the final product of a fabric reinforced placemat. But a quality to consider exploring in the future perhaps.


I will not however be changing my approach to making bioplastics by pursuing a harder, firmer and less tacky substance. I’m having a difficult time thinking about how to present the final product and whether or not to record a performance and the place mat being used. It all sounds a bit dull when I think too much beyond the material explorations so hopefully the form will evolve again.

Here’s a videographic tutorial to create the same.
]]>Starting with disabilities, and having only a month to explore that, puts me in the position of an ableist. As a social designer, I am constantly unravelling my intentions through problem analysis, and at this point, I would not rush to create something that would do more harm through its assumptions than good.
I also would really like to explore amalgamation of senses given the technical expertise I have the opportunity to engage with. I am excited to look at how sound frequencies create visualisations, and how that impacts memory, experiences and thought for its viewers.
For this project, I am partnering Laurain Park. Before I met Laurain, I had an idea I wanted to explore, a theme, a medium and a question around polysensory experiences. Upon meeting with Laurain, I was intrigued by her curiosity around memory.
Memory affects us in various ways. The four biological ways in which it impacts us are:
Here’s a talk that describes this in greater details.
As I am researching more into sound, its impact and its role in our lives, I am looking at ways of how this can be translated into another media for its digestion. Will it have a similar impact on us? How does memory wrap into this?
I recently came across the Lumbee Tribe. Laurain and I share the love for indigenous craft practices and were exploring the possibilities of looking into how Baltimore’s memories taint its indigenous Lumbee Tribe.
Apart from this, we have a few more ideas on what the application and role of cymatics should look like for us. The coming weeks, we will explore the tool of cymatics coupled with a few more sound visualisation tools – while playing around with narratives of memory from different lenses.
As for our project Timeline, you can find more details on Laurain’s blog here.
I look forward to digging deep into this space in the next month!
RESEARCH RESOURCES:

This past week I spoke with numerous professors, classmates, former coworkers, mentors and family members about this project. My hope was too narrow down, but I was only gifted more ideas to consider and explore. I’ve come to the realization this is a multi-year project and for the purpose of this class I’m choosing to focus only on a small section (see below). Many of the current ‘futuristic’ ideas/designs have been dominated by the use of knitting machines which can be expensive and inaccessible to the average crafts person. Many speculative design solutions and resources are extremely expensive, proprietary, or require extra study to understand. This project is challenging this privilege and power held by a few by using a method of making that the average person can learn and use…Knitting.
All of my lofty ideas of using knitting as a foundations for speculative futures and sustainable social change are grounded in the fundamental use of knitting as a structure to build upon. For the purpose of time and feasibility I’m choosing to focus on knitting as an accessible method of making and question its traditional perception through how it is being taught (specifically in America) + what materials are being used. I’d also like to note that I’m not trying to erase the long-standing historic and cultural tradition of knitting, but instead create a new thread/perception that can celebrate what has already worked, lead us into the future, and make knitting more accessible to a wider community.
Questions + Themes moving Forward:
Can a platform exist that simplifies/consolidates the resources that already exist and removes the barriers to learning for beginners?
Can alternative materials challenge the traditional perception of hand knitting?
How can other cultures and traditions be celebrated to expand the Eurocentric perceptions of knitting?
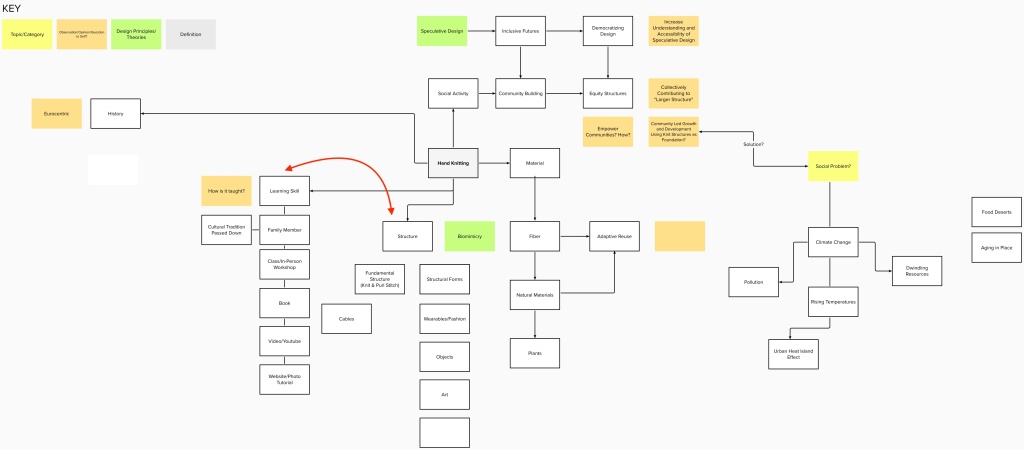
As shown above, the first step of this project is mapping my thoughts, research and ideas into a large flowchart/mind map. This will be an ongoing part of this project and will be continually updated throughout this semester and beyond. I’ve outlined the main components and goals of this first phase below:
1. Encourage Learning
Simplify and improve accessibility learning. Assess language, consolidate resources and integrate historic and cultural precedent
2. Explore Alternative Materials
Move away from traditional fibers. Consider adaptive reuse, more natural and found materials
11/3
Have more things printed between class periods
Continue digital processes in class
11/10
Have more things printed between class periods
Continue digital processes in class
Build random character selection tool? (if this is a route I end up taking)
11/17
Have more things printed between class periods
Continue digital processes in class
Figure out how/where to implement random character selection?
11/24
OFF
But still try to print a few more things 
12/1
Try to have a ‘product’ or something to show. As for what this will end up being, I hope to gain clarity upon further meetings with the professors.
12/8
Have presentation ready to go.
Practice presentation, have index cards with short notes.
When I expressed this to Ryan and Annet, as well as my concerns about feeling, quite frankly, overwhelmed by the thought/task of learning enough programming, etc., to do what I was seeking to do, they were (amazingly) understanding. Annet even proposed or talked about how using my own body as the machine instead of a computer, which is something I hadn’t considered. Could I push this idea, and maybe my own limits, and see what was generated? Pretty intriguing!
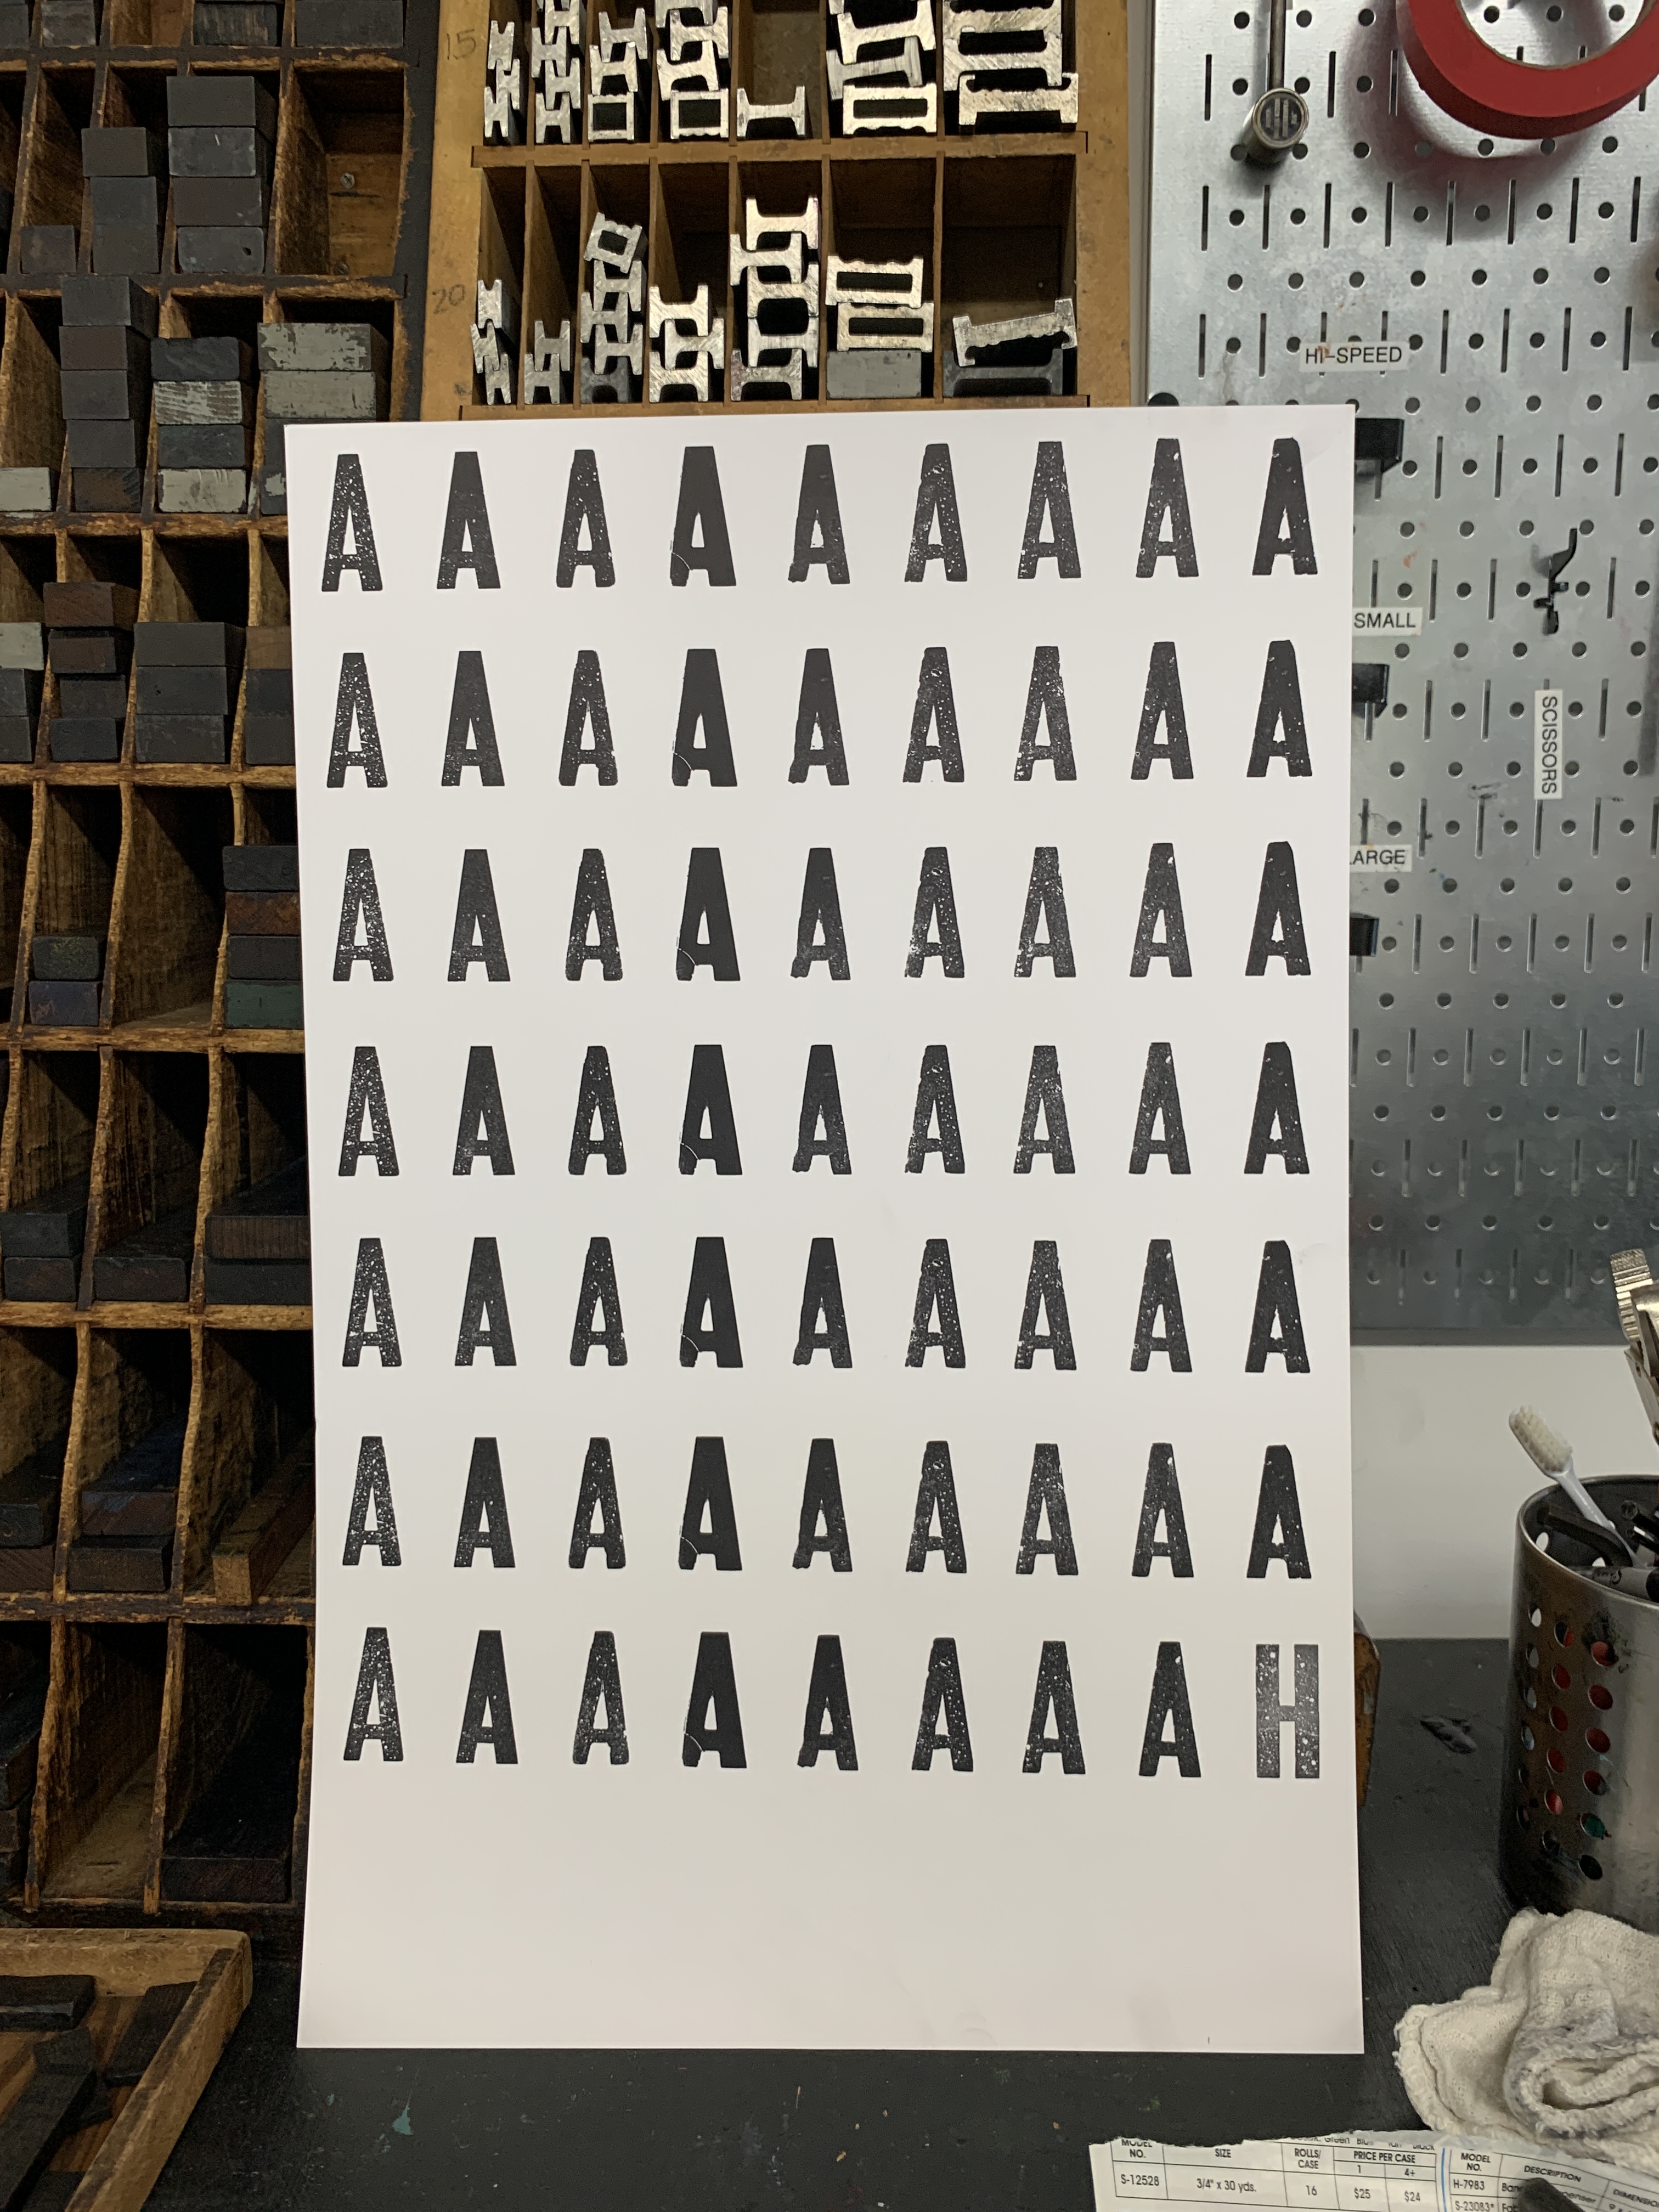
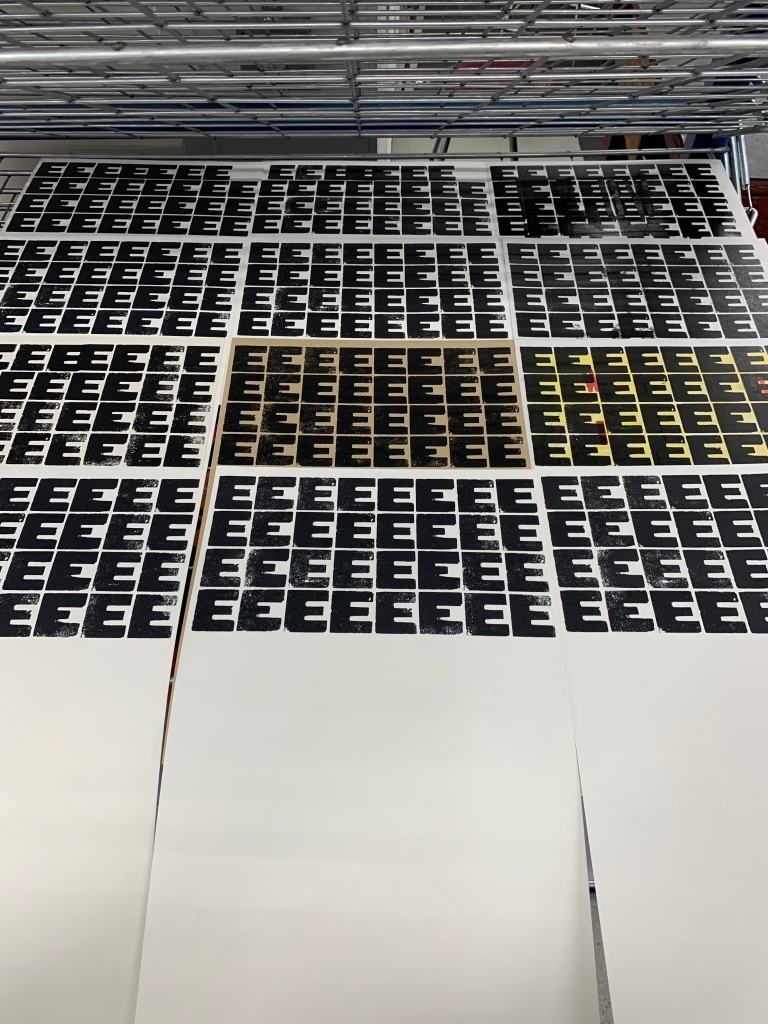
I did a test run of an idea over the past weekend, and definitely learned a few things. First, I will describe the set up: fill a page up with the same letter, printed repeatedly. I chose the letter E because it is the most commonly used letter in typesetting, and thus felt like a natural first choice.
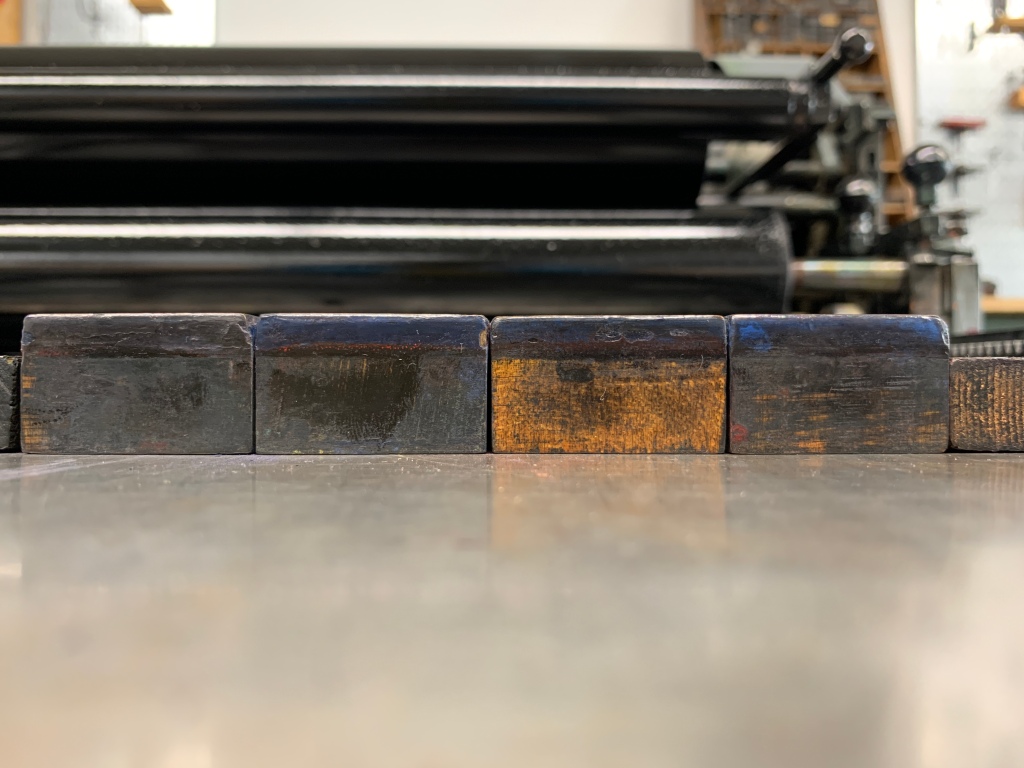
Granted, wood type is a bit different than lead type, but the point remains that E is a very commonly used letter. So, I examined what sizes I had available to me in the letterpress studio, looking for something that was roughly a square size, thinking this would help to maximize the area on the sheet, as well as making my math easier as I moved things around. I settled on a “10-60″, which in Globe Press jargon means it is 10 line, or a bit over 1.5” tall. The 60 is actually a catalog number from when they ordered the type, but it serves as a guide to relative width. For instance, a “10-51” would be narrower than “10-60,” and “10-71” would be even wider than “10-60” is.
As is the case with these things, there was a limited number of specimens available. While I originally intended on printed just 1 letter E, I decided to use as many as I could find, in this case 4. This proved to be smarter, as the process took a lot longer than I could have anticipated.
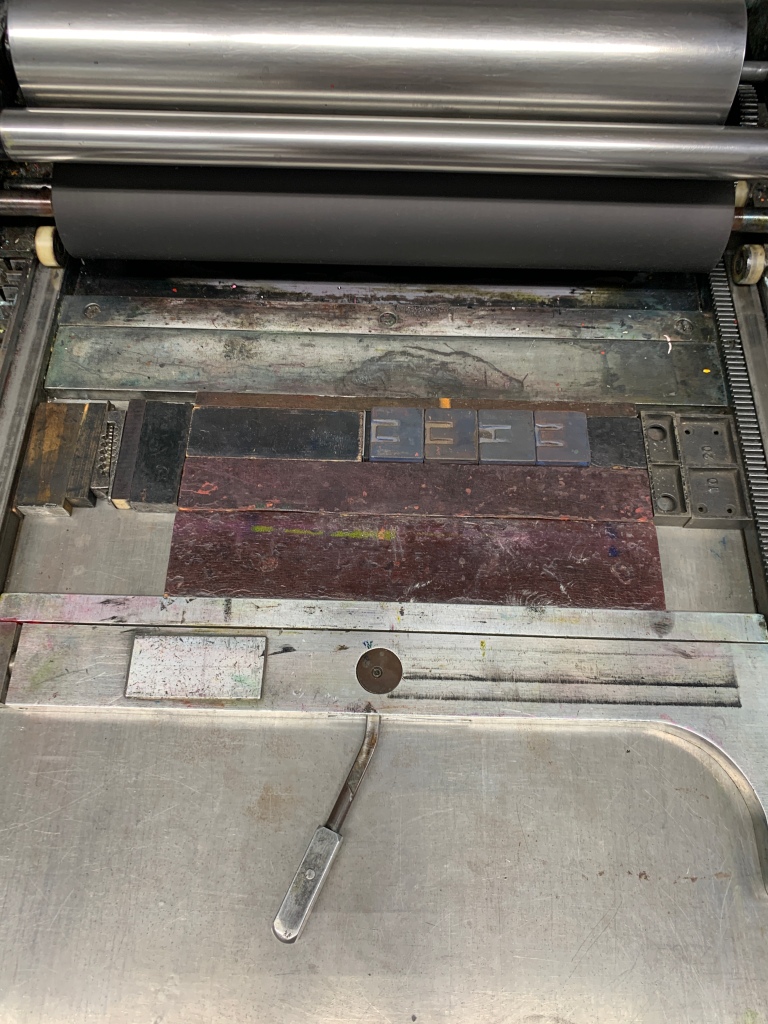
Upon locking up the type, I did a few proofs to get it positioned in the way I wanted, again, to maximize the number of characters I could print on a sheet. My sheet size was 12.5″ wide, and so I was able to get 8 Es per line. The process from here was mostly the same:
1. Print 4 Es
2. Move the Es over and print another 4
3. Move the 4 Es down, print
4. Move the 4 Es over, print
5. Repeat, repeat, repeat.


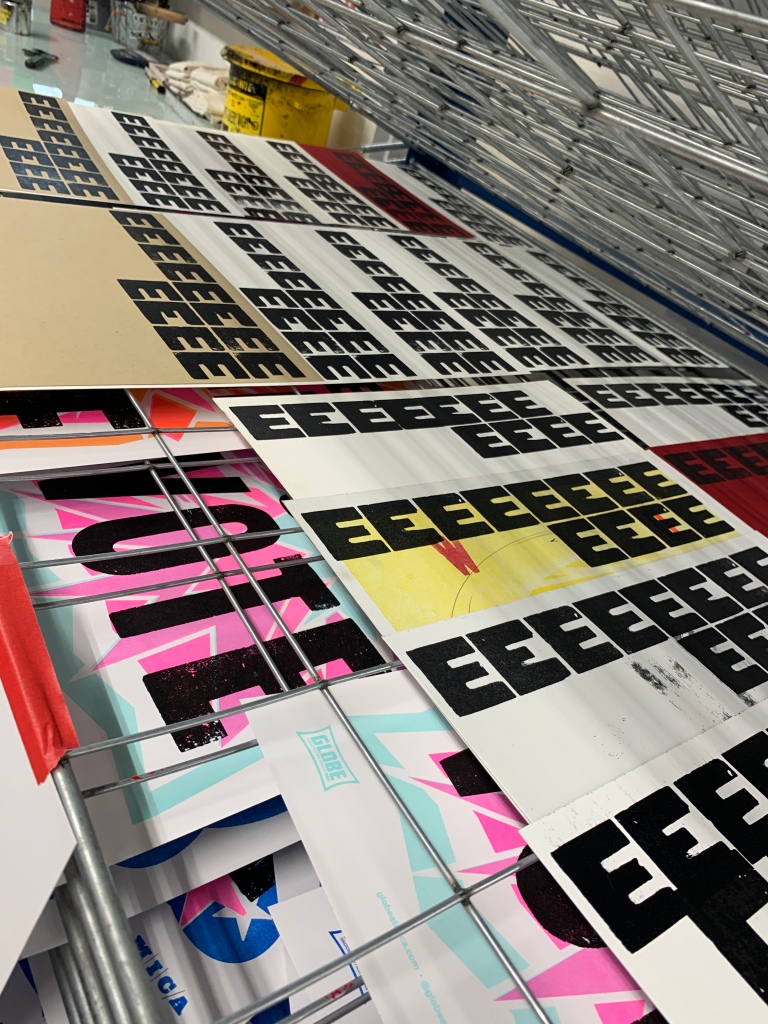
I had about 4 hours to work on this over the weekend, as that is what my schedule allowed for. I thought it would be no problem to fill a whole sheet (12.5″ x 19″) with Es. I was definitely wrong! In the end I only got 4 lines done. But, when you do the math, that is 32 per sheet, and if I did about 12-15 good sheets, that is still 384 Es, which is nothing to scoff at.
Now, I probably could have been a bit more productive had I taken more care when selecting the type. It wasn’t until I was moving it around that I noticed some problems with it that I would end up having to troubleshoot every time I moved the line around. Mainly, this letters weren’t square! Thus, when I tried to lock them up on press, they naturally wanted to spring upward and form a small arch, which can lead to disaster while printing, damaging the type, the press, or both. I eventually figured out a solution that worked, but still took time to reset it each time I moved the line.
It wouldn’t be printing without some troubleshooting and having ink all over your hands (or at least in my opinion). While it wasn’t as productive as I thought, it was still a valuable learning experience, and I can take what I learned and apply it moving forward, both in this class and future printing endeavors. As for next steps…maybe it is scanning these and beginning to figure out a workflow to cut them out? Or is it fully fill the sheet and see what that looks like. Do we even recognize it as an E anymore? What if the character was narrower, or wider? What if it was a word instead of a single letter?

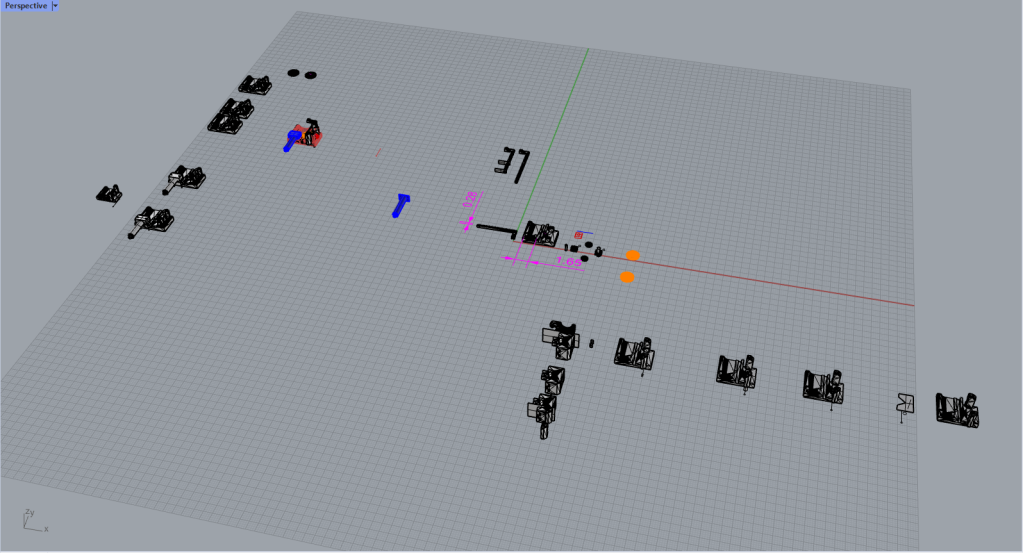
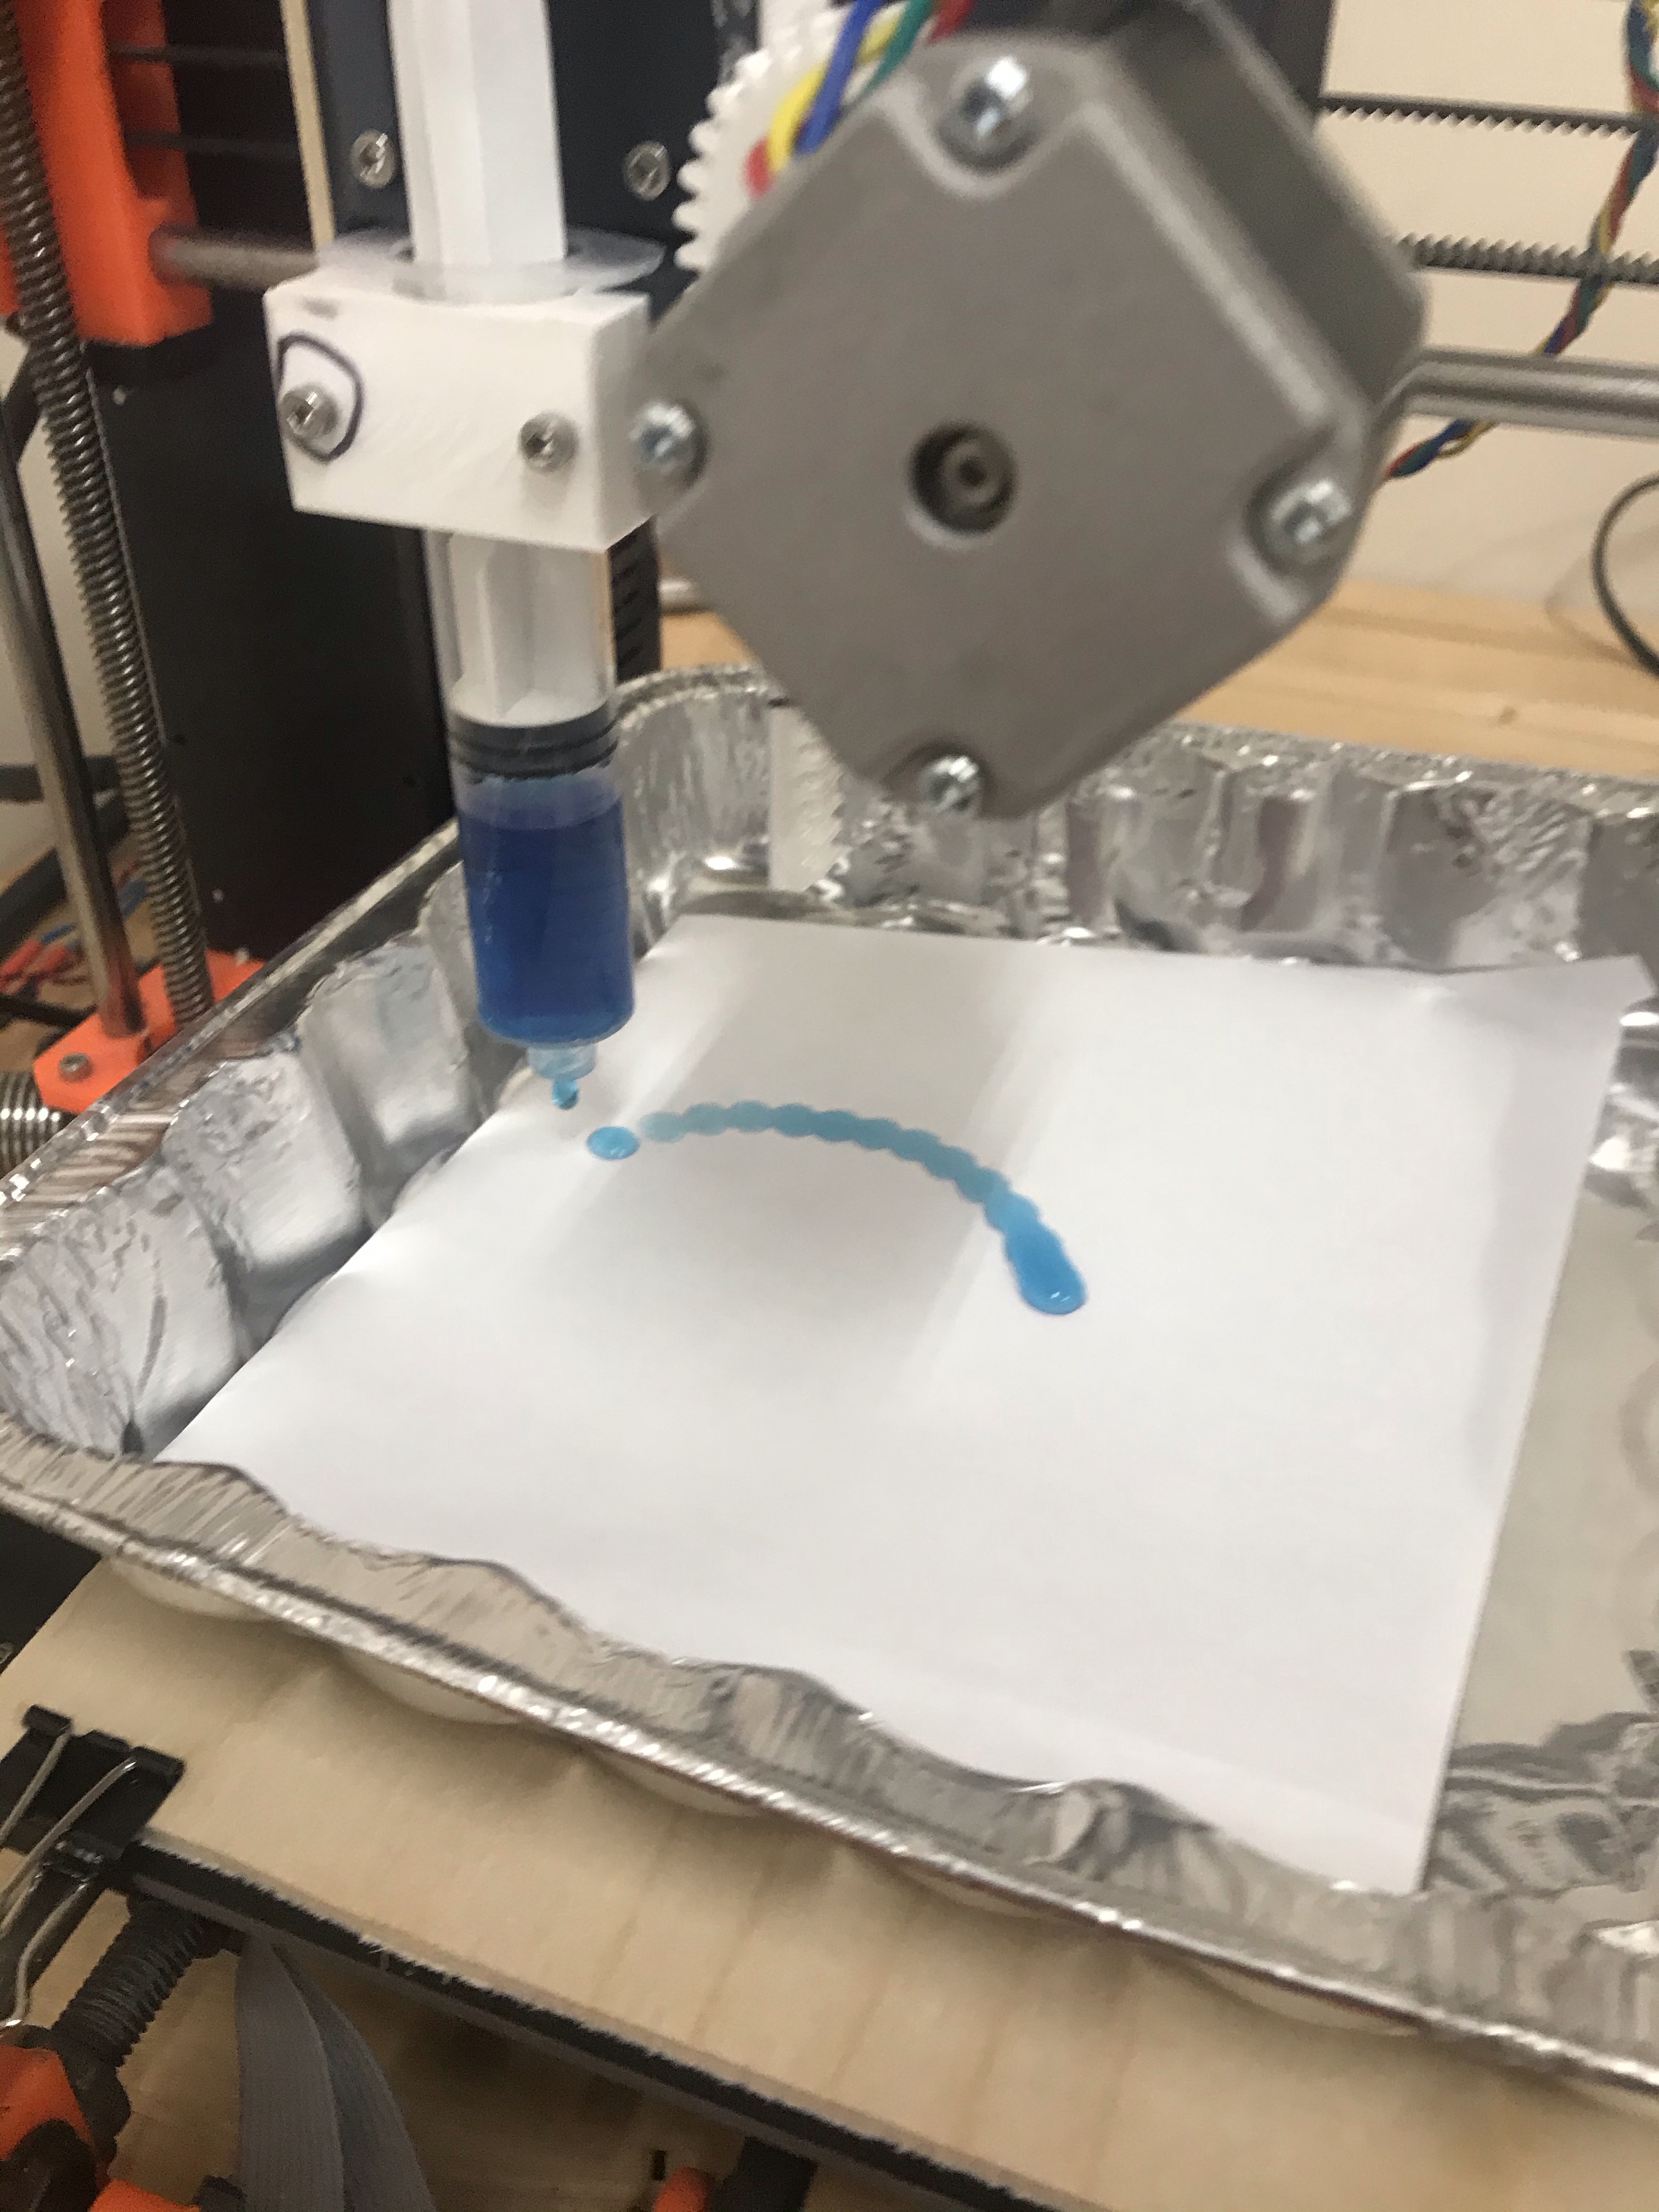
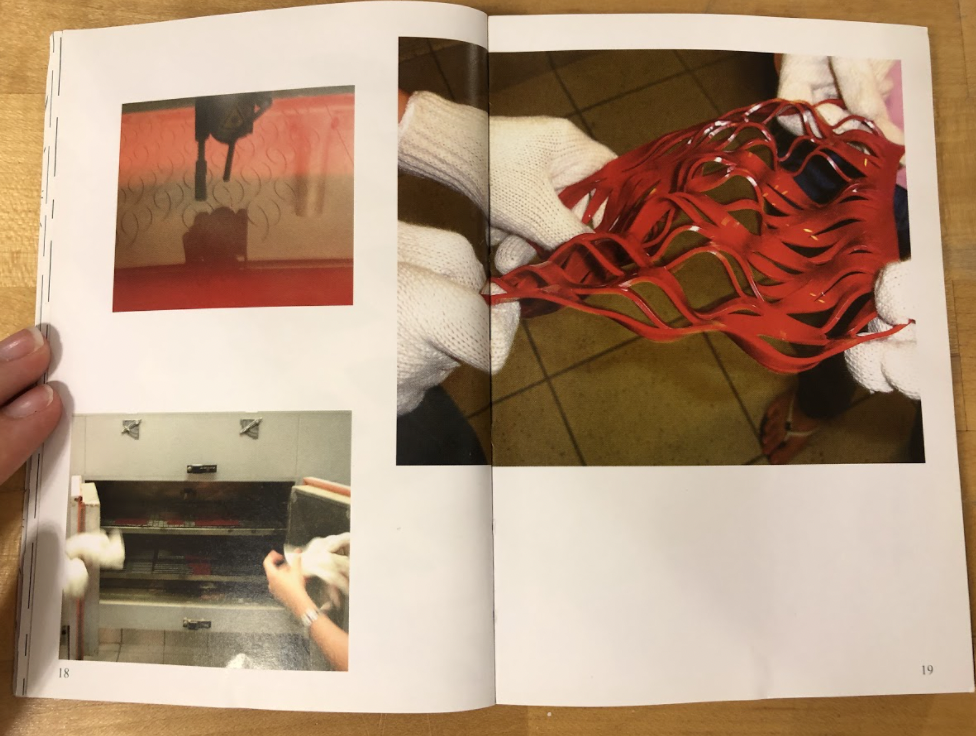
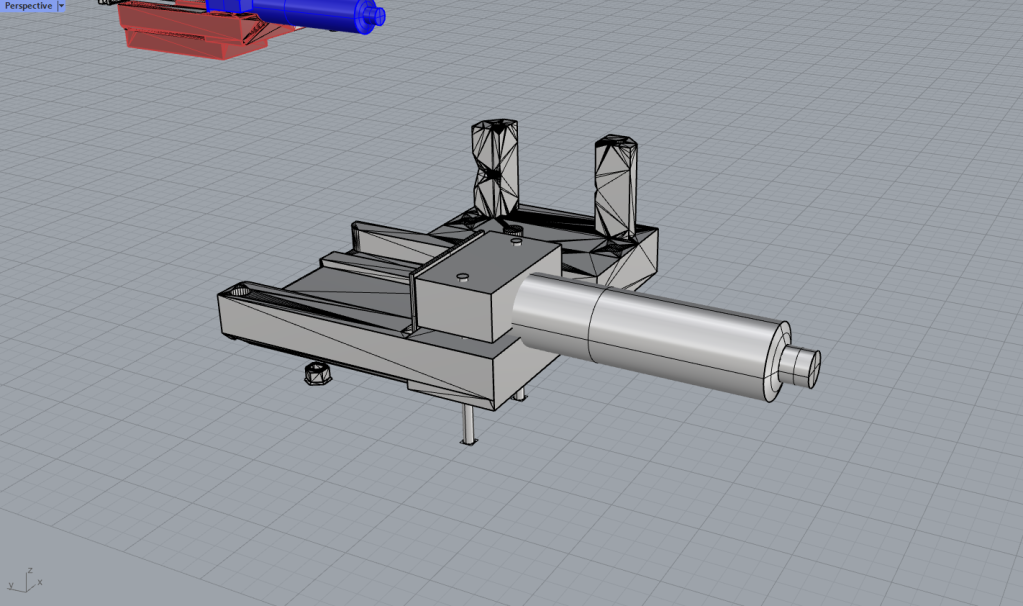
Most times that I use a 3d printer, I model a solid object in Rhino, export to an STL, than use a slicer such as Prusa Slicer to generate the gCode which controls the movement of the printer. So controlling the printer manually, or without a solid object was completely new to me. Luckily, our wonderful professor, Ryan Hoover has already created a plugin for Grasshopper which converts curves in Rhino to into gCode moves. This plugin is called Xylinus.

I created the necessary geometry by drawing a few curves in rhino, than arraying and weaving those lists together in grasshopper, to form a single, consecutive list of curves. After some more troubleshooting and tests to insure that list was properly ordered, I added in entry and exit moves, and input those curves into the Xylinus “Crv to GC” component. This gave me the gCode for the basic motion, but I still needed a way to control the intensity of the wood burning.
While this took some work to get right, the concept is simple. The gCode command “G4 S(n)” instructs the printer to “dwell” at its current location for “n” seconds. The S values were generated using a “range” with a reasonable domain for test grayscales, and the rest of the command was formatted with the “concatenate” component to combine text fragments. When I began actually using pictures the handoff was easy, I just swapped these values for remapped brightness values using the Grasshopper definitions from our “Encoding environment” workshop.
Since Xylinus conveniently formats each curve as a tree branch the dwell commands were than inserted into the end of each list. From there I added beginning and end code, before saving out to a text file.
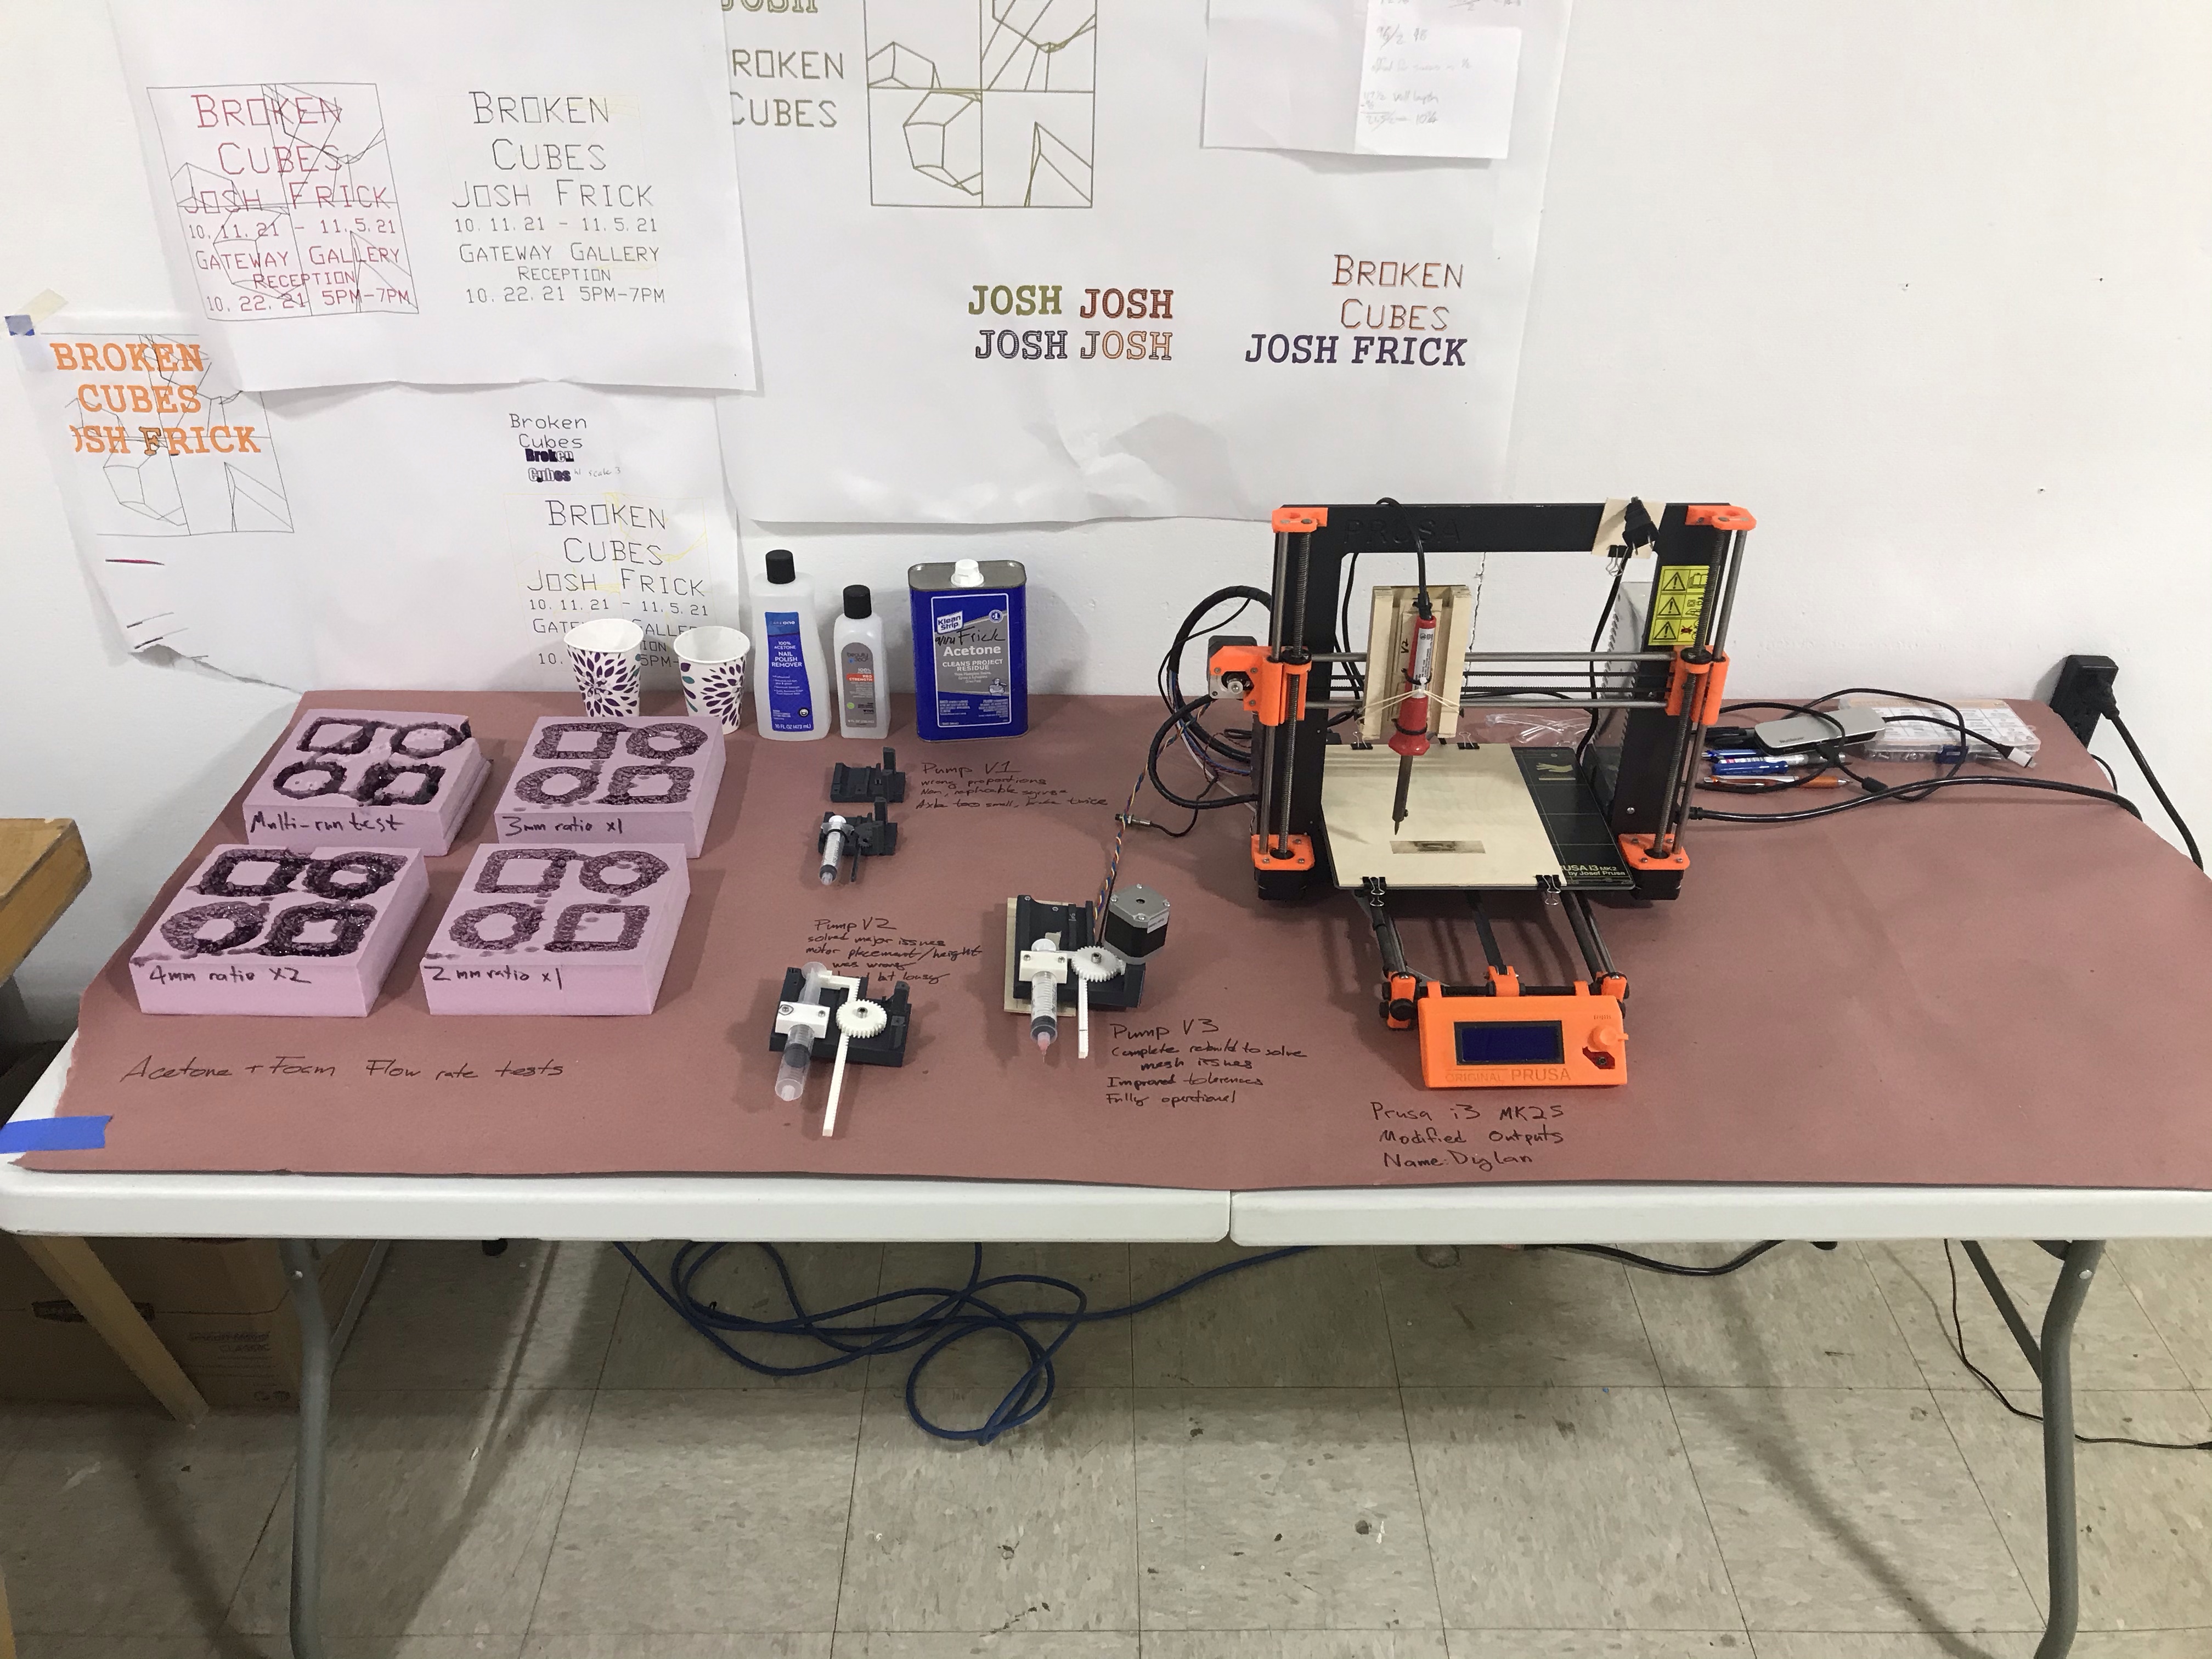
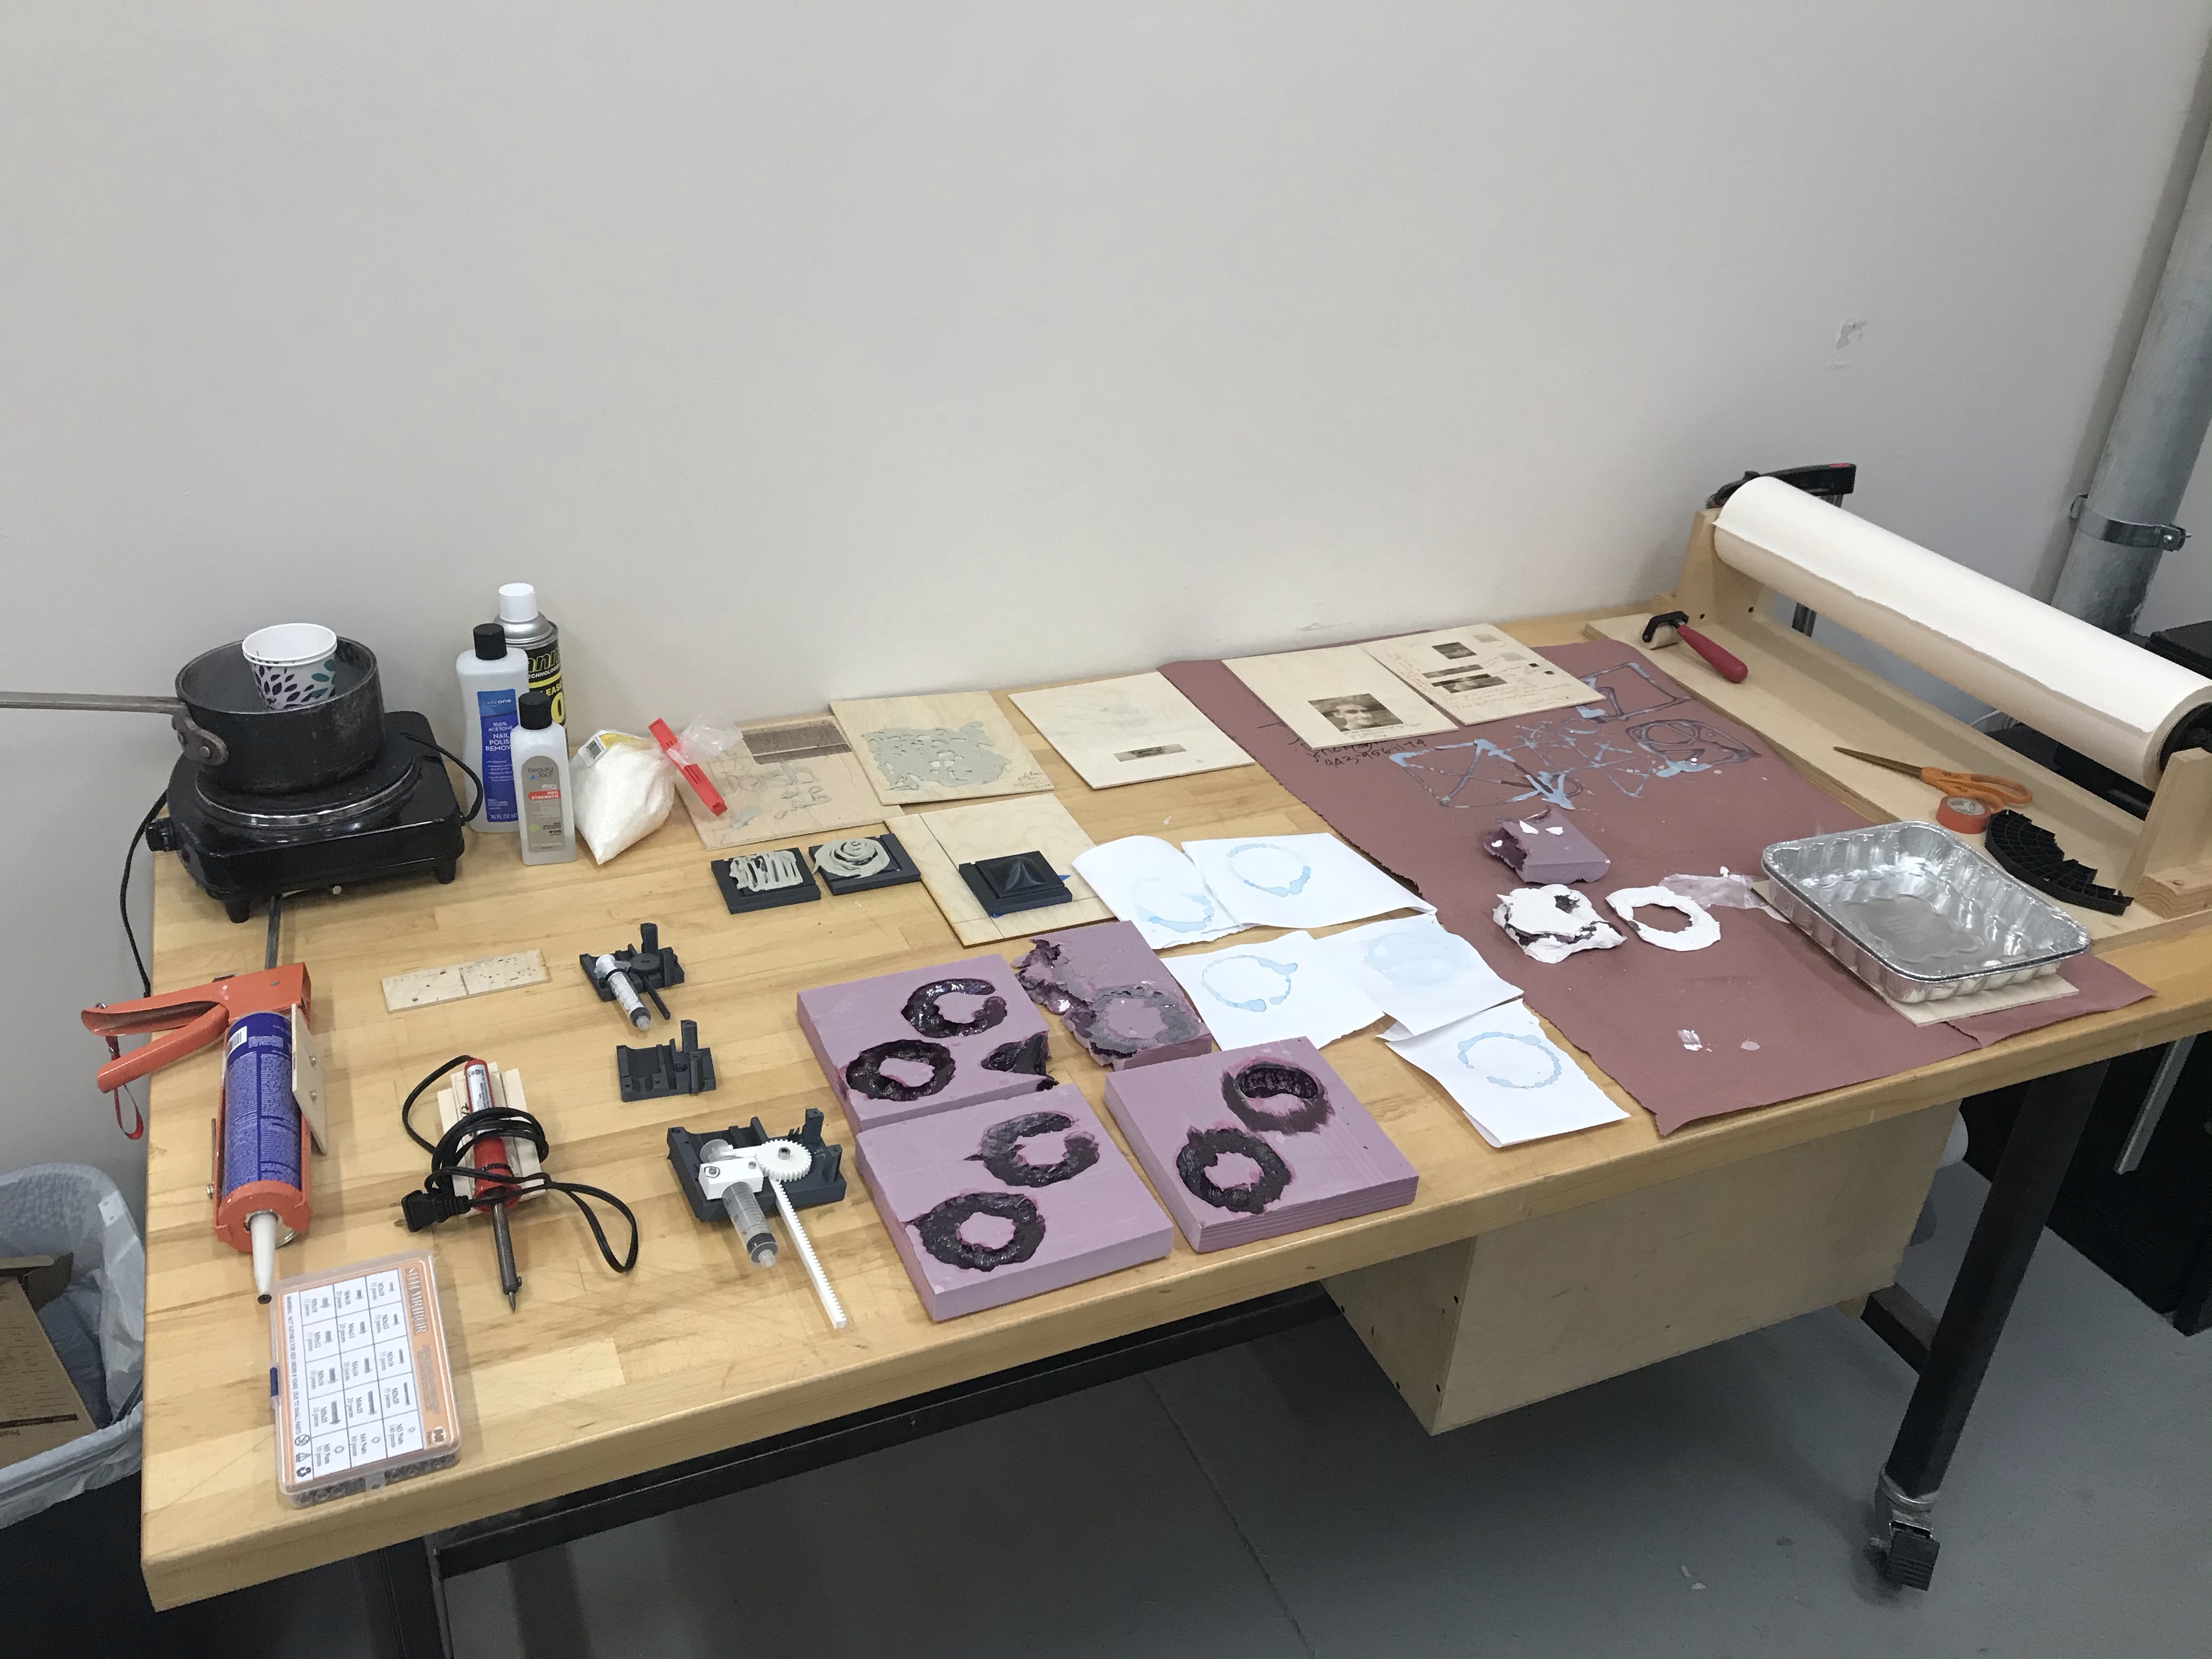
]]>
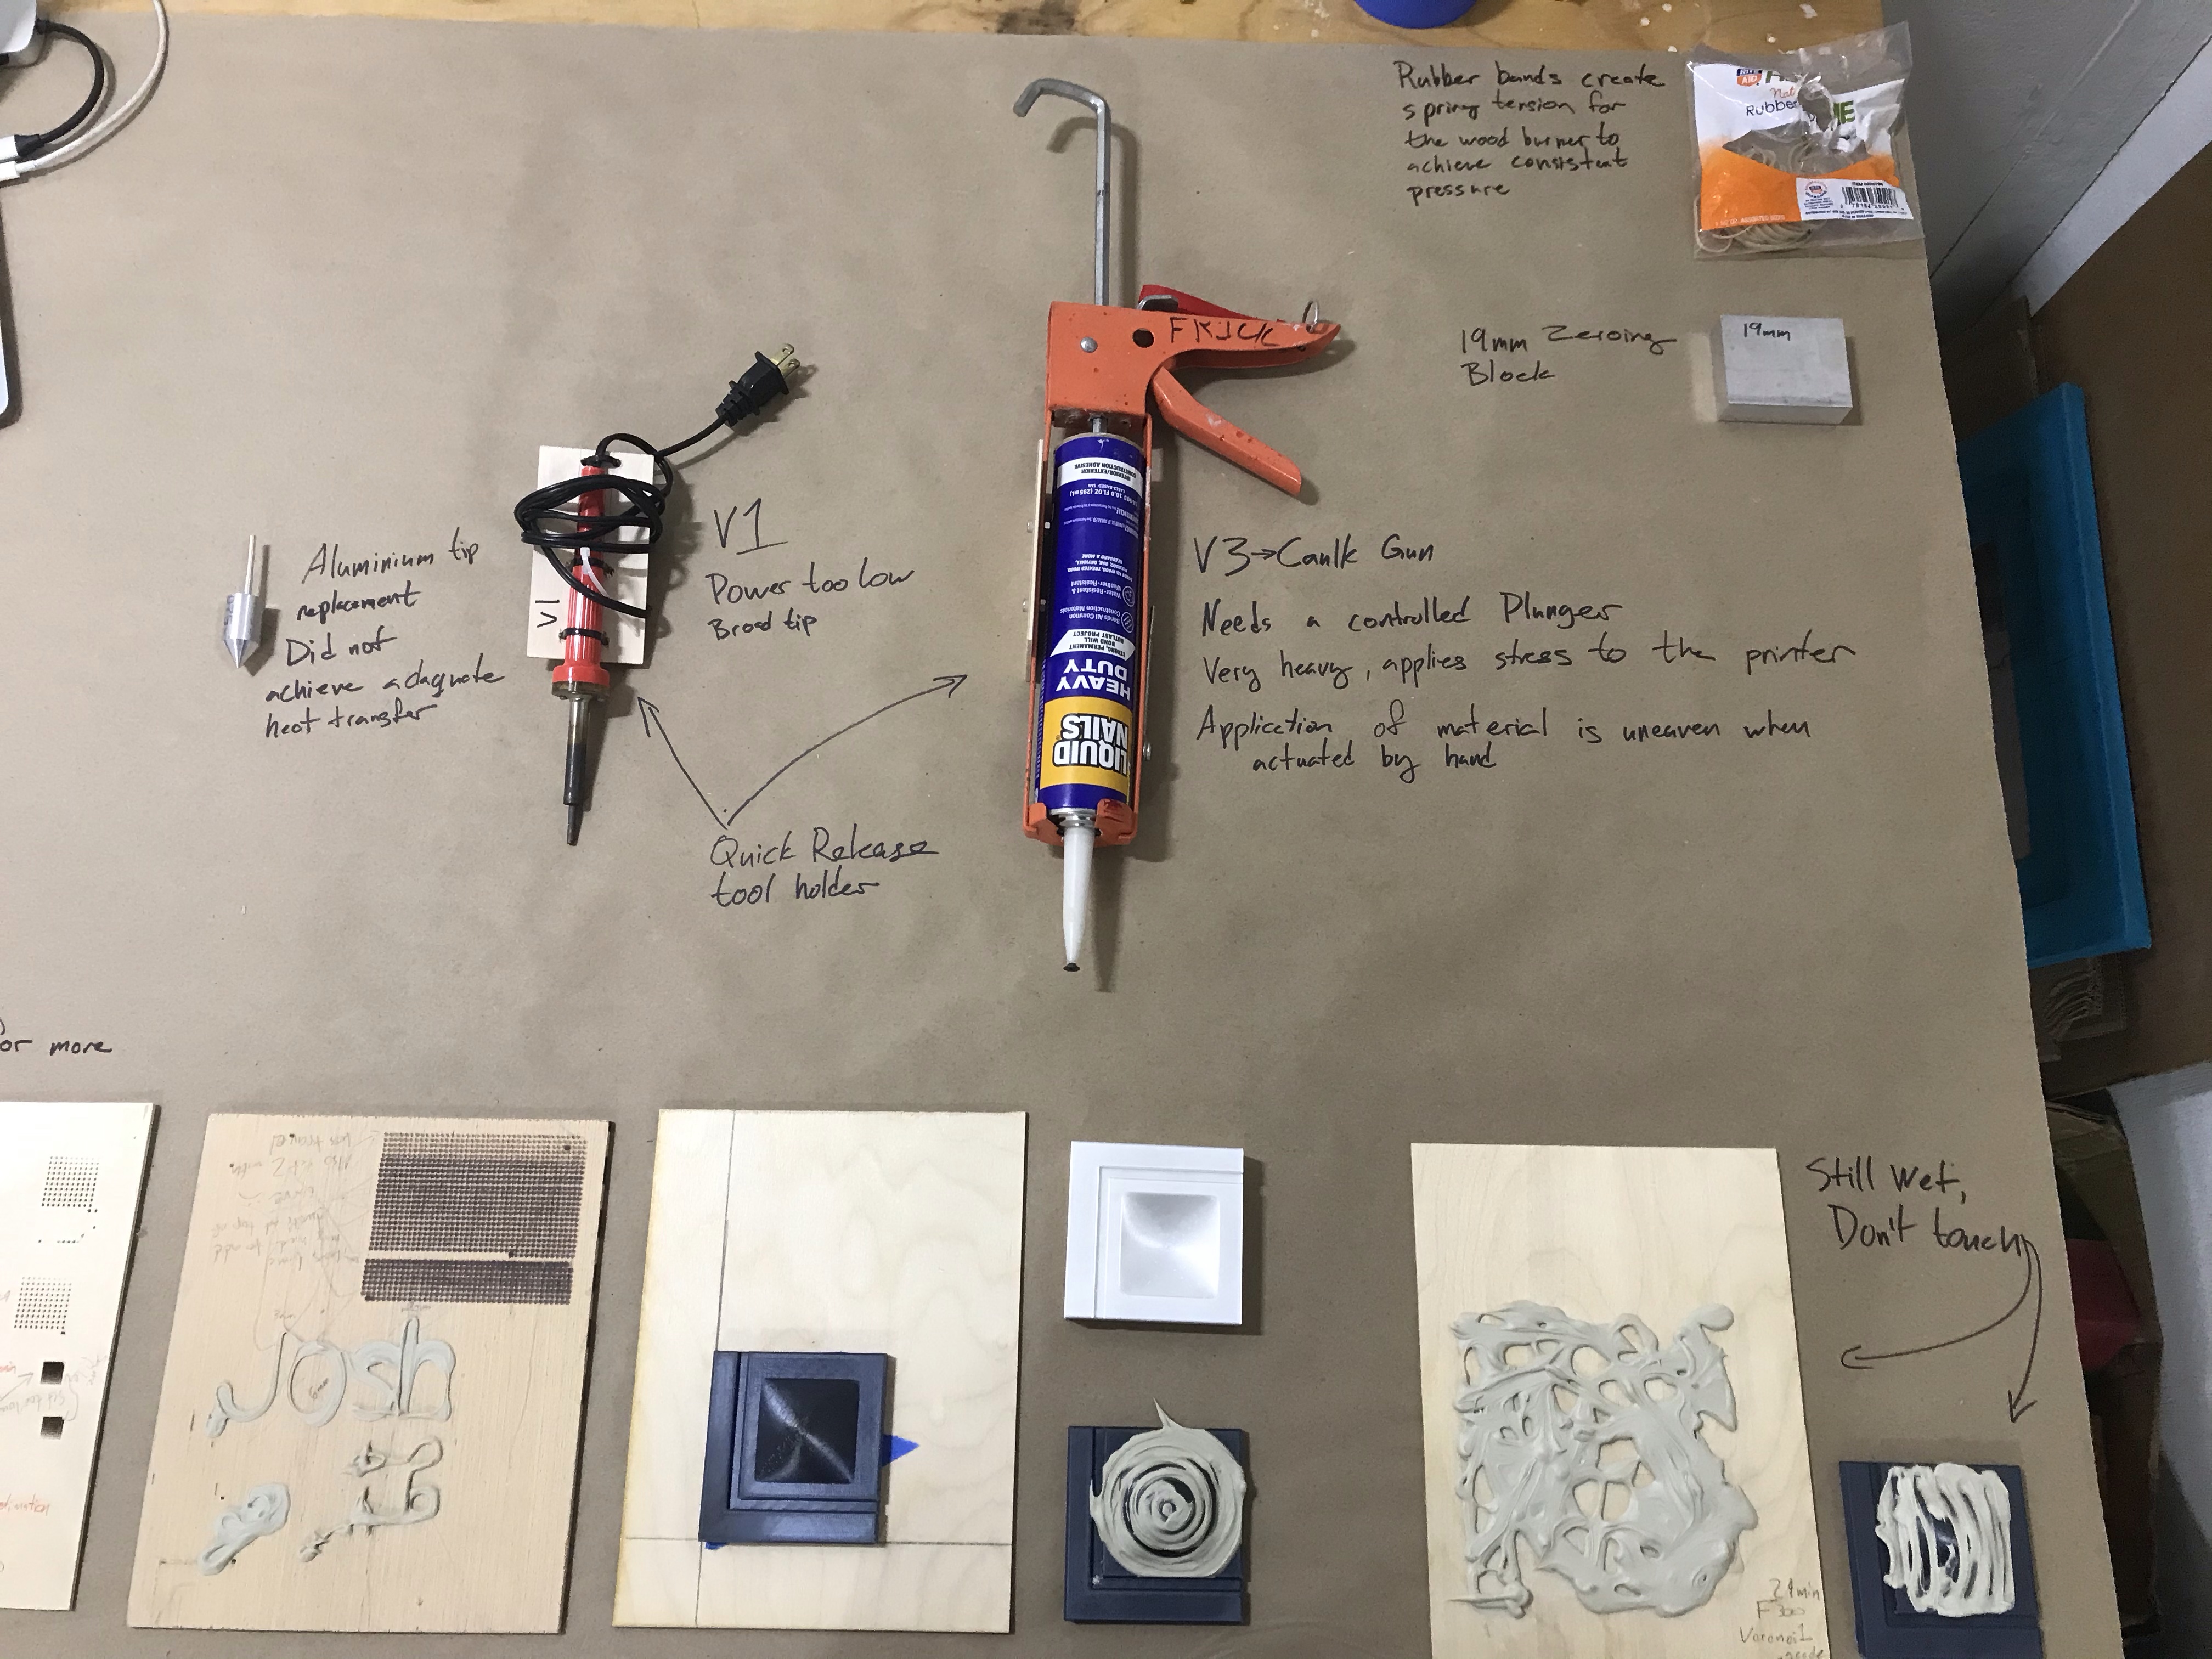
After removing the old x-carriage assembly with the extruder motor and the hot end, I got to work building my new attachments. The STL for the x-carriage mount freely available, so I printed one off to use as the base of the design. From there I mocked up a quick prototype from wood, and bolted that to my new print.
This initial mock-up was slightly flawed, but contains a few key features. Primarily, the burner is attached to a base plate which is free to travel in the Z axis. This plate is than tensioned downward with a rubber brand creating a spring action as the burner assembly descends. This first version also contains an auxiliary arm for bed leveling sensor, as the printer requires this attachment to home itself properly. In later revisions I learned how to home the printer through g-Code, negating the need for this sensor.
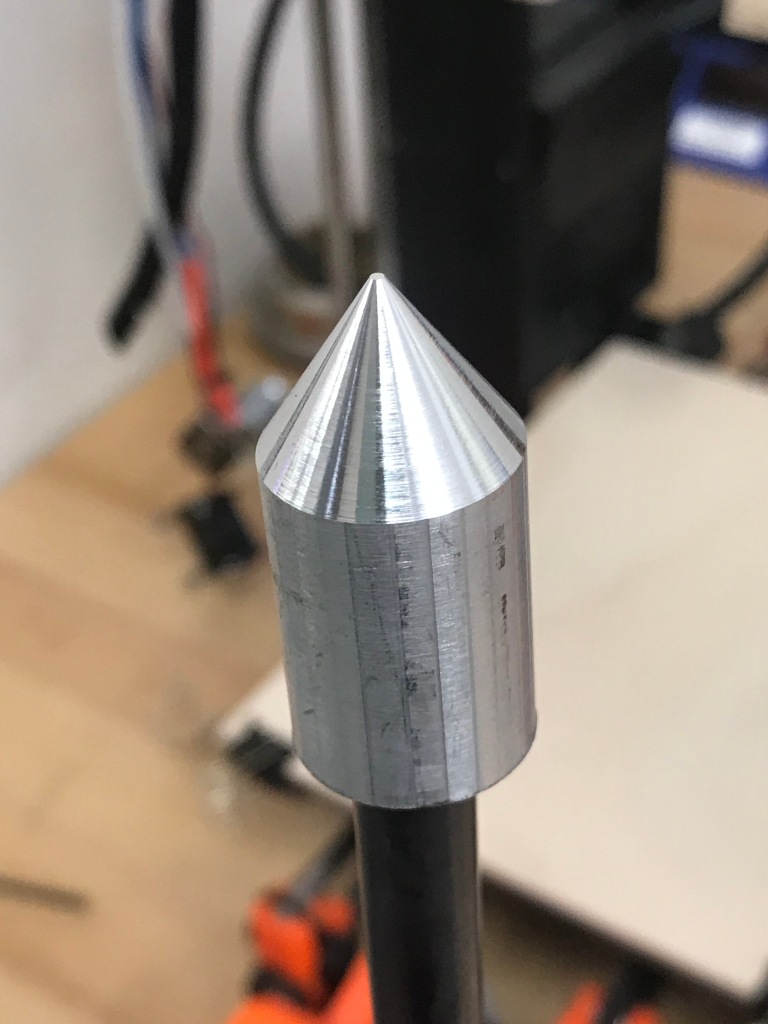
After some tests prints, I determined that the burner could not stay hot enough to remain even and consistent over a long period of time. Given the same rest time on the surface, the intensity of the burns would degrade over time, since the burner loses heat energy with every burn, and could not replenish fast enough.
As a possible solution, I got some help to machine a new aluminum burner tip with a large heatsink. The goal here is to heat up the larger metal mass, which will stay hot for longer and bridge the energy gap. More testing is necessary.
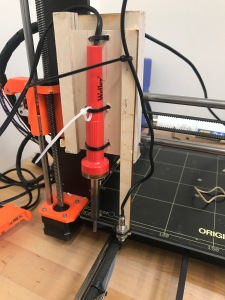
In accordance with the dFab shop convention, every 3d printer, or motion machine needs a name. Thus, this machine shall be named Dylan.
]]>Why, you may ask. As I began my journey through Unravel the Code, my topic of interest was strictly to do with traditional craft practices and modern technology. The deeper I dug into technology as a tool, my belief system towards how technology can shape the world grew stronger. I do believe craft as a practice is communal, it is entrenched deeply in culture and operates on cultural relevance of communities, people, places and history.
However, for this project, I am focusing on how technology can be leveraged to erase sensory barriers that give rise to our society’s understanding of ‘disabilities’. I strongly believe that the term ‘disability’ causes a sense of othering a segment of the society that are not really disabled, but experience the world differently. How might we leverage technology to help individuals seek concepts, ideas, and experiences universally, as opposed to relying heavily on our senses.
Having said that, attached here are my initial thoughts to my mid-term presentation, a document that encompasses ideas I would like to explore.
]]>“Wow you are such a grandma!”
After 13 years of hearing comments like these, I’ve enjoyed pushing back and questioning people on why they viewed knitting as an outdated activity Reserved for the older ladies at the local craft store.
There are a few artists, designers and architects challenging the traditional perspective of knitting. Elizabeth Zimmerman, a change maker of the past revolutionized hand knitting quite a few years back with the push for seamless knitting in the round, but there hasn’t been a name as well known as hers since.
Some designers have experimented with knit structure such as knit sneakers, but at a much smaller scale in comparison to other traditional methods of making (ex: weaving). These projects have been dominated by the use of a knitting machine which are are expensive and inaccessible to the average craftsperson.
On the other hand, speculative design is used to predict future solutions, question our current society, and visualize the vastness of our imagination. It too can be inaccessible and expensive for the average creator/designer to explore.
For my final project I want to challenge the traditional perspective of hand knitting even further by exploring it’s application in the future using speculative design. I am still trying to figure out exactly how to do this. Part of this narrowing down is exploring a problem that speculative design could provide potential ideas for. At the moment, climate change and rising temperatures are intriguing to me. Temperature control is something that can be used across various industries, both in the present and future. A very important part of this project is the ethical considerations of making futuristic tech and designs available to the average person. Many innovative, futuristic design is extremely expensive, proprietary or requires extra knowledge to understand it. I want to challenge that by using a method of making that the average person can learn and use.
Wearables are one way in which I could see the possibilities of knitwear and temperature control being combined. Furniture or construction materials are others. Rather than limit myself to a single type of object, I think the best way to move forward is to experiment with knitting different materials, knit stitch structures that could naturally cool/heat, and/or create swatches to test out the integration of electric temperature control. I have many ideas swirling around in my head about future applications, but for now I need to start experimenting.
Research Question:
How can the traditional perception of knitting* be challenged by exploring it’s application in futuristic objects and structures?
*Hand Knitting for accessibility & feasibility

LikeLike
]]>LikeLike
]]>
Later meeting with Ryan and Margaret and Annet was helpful, and they encouraged me to potentially seek out a collaborator for my project, as it requires a few tech skills that I decidedly do not have! I think this week of presentations will help to give a more in depth insight into people’s topics, and hopefully a collaborative partner might emerge.
]]>I originally came in to this class thinking I wanted to get a headstart on my thesis exploring woven reed structures but I have such a clear idea of my thesis that I feel like I would be making waste of this opportunity to try something different. If anything, I want to make something in this class that can inform my thesis rather than begin it.
Throughout my time at MICA i’ve been extremely interested in using Grasshopper for my architectural projects, and just recently discovered that I enjoy using it to create art as well. I’ve also really grown an interest in weaving using architecture to inform the few pieces I’ve created.
Something I found myself thinking about a lot during our last class was that I would like to explore the intersections of fiber, parametrics, and coding in some way. Having a process that goes between the 2D and the 3D, the digital and the physical has always been part of how I make work and I feel would mesh well with these components.
I would really like to continue using the TC-2 and possibly even the floor loom. My thesis revolves around rigid weaving, more in the style of basket-making, and I’m really curious to see what I could do with a more flexible weaving. Laura Devendorf showed us how she uses weavings as sensors, as inputs, but I’ve been interested in the thought of having the weaving embody an output. Could I program a weaving to move? To physically respond or communicate to its surroundings? Could I make it go between the 2D and the 3D fluidly?
Or perhaps I could delve into using grasshopper to output a design to be woven. Grasshopper can create so many different outputs with the same script, is there a way I could incorporate that variation in a weaving?
I still don’t have clear thoughts on the final product I want to make but I know what I’m eager to explore. I think using my architectural background to inform my work whether by process or visually is most intriguing to me right now, along with the TC-2, Grasshopper, and coding.
Some of my pieces that I feel are guiding me in the right direction:


Strengths
Digital modeling
Grasshopper, other software, rendering software
Photoshop, graphic editing/generation
Weaknesses
Hand-drawn graphics
Weaving
Technical assistance/research (to a point)
I enjoyed the Pattern Generation workshop we had begun the class with, and would like to evolve that further. I have managed to get grasshopper to take an input from an Excel document to be used as an input parameter. Furthermore, I know that Excel can self-update from a website value, so the script can update in real-time. However, to make the project more successful, the program would not only need to bake, render, and save each new version, but then overwrite the displayed version when a change happens. Similarly, to make the project most successful, it would be most powerful if completely digital and free of a particular host software/environment.
This could be through hosting on servers, or through translation into another coding language to replicate the effects of the Grasshopper script, or by using a plugin to export a version of the script/final geometry. These are avenues I am exploring at the moment.
]]>presentation of final project
]]>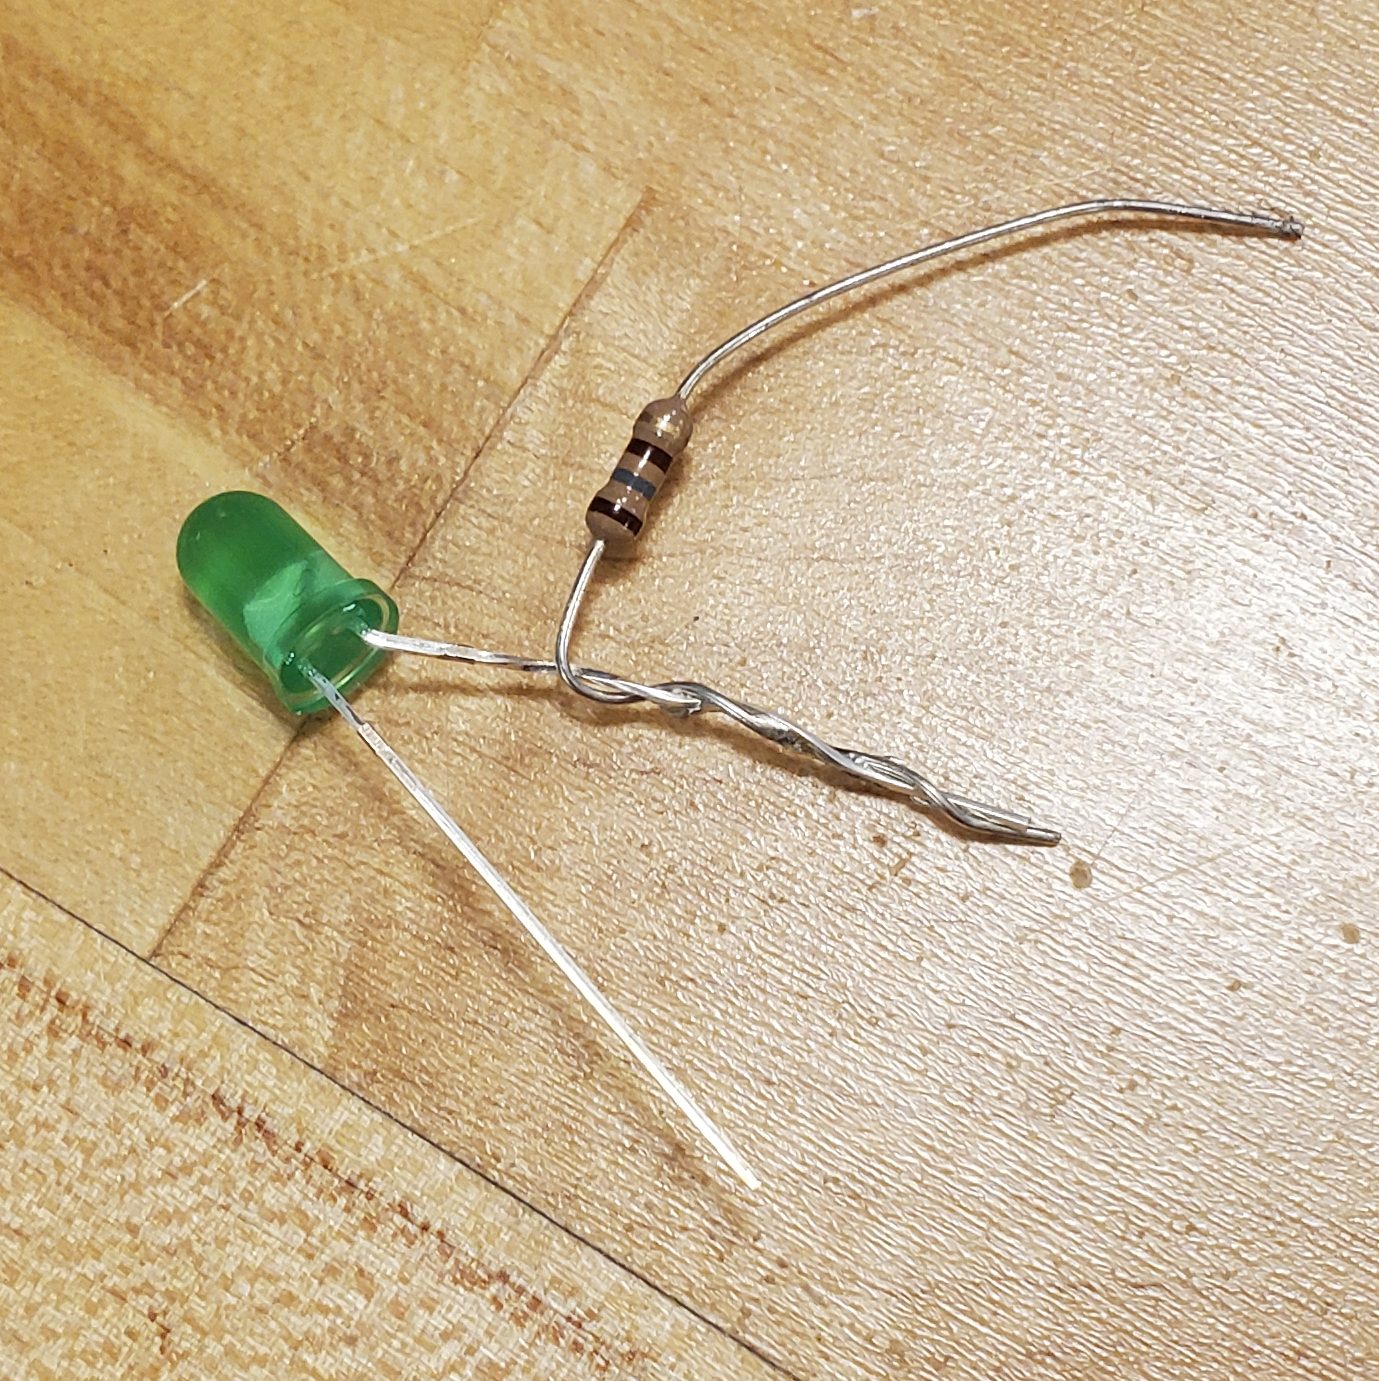
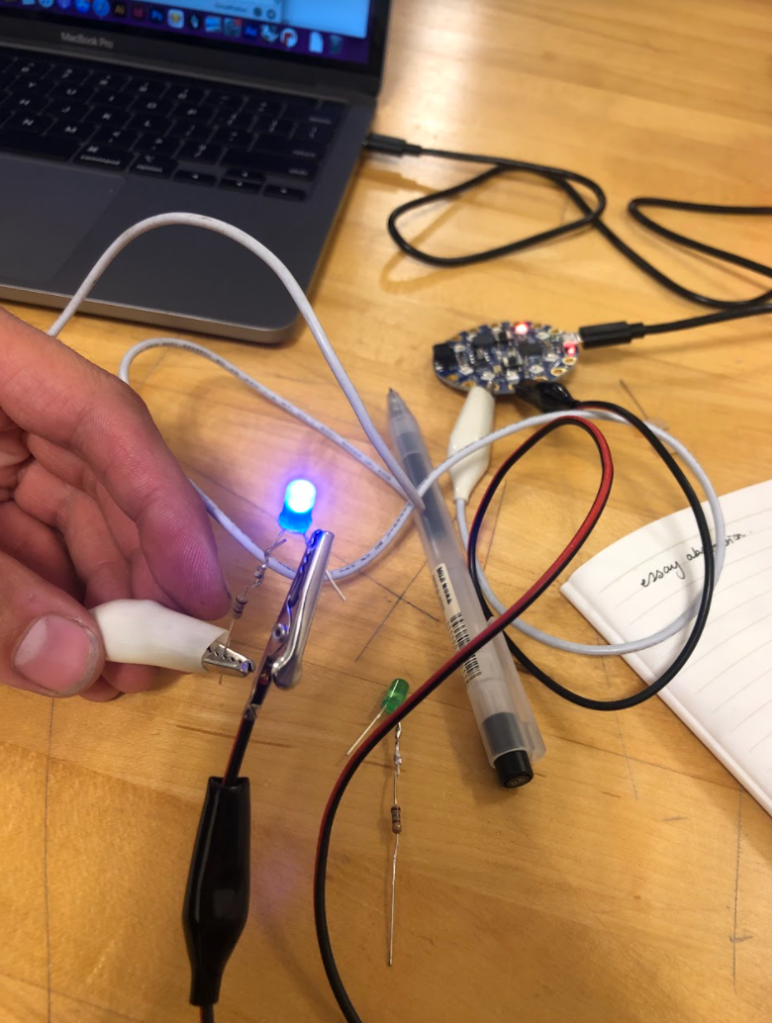
We started off by learning how to sauter by connecting an LED to a resistor. I’ve always wanted to learn how to sauter and was really interested to find out that the metals we are connecting should be heated rather than heating the lead directly.


Through a series of growingly complicated codes, we were able to experiment with controlling the Arduino’s LEDs through time, touch, and color. I found it really satisfying to be able to alter the code and understand how different components affect the commands.
I’m really interested in the connection between the Arduino and Grasshopper, as Grasshopper seems like a more simplified version of coding. I wonder if they can work together in some way or other.
]]>I found your research topic very captivating! There is certainly a lot to dwell on in terms of how human touch takes shape, especially while in the midst of a pandemic. I am curious how the simulation of touch shown in a digital format will read to your audience members.
Your research topic reminded me of a piece exhibited at the Hirshhorn quite some time ago.
https://hirshhorn.si.edu/exhibitions/rafael-lozano-hemmer-pulse/
The artist’s name is Rafael Lozano Hemmer, his exhibition was called Pulse. He had a series of installations where audience members were encouraged to touch a type of sensor and their heart rate would then be displayed in a physical manner. My favorite installation was where you placed your hands on two bars and your heart rate was seen by the flickering of lights on and off. These lights covered the entirety of the ceiling in this very large room. Given this was an exhibition, I do believe there is more of a theatrical element but I still saw some similarities with this piece and your interest.
best,
Kate
LikeLike
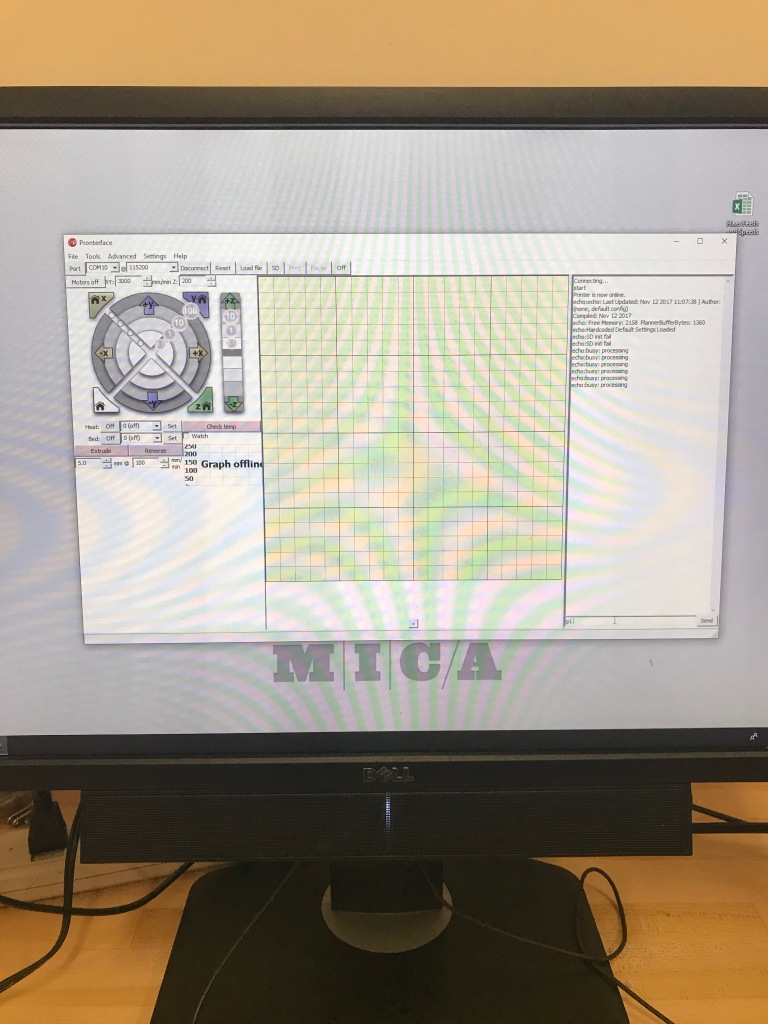
]]>This week I performed some initial tests and trials to see how my wood burning idea would manifest. I connected the printer to pronterface and sent move and temperature commands. I also played with grasshopper, looking at Hoover’s custom plugin to generate g-code from grasshopper curves, but was unsuccessful at creating the program I need.


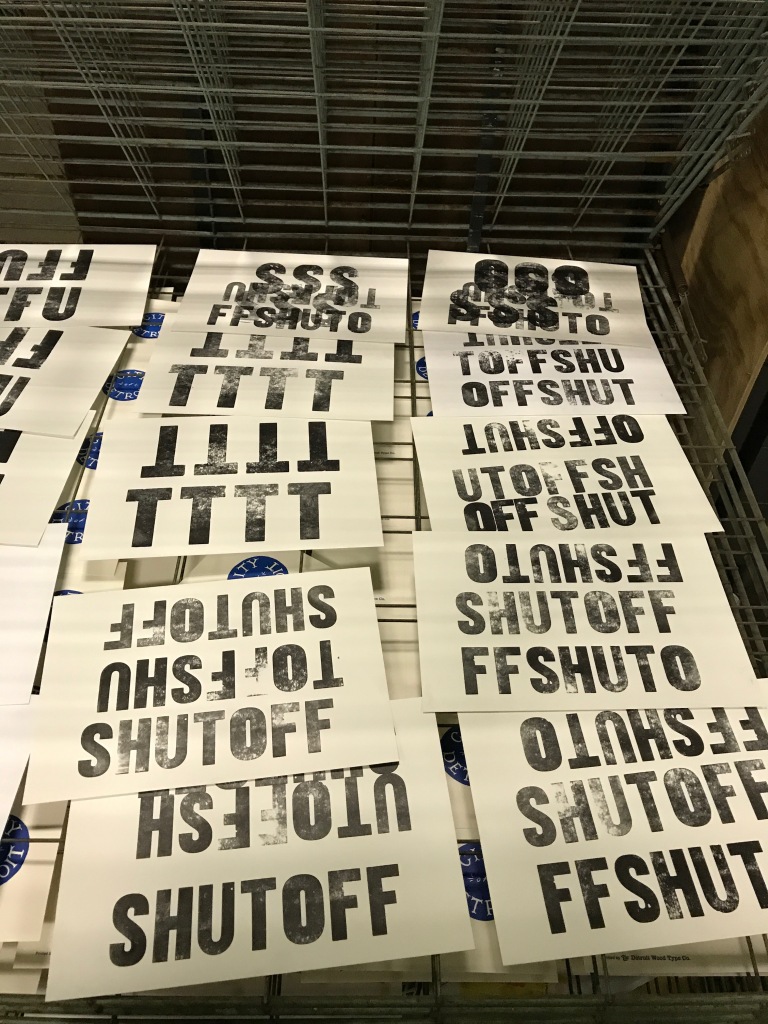
I was thinking about my work for a record cover that was seemingly simple: the word “SHUTOFF” repeated and filling up the entire cover. There are filters and effects out there at simulate wood grain/printed textures, even entire letterpress “fonts” that mimic the look. The problem with a lot of the digital solutions is the lack of variety; that same texture often appears every time that letter appears. And once you see it, you can’t unsee it. So for this record cover, I printed 20-30 specimens of the word, which were then digitized. Then, letter by letter, the final artwork was constructed digitally. In this way, each appearance of the letter was unique because each original print of the letter was unique. Then, to imbue a little more texture to it, the albums were then screen printed on uncoated paper. Sure, there is an easier way, but is something lost along the path?

So I guess the question becomes, well, what if the computer could simulate/generate unique textures? Could I input a given number of versions of the letter S, and then the computer could output even more, uniquely remixing/texturizing them each time? It would be pretty neat (though possibly resource intensive) if every time you typed the letter S, one was generated at random, based on our previous inputs. Plus, I enjoy seeing how a computer might mimic or map something handmade/printed. Will it be so good I can’t tell the difference? The implications are interesting.
There is a little bit of precedence in this lane: https://www.plymouthpress.info. However, they seem to be relying truly on scans here, so while alternate forms do appear, it is only possible if it was a form that they originally input, as opposed to one being generated, as I am proposing. Secondly, this font seems to rest a little bit on the variation, leading to what has sometimes been referred to as the “ransom note” style. While charming, it lacks utility, and quite frankly just isn’t my vibe.


]]>
thanks for sharing. i love this idea. it feels personal, accessible, and kind. i had a brief chance to work with some bioplastics this semester in another class, and it was really fun. i hope that you’ll have fun with it too.
best,
david 🙂
LikeLike
]]>
For my final project, I have continued to think about developing my own devices for my music setup. I still need to learn the right kind of soldering to put together my kits. I am hoping to make some time for that in the next week or two. Another branch of this research goes back to my time in my Intercultural Practices class last semester. During that class, we discussed the work of Ernesto Oroza. He is a designer originally from Cuba. He creates and maintains the Technological Disobedience Archive. This archive documents the hacking of items (appliances, vehicles, tools, computers, etc.) in Cuba. Due to the U.S. embargos (starting in 1960) and the collapse of the Soviet Union in 1991, Cuba has had a relatively limited supply of imports. In turn, it is fairly common for people living in Cuba to have to repair, alter, and create their own devices. I feel much more connected to this approach as opposed to creating my own items from scratch or newly bought materials. I think I feel this connection for a few reasons. One, I have been going to thrift stores and antique malls my whole life. Two, I never really learned the proper ways to fix or build things, so a lot of my repairs (from lamps to chairs) look very DIY. Lastly, this feels like a realistic approach to me. I feel like we have a lot of stuff. I think it is easier for me to repurpose this stuff instead of making my own.
Creating analog tape loops is a fairly common project for people interested in DIY electronic music. I have started scouring craigslist, and I am hoping to hit some thrift stores soon to try to find some tape recorders or reel to reels that I can alter.
]]>As the Earth-bound object that people hold to one’s ear, phones are by nature symbiotic. We expose ourselves to the phone by holding it up to our bodies. Exposed phones are sites of continual ambient data-gathering.
Unscrewing these phones reveals the plastic or metal frames of their skins, then the inside: silicon thinking agents created from precious metals and minerals.
These materials reveal a large chunk of the phone’s embodied geotrauma. The geographical origin and extraction method of the metals and minerals inside of the phone tell a story of violence and repossession.
A smartphone senses through its camera, its microphone, the accelerometer inside it, as well as touch and pressure on its screen. However, much of how the phone understands the world (and us) is completely opaque to us.
I wonder how we may use those same sensors to create interfaces that allow us to understand more about these alien creatures whose origins lie deep underground. How may we activate the geological and colonial histories embedded in the materiality of our phones? Is it possible to reverse engineer and remesh the mobile phone to create memorial places (places of memory)? In other words, sites for capturing and processing the range of geotrauma on the human body?
]]>I have been thinking a lot lately about Marantha Dawkins exploration of the real tactile world from a technological standpoint. The 3D to 2D.
I have been thinking deeply about how what we experience from a visual and auditory sense, can be translated to a tactile sensation, whileexploring the harmonious relationship between Grasshopper > Print > Textile. The way senses can come together, and be devoid of boundaries.
I have been thinking intently about how the world perceives the ‘other. How the world looks at sensory disabilities, and deems them as imperfect. Deems them as less fortunate. Deems them as the ‘inability to enjoy an experience holistically’.
What if we could merge these senses? What if the boundaries between the visual, the auditory, the tactile and the olfactory could in fact be merged into a singular experience.
So far, I have looked at technology from a critical lens, more so because of my in-depth work in the sector, lacing my thoughts of the same as something that cannot be put at par with human intelligence and capabilities, something that in fact ethically challenges what we know, accept and agree with today. Where are the boundaries? Where do we stop?
However, I am beginning to realise how technology in fact can serve to strengthen the divide, can in fact be used to explore realms that otherwise cannot be imagine in plain sight. It can in fact erase the boundaries that limit us.
Why must a visually impaired individual be challenged with creating art? Is the purpose of art limited to the visual? Why must hearing disabilities stop us from enjoying the frequencies at which music operates?
I’m looking forward to exploring these realms. Having witnessed my very own friend go through the experience of losing their site, watching them return to art, and to realise their expression with painting is now impossible, and watching them shift to music, to olfactory senses, I’m wondering what if there was a way to bring the two together?
I would like to explore the potential of arduino, as it comes in contact with a reactive service, and produces music as one paints on it. I am exploring the potential of music for the deaf, and how one might make that a tactile, or a visual experience.
]]>LikeLike
]]>
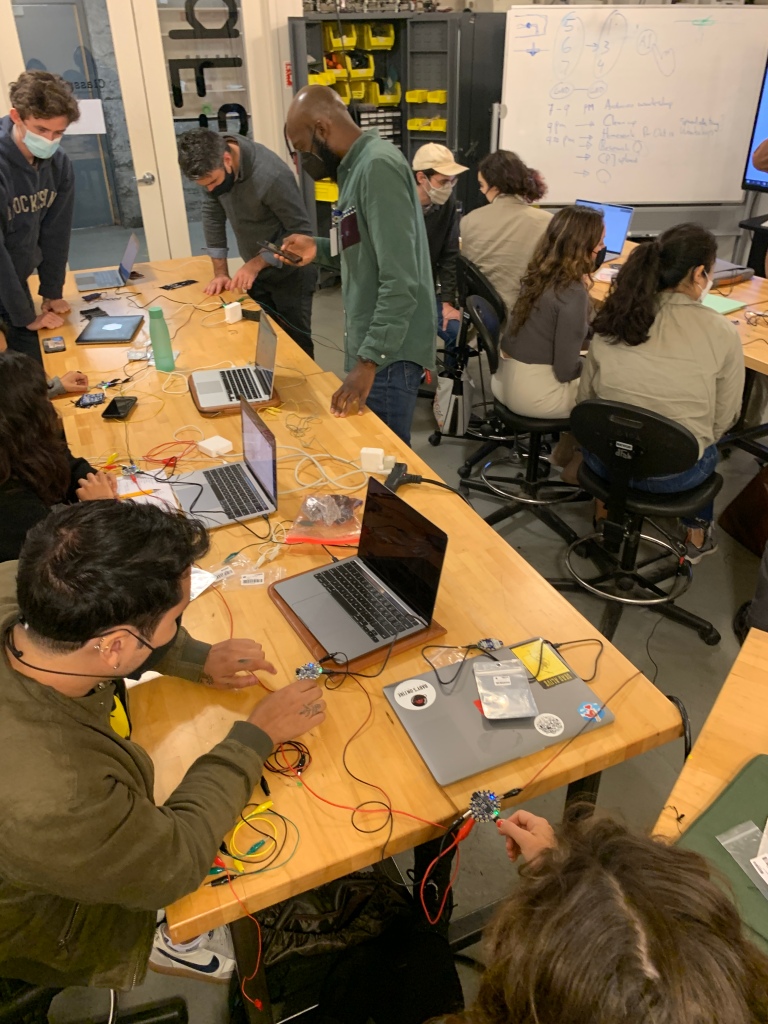
Alfie and I worked together, soldering an LED light to a transistor. It was really helpful to have an extra set of hands to hold the two pieces together while the other was soldering. Our microcontroller was the CircuitPlayground Express (CPE), and it was cool that it just hooked straight into our laptops via USB-C. Vic and Alan took us through some exercises, getting us to look at and analyze the code. They also allowed us to play with and edit the code, which I think was helpful for me in understanding what different parts did/corresponded to. It was definitely quite easy to break the code and get nothing to happen. Conversely, when something we tried actually worked, it was admittedly quite thrilling! Alfie and I were able to combine parts from two different codes to get the lights to blink on both the CPE and on our attached LEDs. We are pros now, right?


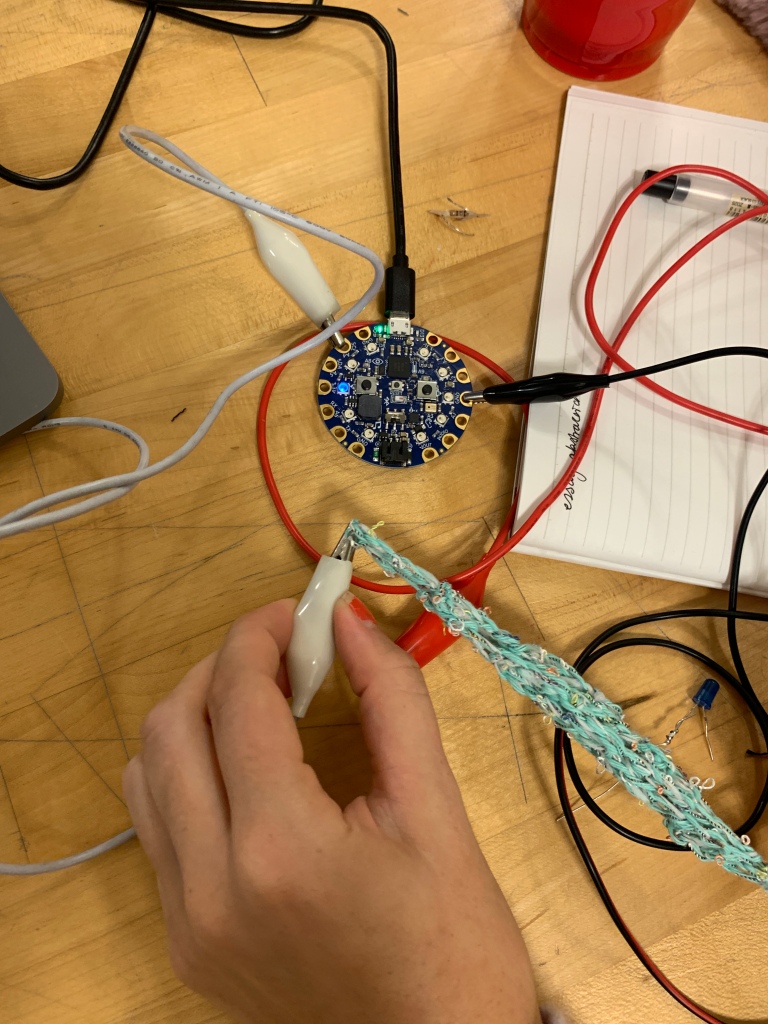
We also hooked up our conductive fabrics that we wove/crocheted last week. It was really satisfying to see the the LED bulbs light up when we stretched or pressed on them, though we had to sandwich our two woven ones together to see any output. At the end of the workshop, we daisy chained all of our CPEs together. Though it took a bit of troubleshooting, we eventually were able to see outputs (lights) when someone pressed elsewhere in the chain.

This workshop was more fun than I anticipated. I was a fan of the systematic and sensible approach to a lot of the coding and commands. That being said, I don’t think I will be taking up coding as a new hobby any time soon, and I am not sure if my research for the rest of the semester will involve any.

Sources So far:
Existing Products
Existing Tech > NASA Fire Shelter:
https://www.nasa.gov/feature/langley/nasa-works-with-us-forest-service-to-improve-fire-shelters
Biomimicry + Weaver Birds:
https://atmos.earth/desert-cold-commune-birds-weavers/
Wildfires + Air Pollution:
Overheating + Baltimore:
https://www.theguardian.com/environment/2021/jul/01/us-cities-heat-baltimore-suing-oil-gas
]]>“Entrainment is an important characteristic of interactions between brain rhythms and refers to the coupling of two independent oscillatory systems in such a way that their periods of oscillation become related by virtue of phase alignment (Cummins, 2009).”
And it makes me think how this could be converted into a tool that would portray the connection between two people in an obvious, visual way. Is there a path to literally visualizing our connections with other living beings?
*
]]>
*
]]>Project: instructables.com/Sound-Reactive-Earrings/


*
]]>
This week we did an Arduino workshop with Alan and Vic. Arduinos are micro controllers that record and store code. The Arduino talks through the code to activate things like sensors and circuits. This object truly has its own language.
To communicate with the Arduino we used Mu Editor with a circuit python extension (?eeeeek?) which is a dialect of python (???????). We investigated the different lexicons of python and reviewed terminology like ‘setup’ and ‘abstraction’ and ‘libraries’.
I think I was most fascinated by outputs such as the touch sensors. It was truly thrilling to code something that is then activated by the human body.

Next we tested our swatches of weaving and my crochet samples. Matt’s weaving was too tight to create a touch sensor (minimal resistance) and my was too loose (lots of resistance!) but when we layered them atop of each other they created the perfect touch sensor. My double crochet sample was too tightly woven to create a sensor but the market bag stitch was perfect as a stretch sensor. How cool.

]]>
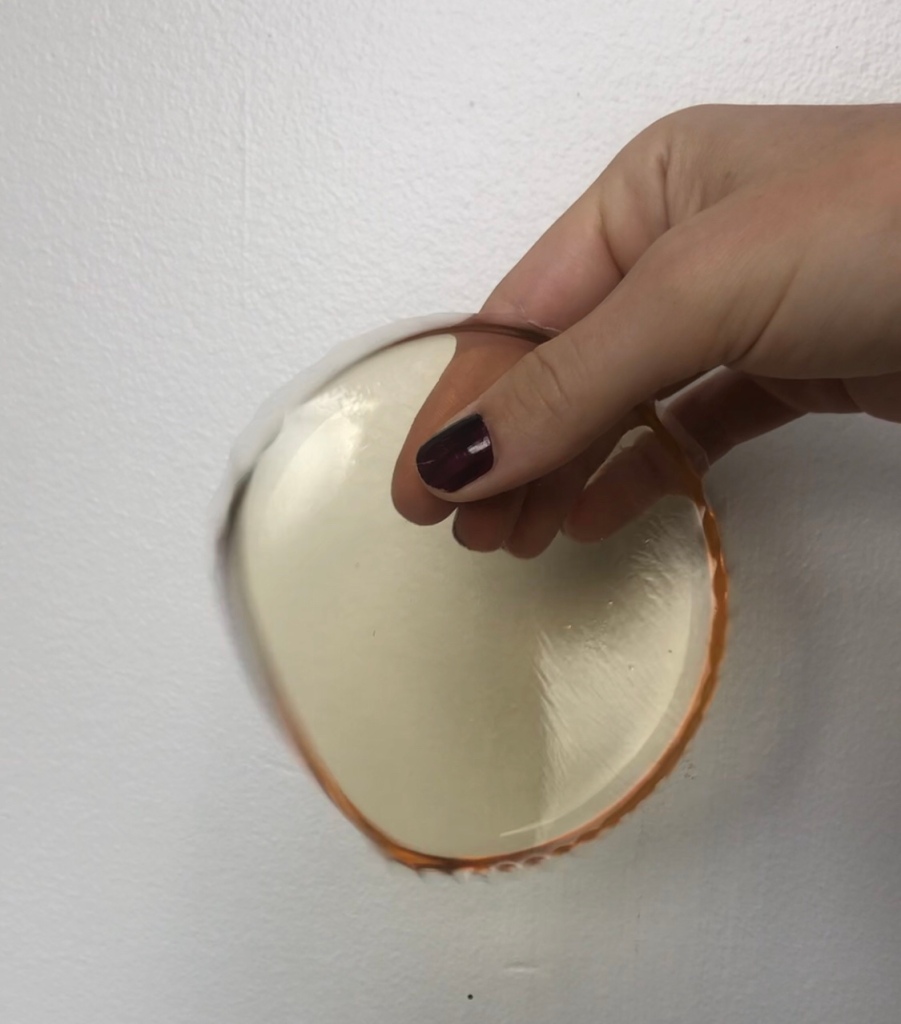
To explore this notion I want to investigate how we can make barriers of touch more human. I intend to look at bioplastic forms (ambitiously, a bioplastic glove perhaps) that have thermochromic properties. When they are handled they will leave a trace of human touch behind as they slowly return to their base color. Thermochromic pigments are activated by the human body temperature and so touch can be recorded with a time based action after the plastics are handled, in whatever form they take.
My initial investigation will be experimenting with different bioplastic recipes of which I have found various ones which yield to different degrees of flexibility and tackiness, depending on ingredients and ratios.
https://www.instructables.com/Bioplastic-With-Different-Stickiness/
Once I have settled on a recipes I will begin to integrate the thermochromic pigment into the ingredients and observe how effective the material is at temporarily recording touch.
I have recently come across bioplastic material investigations on Instructables that have laser-cut samples, which would be perfect should I pursue creating a bioplastic glove using a sewing pattern. I have not yet grasped the feasibility of this endeavour but I’m so keen to try!
]]>
This project digitizes the concept of “light painting,” so that rather than a human holding and moving light to create images/words in long-exposure images, LEDs programmed by an arduino are used. This creates much more precise and surreal light paintings.
The input in this case is a digital image, which I find really interesting to think about the concept of “physicalizing” a digital image in order to create a new digital image. The code is as follows:

While I did try to read this, I’m not familiar with code and had trouble understanding most of it. What I am generally getting is the code identifying the dimensions of the image input, breaking it down to pixels and allocating the pixels’ on the LEDs. I think overall this gives a lot of room for experimentation in photography.
https://learn.adafruit.com/pianoglove

This code, for a “piano glove,” seems really fun. The glove uses a color sensor to “see” whatever color it is placed on which then gets translated into an output sound. This way, you can use colors as notes.

To be honest, this code completely lost me. Despite the code including some comments explaining what would occur, I still wasn’t able to decipher it beyond seeing singular words I recognized. The previous example’s code seemed much simpler and totally set me up to expect a more legible code from this project! I would really like to get to a place where I can understand at least some of this, as I’ve always found the potential of coding incredibly interesting.
]]>The first site I visited had a basic version of this project, however I soon found an expanded version of the project that used the sensors to replicate the basic function of a theremin. Doing more research, I found another project which recreated the basic sensors a theremin uses pretty easily. While it does not replicate all of the features of a theremin, it could be combined with other projects to add features. This second project was incredibly helpful to understand that full concept of what i was looking into, as the creator inserted comments nearly everly line of code to explain the process of his writing and the function each line served. It was an incredibly thorough tutorial.
A Theremin is a digital electronic instrument that uses the players hands’ effects on electromagnetic fields emitted by the instrument to change the note, sound, and tone of the instrument. The instrument can detect changes in hand orientation, shape, velocity, and proximity, and uses these inputs to play the instrument without the player and instrument ever physically touching.
Interestingly, if the processing power of the Arduino board is sufficient, it could be possible to self-create a theremin given enough time and calibration, since the creation of an electromagnetic sensor similar to a theremin’s has been replicated as part of another Arduino theremin project. In practice, creating an electromagnetic proximity sensor using interference can be fairly easy, and it seems that Arduino may even be better suited for this, as it can tolerate super high impedance circuits, resulting in a more drastic sensor reading.
Sites:
https://create.arduino.cc/projecthub/lanmiLab/make-musical-instrument-using-arduino-and-flick-large-e2890b?ref=part&ref_id=8233&offset=2
https://maker.pro/arduino/projects/how-to-build-a-pitch-only-theremin-with-arduino
View fullsize


For interesting output, I found this automated beverage station. This is precisely what I expect to be able to create in class.

CENTERING IN ON THE THESIS OF MY RESEARCH
GATHER, RESEARCHING AND PRESENTING EVIDENCE, CASE STUDIES, ETC
]]>For this class we will be introduced to Arduino.
]]>Being a big plant lover, from having watched my mother nurture plants like the way she nurtured me (sometimes even more!), to having my own plant babies propagating at various times of the year to fill my space in eventually, I found this project to be extremely interested.
There have been many research projects that have looked into understanding the plant from an individualistic perspective. Questions like does a plant feel? does a plant see? does a plant emote? have given rise to many research projects that aim at extending the understanding of plants as species with much more to offer than homo sapiens themselves.
This project looks at creating sound waves and reaction for when a plant is touched. Catch a glimpse here:
Find the open source file for this on this link.
Previously, many experiments have been done to understand the atomic frequency of plants in relation to music, and how the two frequencies compliment each other.
Mother Earth’s Plantasia, an electronic album by Mort Garson created in 1976, was garnered towards productive, happy and healthy development of plants, running along the lines of research studies conducted in The Secret Life of Plants, a book by Peter Tompkins and Christopher Bird.

While coming across this project during my research, I began thinking about how nature and the machine have been always viewed as two worlds against each other, instead of two worlds that compliment each other. I am more of a cynic, I look at technology with rust tainted glasses. However, I am beginning to open myself to the world of possibilities with machines, finding ways in which we can actually aim at improving what is believed to be deteriorating through the immediate influx of machinery.
As I begin to think wider about plants, music, and machinery, I couldn’t help but also wander, how would the same application work with art, artists and painters? For the visually impaired? Can we create a live art studio wherein the visually impaired can enjoy an experience of live painting? Can we connect the components of a paint brush, perhaps create the brush using conductive wire, and have its interaction with a canvas or a surface, translate to music? A very nascent idea and experiment, but it definitely makes me think about motion, music, and interaction of different worlds coming together!
]]>

For this week’s homework I compared the gcode for two objects I have fabricated, a 3d Print on a PrusaMK3s, sliced in Prusa Slicer, and a 3d carving milled on the Fanuc CNC router with gCode from RhinoCam.
I noticed many similarities, like G1 for move commands, and the syntax of how comments are inserted. There were also differences like the g2 and g3 codes in the CNC file which control arc moves.
I found the prusaslicer code to be much more user friendly, as each action had a comment explaining the function of the following code, for example
;Wipe Start
Followed by the move commands, then
;Wipe end
This made understanding the code easy. On the CNC code there were no comments, but you could discern things like step down by looking for a change in the z height.
]]>Back in my college days, I witnessed my friend Aadhithya Kota, create a set of speakers using the concept of Ruben’s Tube.
The Ruben’s Tube is a physics experiment demonstrating a standing wave. It demonstrates the link between sound pressure and sound waves.
Ever since that day, I have always wondered about the application for the same, till I came across ‘Cymatics’.
Cymatics is a subset of modal vibrational phenomena. It is a study of wave phenomena that aims at visualising sound frequency using particle displacement. Since it is a relatively new phenomena, it has yet to come to a wider acceptance of application.
Cymatics has a strong influence to help the deaf and hard-of-hearing population get a sensory experience of sound. One such organisation that is aiming to explore these applications is : CymaSpace.
After coming across the open source software and hardware code for the same, I am beginning to again wonder, and willing to again explore, the applications of this, focusing towards turning one sensory experience, into another sensory experience, while keeping the input for both as the same source.
After Marantha Dawkins’ workshop that focused on the artistic trajectory of imagining one 3D space into 2D, and then recreating it into 3D, I’m drawing parallels to explore how the input of something intangible but also very experiential, like sound, could be converted into something tangible, something that provides a different layer to the experience, and address the quality of frequencies to the audience that were far so deprived of it so far.
Here’s the link to the open source file for this, I hope it helps spark ideas amongst my audience here.
]]>I was really drawn to this animatronic heart that “beats” using a circuit playground connected to a servo motor. I am interested in the space where mechanical machines recreate the motions of life, such as breathing/ beating/moving. How does seeing the motion recreated by a machine help us understand and move beyond the dead/alive dichotomy?
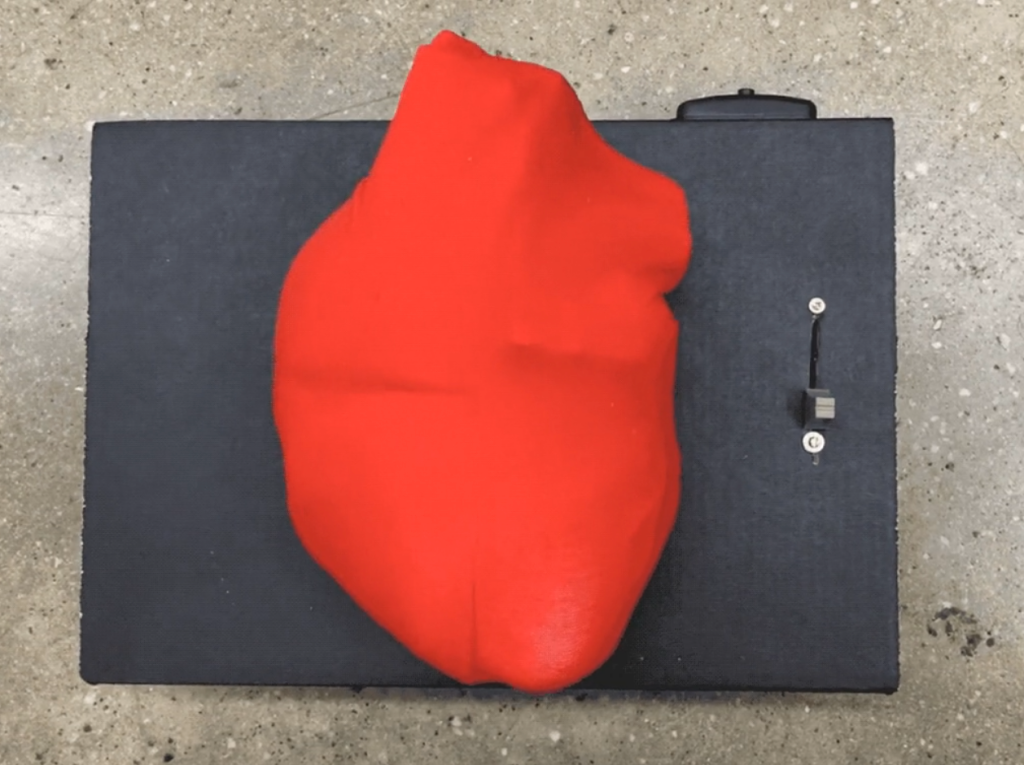
I am also interested in the way the circuit board can be used to translate senses that are normally hidden to us in our human embodiment. Particularly when it relates to plants, beings we interact with but have a lot of trouble understanding how they view the world. The soil moisture sensor project and lime piano project seemed like good starting points for creating cybernetic tools for cross-species empathy generation.
My art practice naturally recurs towards the book form, both critiquing it but also extending its possibilities. The circuit playground seems to offer quite a few possibilities for new cybernetic reading experiences. This e-ink weather display project makes me think of possible ambient or long-term reading projects.
]]>This utilizes a kind of input I have been wanting to utilize for a while: brianwaves.
The headset on the user senses the brainwaves through either user concentration or eye movement to control the truck. The creator suggests that this potentially may help people who are paralyzed.
On the other hand, I was intrigued about this input because I was curious if this could be used for cognitive training. If it could help people practice concentrating or calming down, maybe it will be helpful for people struggling with Post Traumatic Stress Disorder or anxiety.
Using the accelerometer on the Circuit Playground, this controls the slopes of the maze.
It's a simple 1:1 reflection of the corresponding axes location, but I like how the setting of the small marble can shift and change according to our input.
For me, it felt like this project successfully amplified the output. I'm curious if something like this can be applied for a larger scale setting.
Brief experience with robotics; I wouldn't say I'm comfortable with it, but I do find the new avenue of robotics exciting. Previously I have used small motors and the HC-SR04 Ultrasonic Distance Sensor to make a 3D printed sculpture move.
The sensor detects approaching motion, and according to the motion it detects, the wires attached to two motors would control the movement of the 3D printed ribcage. However, the robotic movement didn't really move as planned, and rather than a continuous movement that allowed clear opening and closing of the ribcage, it displayed quite a different result. The unexpected movements and sounds of the motors allowed it to have a mind of its own, which was not at all expected.

The idea of the "useless box" may be similar to my idea.
It may feel unfinished, but I liked it. (I just have an inclination to adore stupid robots)

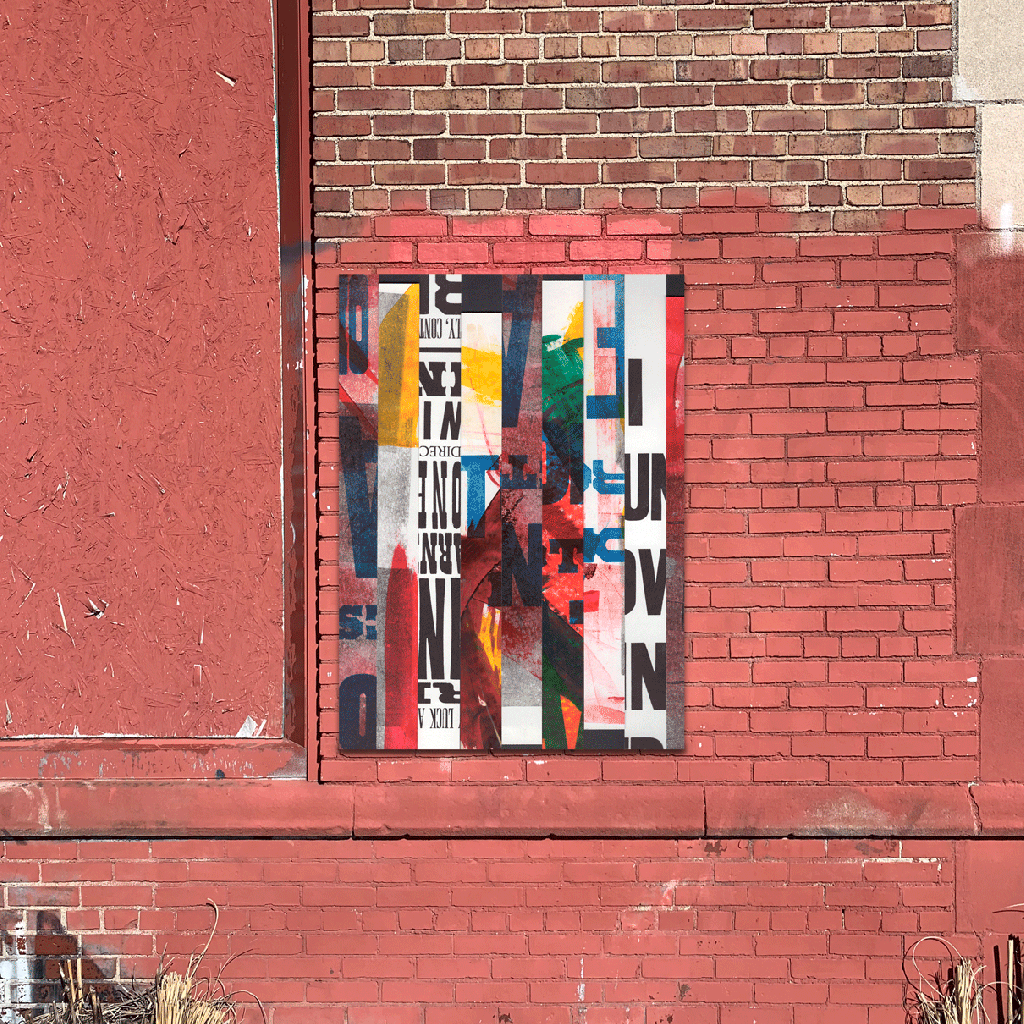
I wonder what a computer would do with these images? It aligns with my interests of archiving/cataloging/documentation.
In a similar vein, last year I printed and scanned some wood type that I had purchased. With printing, even though the idea is that you’re able to make multiple hundreds of copies that all look the same, it has been my experience that “every copy is an original.” What that means, to me, is that there is some inherently unique aspect to every print that I do. For example, if I print the same letter A, from the same wooden block, 100 times, every one of those 100 prints would be slightly different: like a snowflake, in a way.
At any rate, I have a LOT of scanned prints of characters. So, I have a 2D representation of a 3D block. What does software think the 2D print looks like if it were made 3D again? I began to explore this a bit last spring, and it yielded…weird results? But it might bear some more looking into, especially with access to people and tech that I didn’t know about last spring.


Lastly, an idea still somewhat ethereal. As I am in my thesis year a Graphic Design MFA, I am obviously thinking if there is any aspect of my thesis that may benefit from some deeper dives on topics we have covered in this class. So far, all I really know about what I am doing is that it will involve printing of some sort…and that I am sewing aprons by hand? After never having sewn before?
Yes, there is definitely an application for some of the conductive materials we have been experimenting with the last couple weeks, though I struggle with making things conductive just to make them conductive. That is, what purpose would a conductive sensor serve in an apron? These are objects that (to me) represent home, making/manufacturing, even domesticity, as outdated as that term feels. I worry that putting a sensor on it would feel untrue to myself/trying to shoehorn two projects together that maybe don’t need to be shoehorned together?

There were some parts of the code that I think I could decipher. Some of the simple things like “load font” seem to be pretty straightforward, as are the ‘imageload’ commands. It seems to me that once you set your TVOC levels to be your freshness thresholds, the then it is this bit of code that decides what cow to display/if your milk is fresh or not.
While the output here is simple, I think it’s pretty great, as we all need to remember to put on sunscreen more often:
https://learn.adafruit.com/sunscreen-reminder-hat/overview
And it is smart to be wearing a hat in addition to wearing sunscreen, so this is a simple solution. A chime is played to remind you to refresh your SPF. It seems that this code would be responsible for playing the chime:
”if (sinceTime > reapplyInterval) { //check to see if we’ve exceeded the time limitshouldChime = true; resetTimer; “
Here, I imagine you would be able to set the interval to whatever your desired reminder time would be. It also seems like you are able to define what chime you want, which is useful, since you’ll likely be hearing it pretty often.
]]>LikeLike
]]>LikeLike
]]>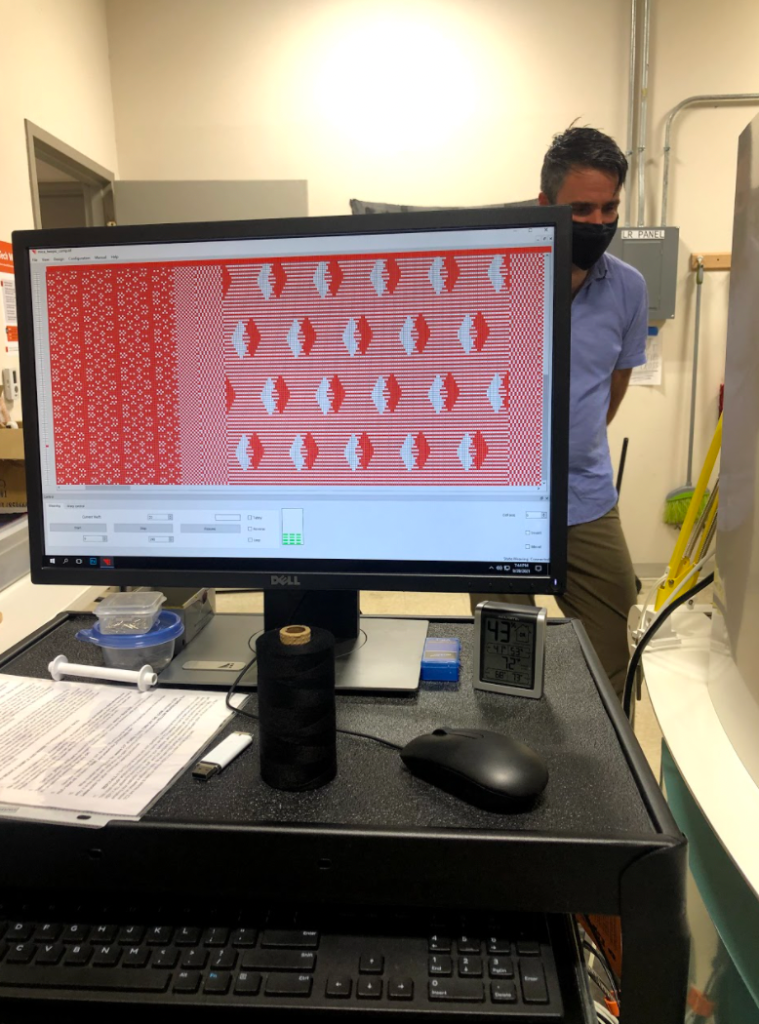
We wove one regular one-ply(?) weave and a conductive tw0-pic weave using the mirror function in AdaCAD. I was really in love with my conductive weave draft but its result was a long open weft weave that is very loose. I did enjoy the physical process of throwing the shuttle through the warps though. It is extremely satisfying when you get a good throw right through to the other side! Made me feel like a pro for one hot second.


After our weaves were complete, we played with some other conductive threads and methods of textiles to create some stretch sensors. I crocheted two swatches; one double crocheted and one using an open market bag stitch that I don’t know the name of. When we tested the conductivity of the fabric, it had less resistance when stretched therefore, voila we made a stretch sensor as Laura had referred to. My reading went from 4.5 to just 0.75 when both swatched were pulled taught!
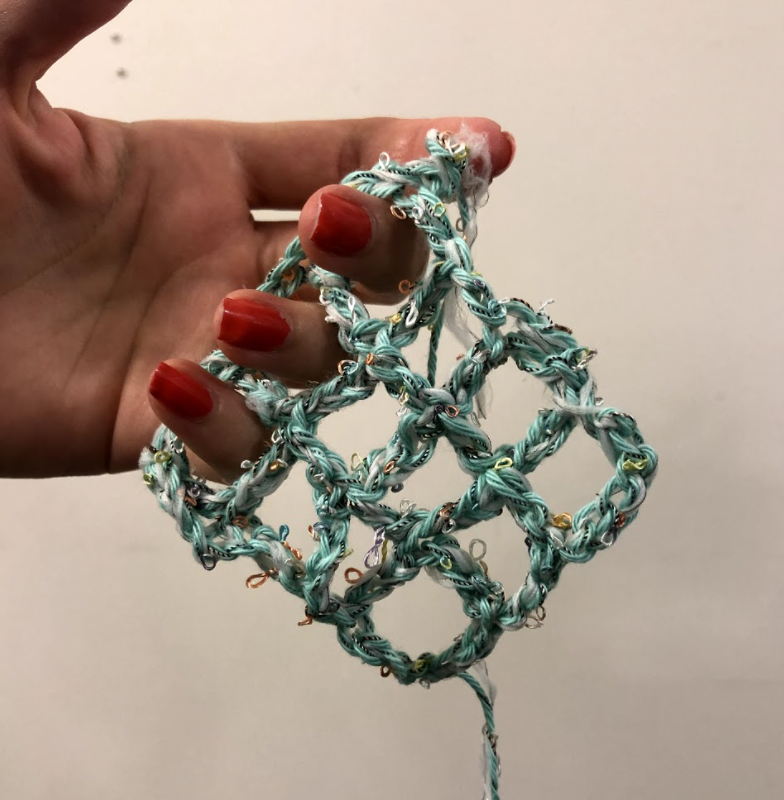
We concluded the evening with a discussion with Laura about her phenomenal software, offering her feedback about areas we thought could be improved upon.
Lastly this week I also had the opportunity to go and see Annet’s show at UMBC and had my mind absolutely blown. I have so much respect for the weaving process on a tc2 and was gobsmacked at the weavings featured in her show. Just unbelievable. I highly recommend for anyone who’s considering the journey out there.

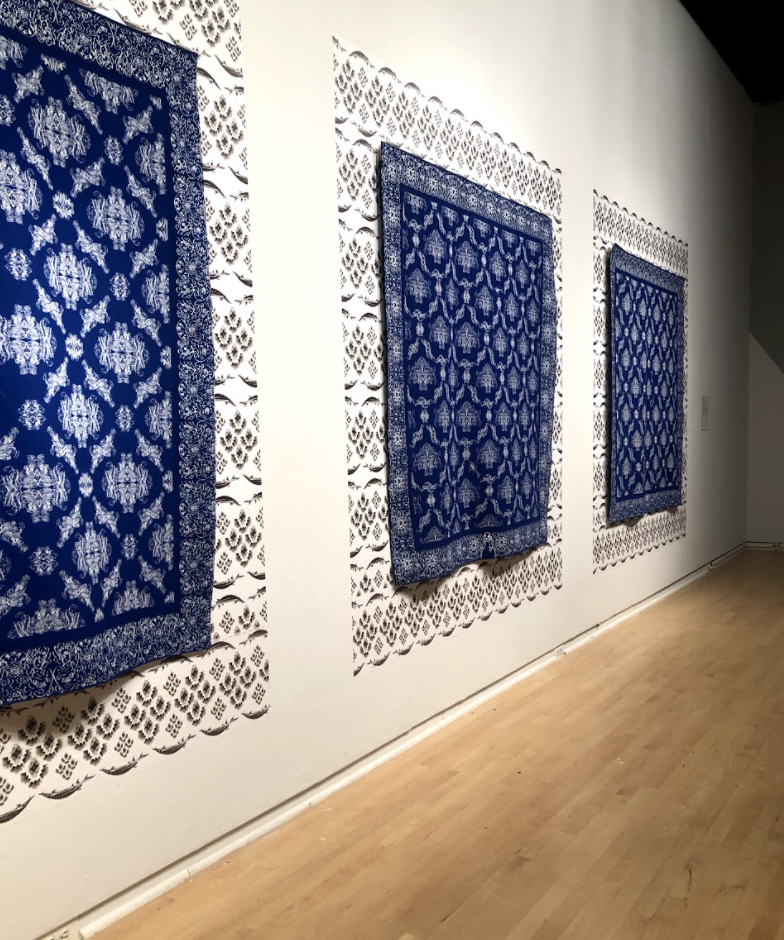

LikeLike
]]>

Using the TC2 with Laura Devendorf, we weaved our designs created by AdaCAD.
The initial TC2 single designs had two colors of alternating thread going through. For the two pic designs, we weaved through a conductive thread that doesn't alternate, but goes through the TC2 loom all the time.


I didn't fully comprehend what two pic designs were supposed to be, or what defined two pic designs. Once I thought that I got the hang of it, I wanted to make a lion pattern design that I saw on paper, and wanted to see if I could patternize that. I got the bitmap design down, and then later I interlaced them using AdaCAD.
For some reason the design was elongated when interlaced, which resulted a serpentine design.(or, a pretzel shape)

If I knew that there would be so much floating lines in the weave, I would have made a design with less amount of empty space. The initial two pic design that didn't really differ from the example file probably would have had more stability with the conductive thread.
When pressed, the resistive sensor's resistance value almost looks like it's decreasing exponentially.
On the other hand, the sensor showed more of a linear decrease of resistance when it was stretched.
Think folding the fabric can be applied for switches that require higher threshold. (maybe turning on / off the light switch? can't think of a more clever way of utilizing this at the moment.)
Stretching the fabric can act as an alternative to a potentiometer, maybe like a dimmer switch.


The Story

In the dark days of yesteryear , the Graphtec plotter only printed with one pen, a thin, black, felt tip marker. The drawings were colorless, and only consisted of an single, narrow line weight.

Then came the hero, the one called Simon, who modeled and 3d printed a new collet, allowing a new type of pen to grace the plotter’s paper.


Simon’s Collet accepted pens of many colors, creating beautiful landscapes and drawings full of color and life.

But alas, I was not satisfied, I wanted more. I wanted gel pens and oil markers, sharpies and metallics, I could not be satisfied with just more colors!
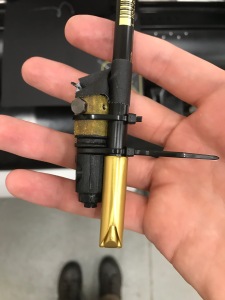
So I got to work, prototyping a new design that could hold a pen or marker of any size. The plotter’s attachment points limit the size of the tip if the pen, but I did not let that stop me. Instead I offset the pen, attaching it to Simon’s Collet as a side car. The prototype was hacked together with tape and 2 zip ties, but it worked!

Hurray it worked! I drew a circle, and so I knew I could make this happen. I rushed to find the rhino files and model a new attachment, to hold another pen alongside Simon’s Collet.
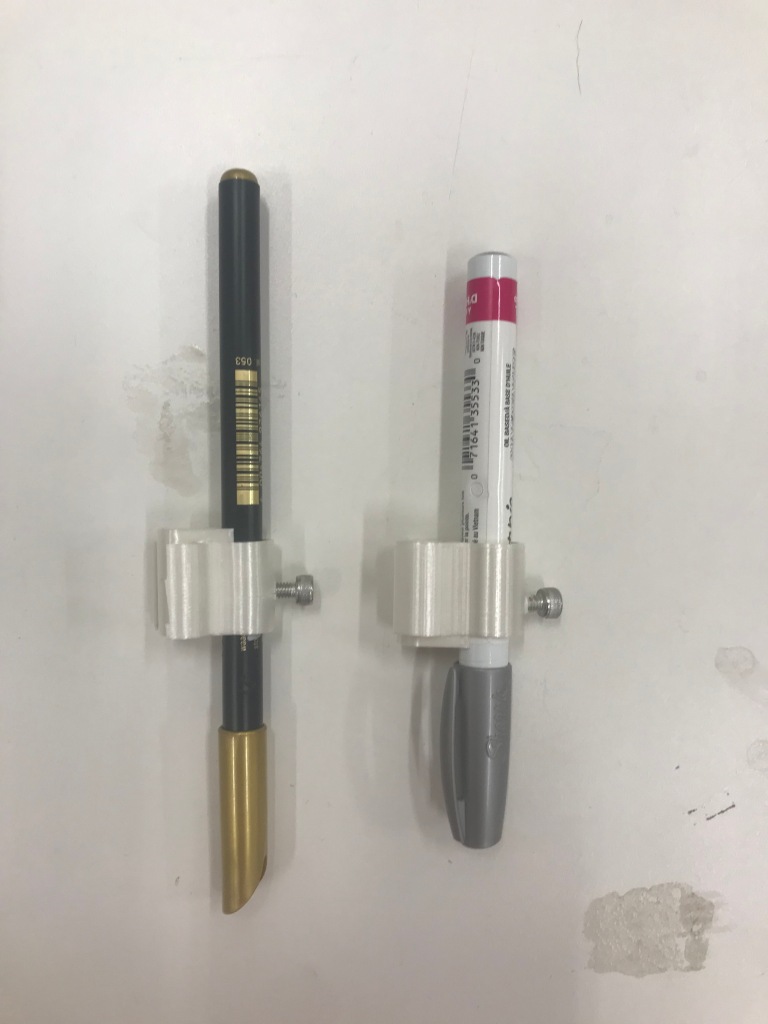
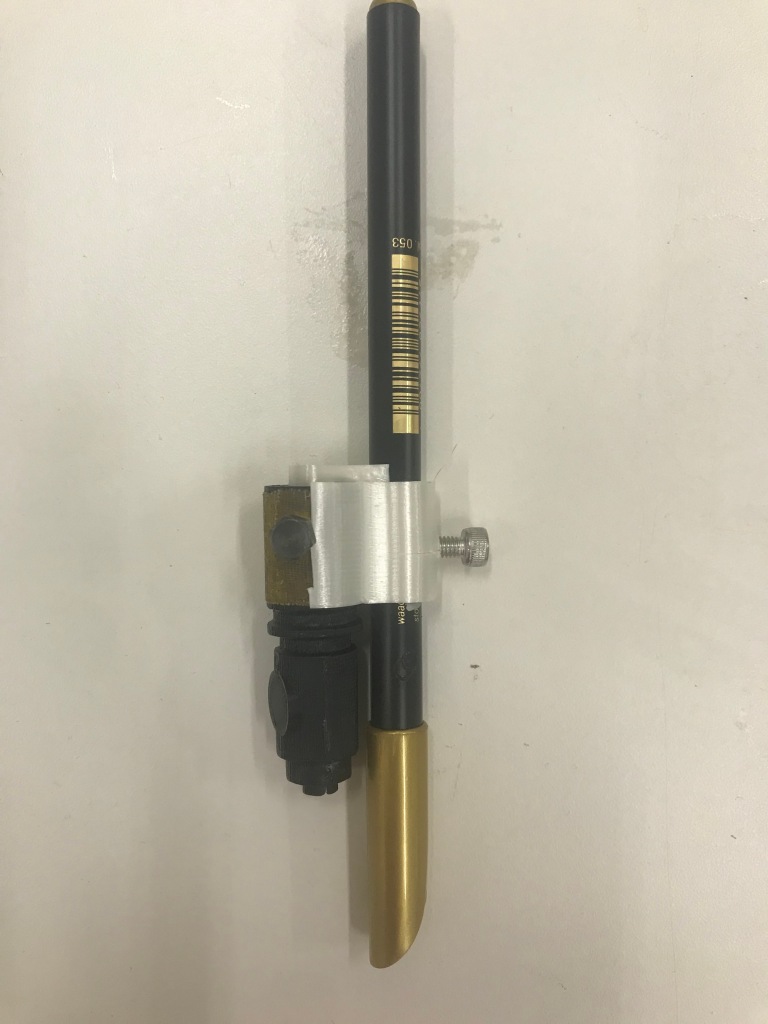

Within the hour I had a shiny new print, capable of holding my metallic markers.


And Did it work? Yes Sir, it worked beautifully. I need to perform further testing, but the initial results are promising. Good Day.
]]>For our last class, we looked at operating the TC2 loom in order to generate weave structures we created in AdaCAD. For this purpose we created two kinds –


For the first structure, I wanted to play with geometry. In various iterations I first played around with optical illusions. The right most image in the second row shows the optical illusions of black and white waves coming together. I wanted to explore how this visual experience would translate from an intangible world to the touch and feel development of it. As I went ahead with these explorations, I experimented with the Fibonacci Sequence, however, it did not translate the way I would have liked for it too. (Here, I was wishing for the software to reduce the threshold of the image, or increase the details for the same). I then explored the realms of geometry, celtic patterns, or patterns that do not have a beginning or an end, and primarily – patterns that challenge the norms of figure and ground as found in concepts of Gestalt’s Theory of Visual Perception. My final results were seen as follows. I tried to play with how the weft and the warp would appear if I interchanged the arrangements of the figure and ground.

The final result, once plugged in to the TC2 Loom and woven on it, looked something like I had never imagined! Due to some technical difficulties, we all experienced a warped experience to our created structures. However, the final result was nonetheless really interesting to study for the interplay of the material, and how fluid or rigid the textile can be depending on the pattern chosen.
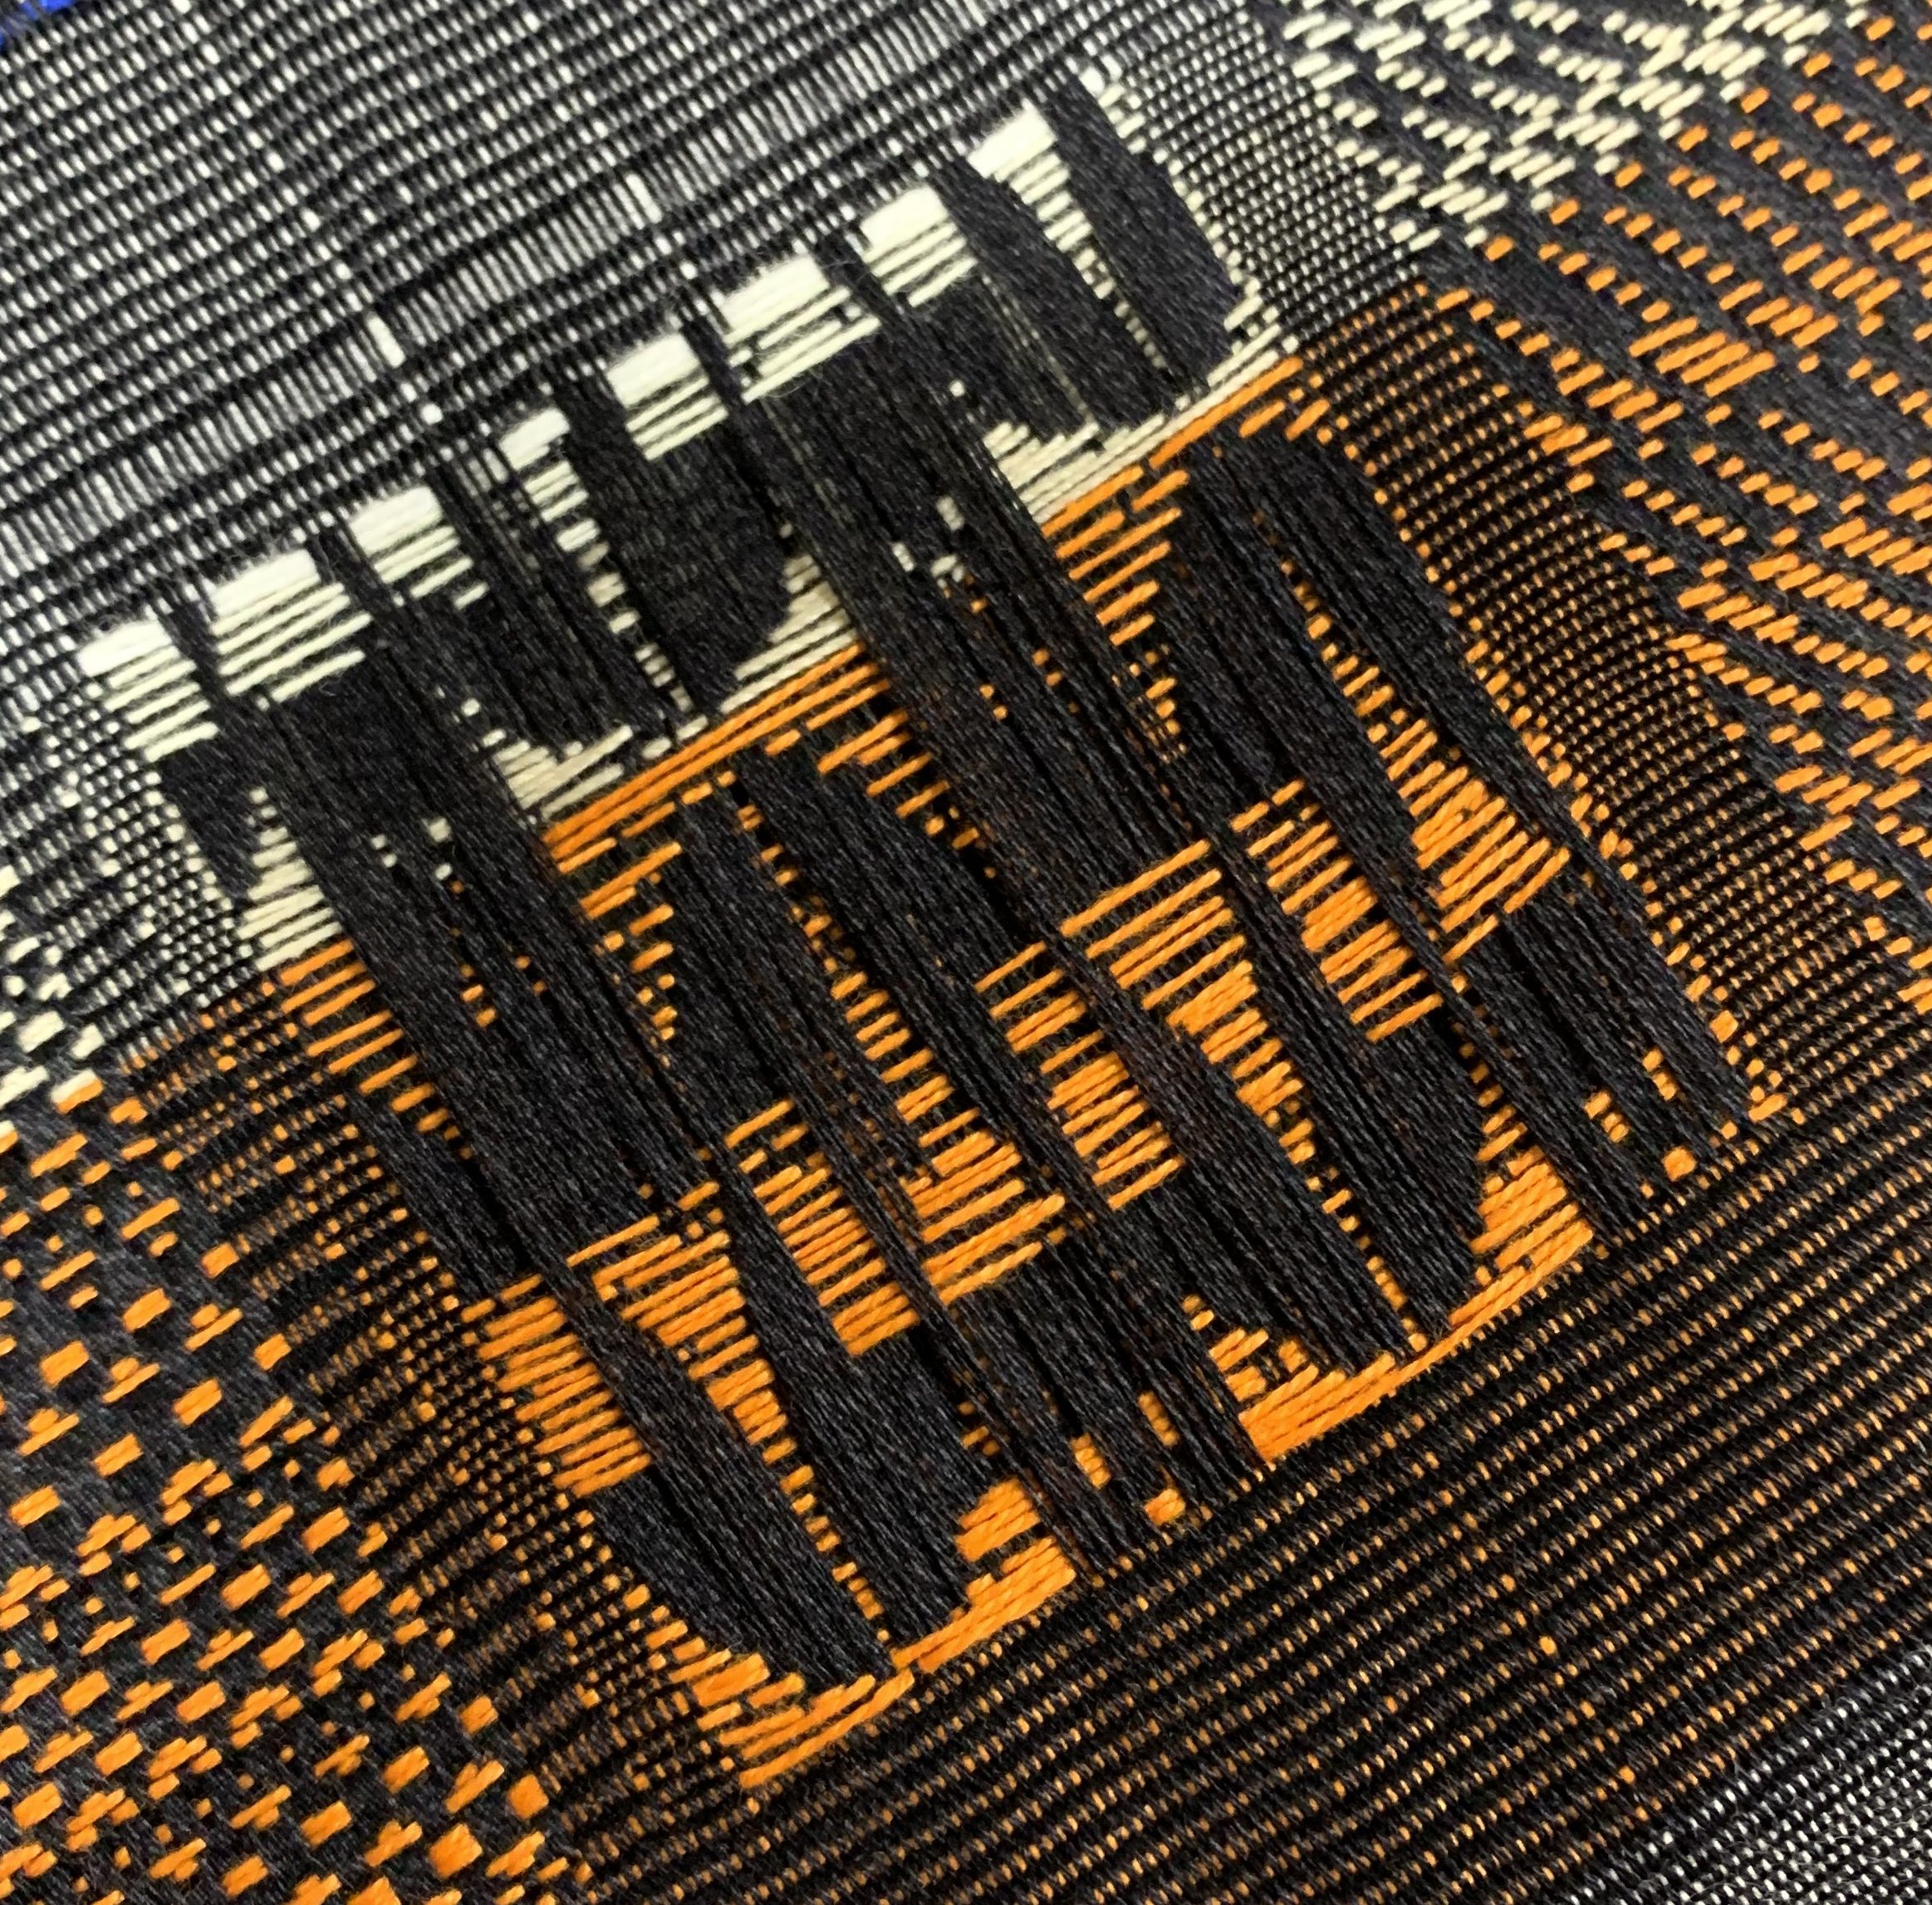

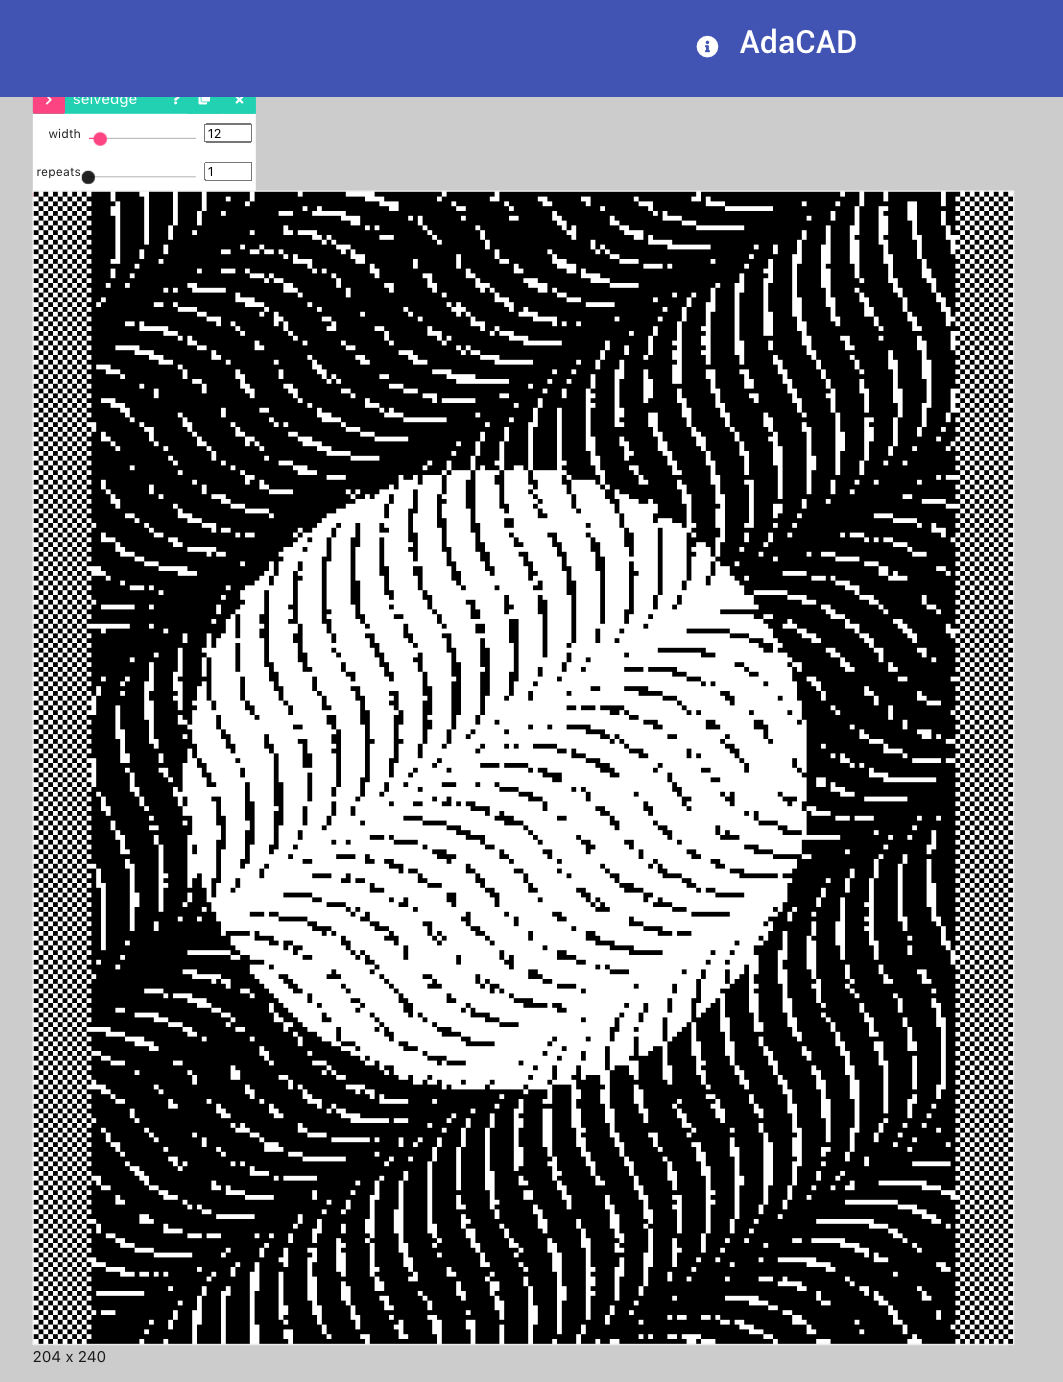
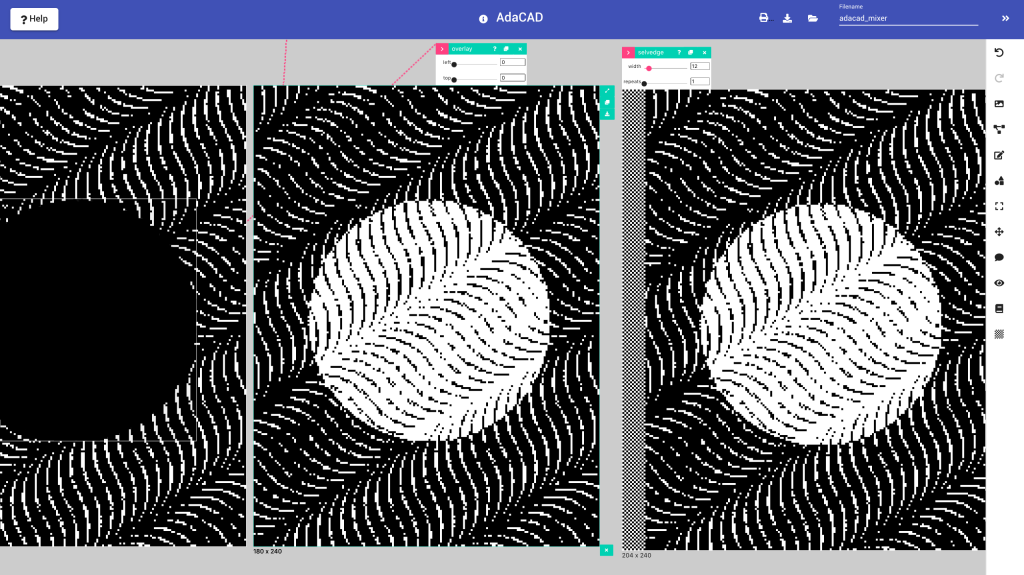
The two layer, or twopic structure on AdaCAD was created using two unique artboards that are ‘overlaid’ using the operations tool on the software. My concept was to use the optical illusion I previously chose to work with, and layer it with another layer of complexity, creating a very clear visual difference to see how the threads react with each other. I wanted to create a break in this visual pattern, and have the warp and the weft play with each other. However, the most exciting part that I wanted to work with in this pattern was being able to actually mirror/flip the pattern which is enclosed within the circle. However, the software did not offer that flexibility just as yet, but that would have been an interesting behaviour to observe – would the movement of the cloth have differed from within the circle, to whats outside? Could these movements then be used to create malleable structures? This keeps me yearning for more!
As for the final result – it was completely not what I expected. The pattern did not come together, however, I could see the wave emerge together. However, I enjoyed the play of colors that took place once the pattern was turned over, and that entailed my vision for the circle in the centre that would have contrasted the background had it been completed.

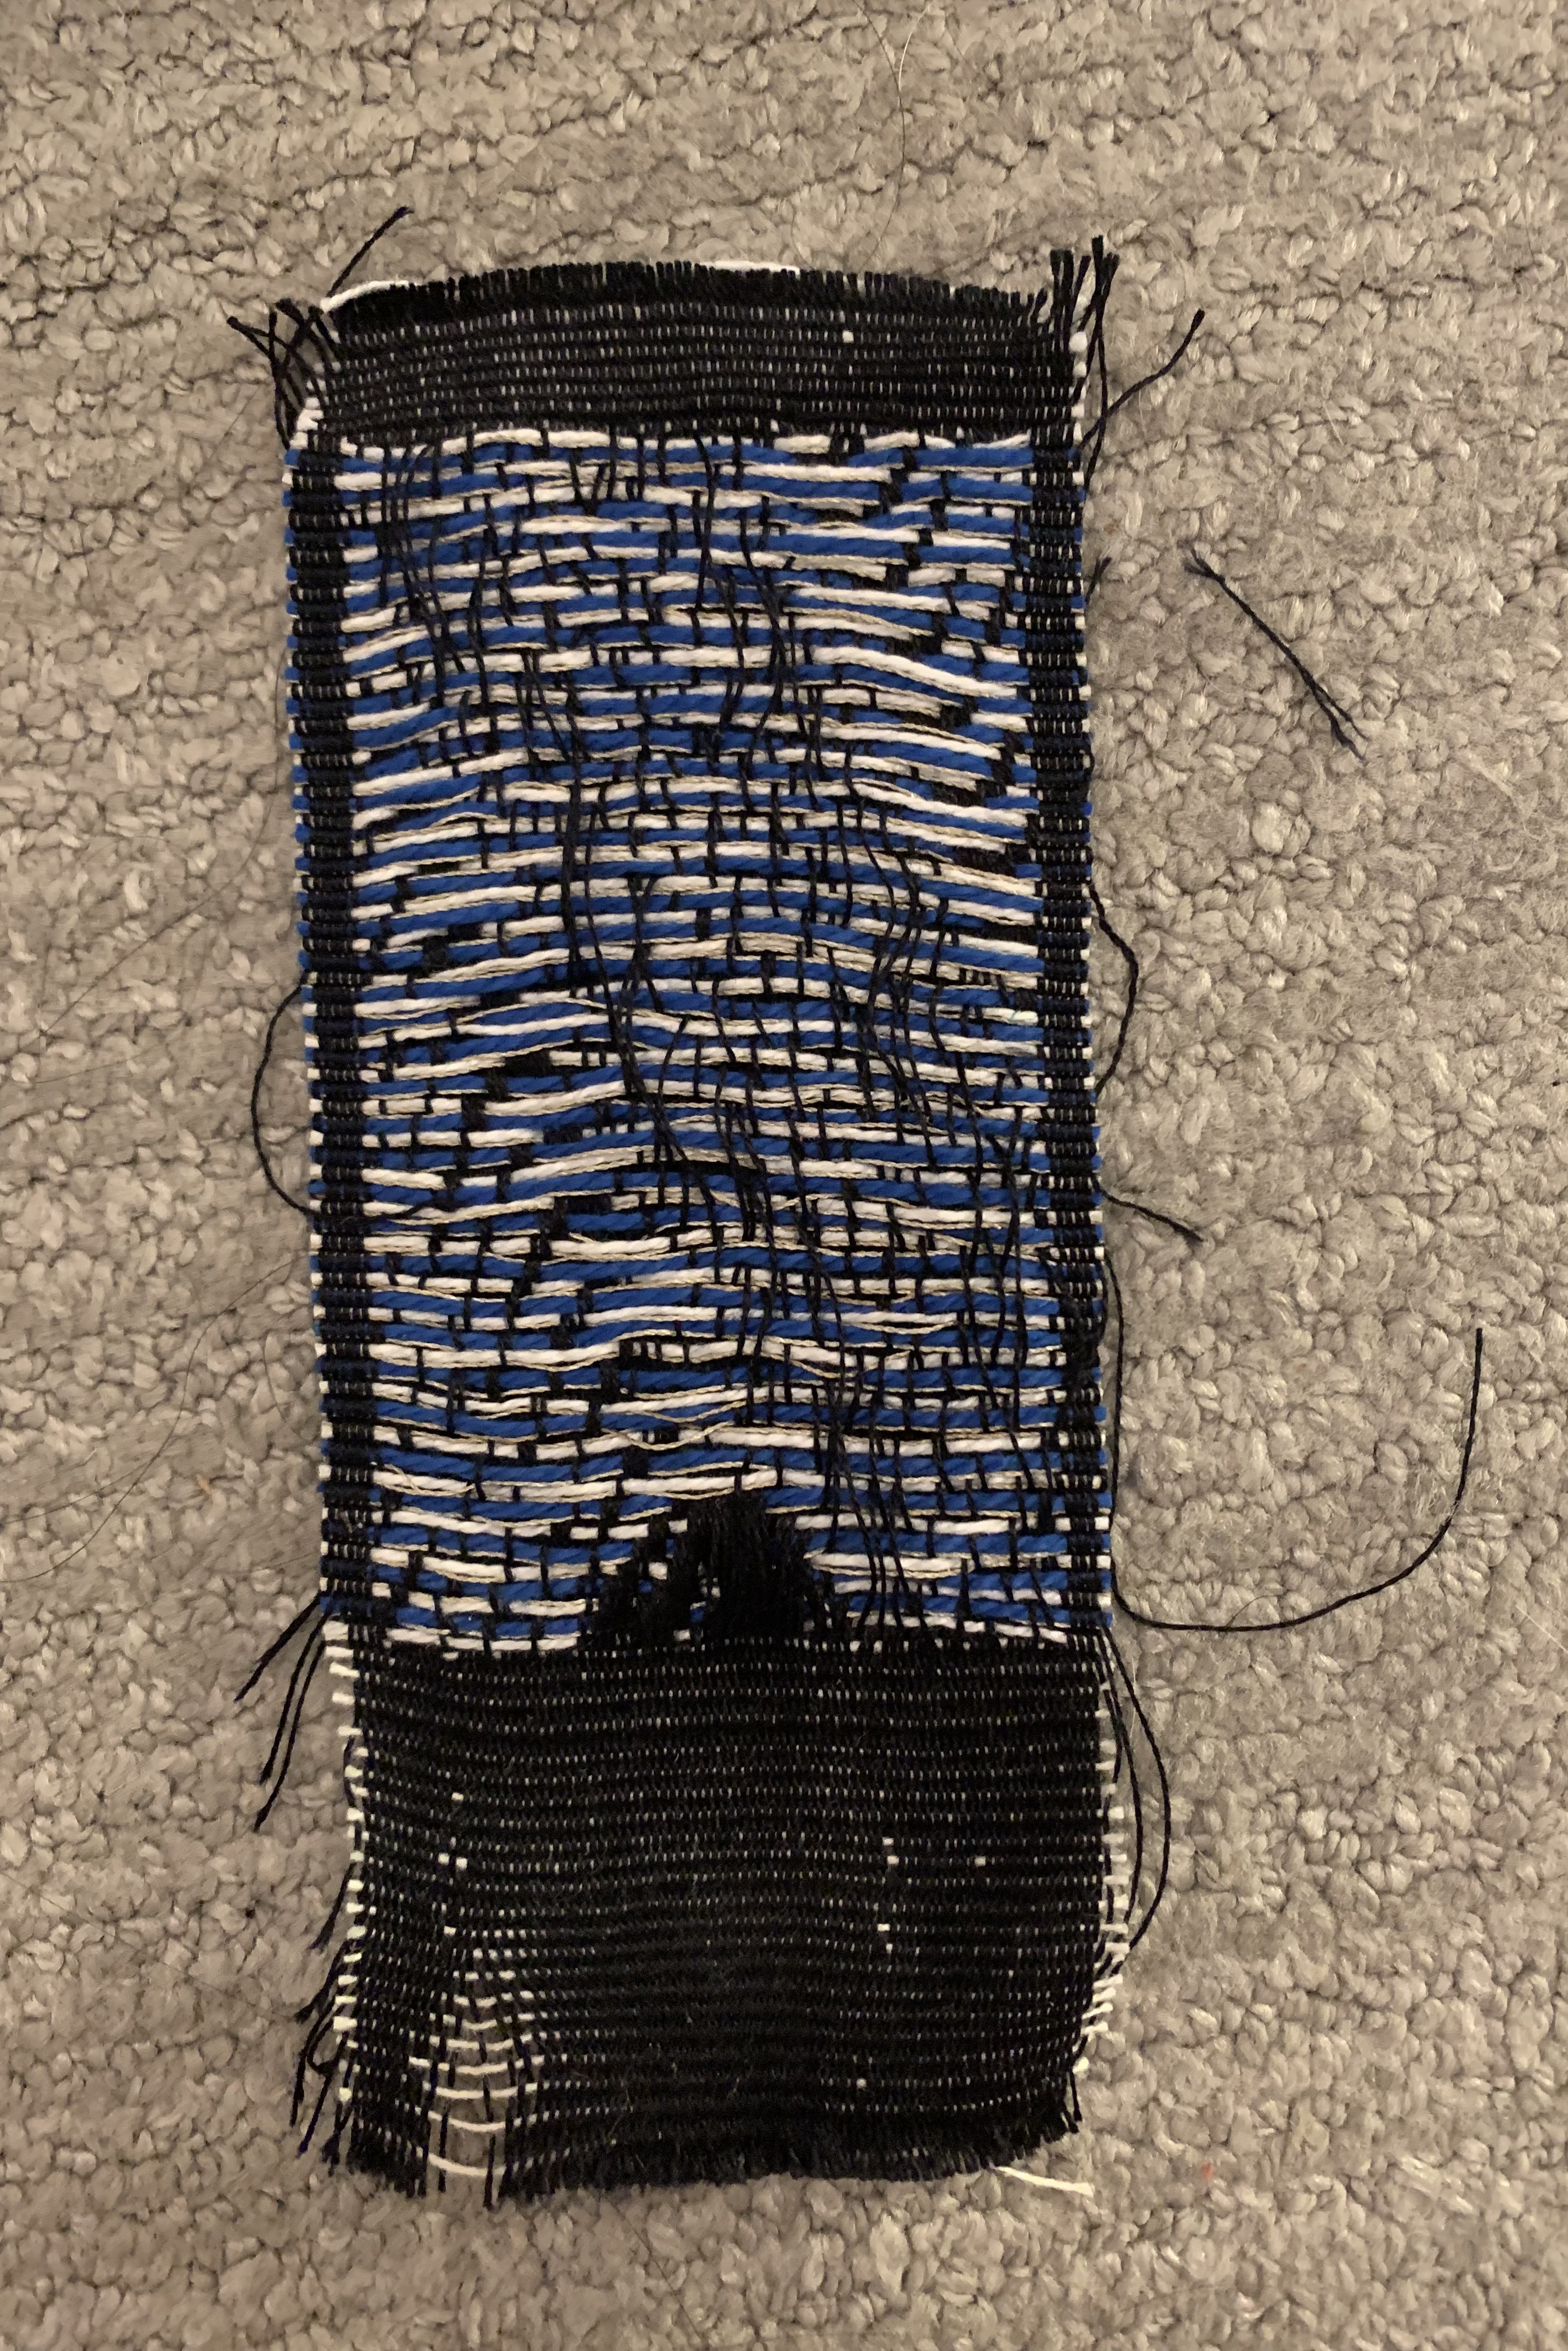
The two-pic structure contains conductive fibre which will lead us to be able to work with the idea of smart textiles, textiles that behave in unison with its environment, but at the same time, acts a layer of complexity to its relationship.
In the upcoming class, we’re going to plug the twopic structure to understand its behaviour with Arduino.
I definitely am looking forward to exploring the potential of Smart Textiles for my explorations to come forward. So far my interests in textiles have been pivotal to my love for crafts, and also limited to its singular application – clothing, adornment, and expression of identity. I am looking forward to dwelling deeper into this new layer to textiles in my understanding of them!
]]>
Finally getting to use the TC-2, we began to weave the two designs we created last week using ADACAD. The whole class’s designs were placed side by side on the file given to the TC-2, allowing us to weave them all at once.


It was really interesting to work through this process. The weaving was much more tricky than I expecting, the shuttle kept getting stuck mid-way through, it definitely took some practice to get the hang of how hard to push it across. It also took much longer than I was expecting, but was really worth it after seeing the final product.

After we were done weaving, we cut the designs apart. The weaving on the left was woven with conductive thread and therefore needed its sides sewn with more conductive thread to re-connect the severed lines for a complete circuit.
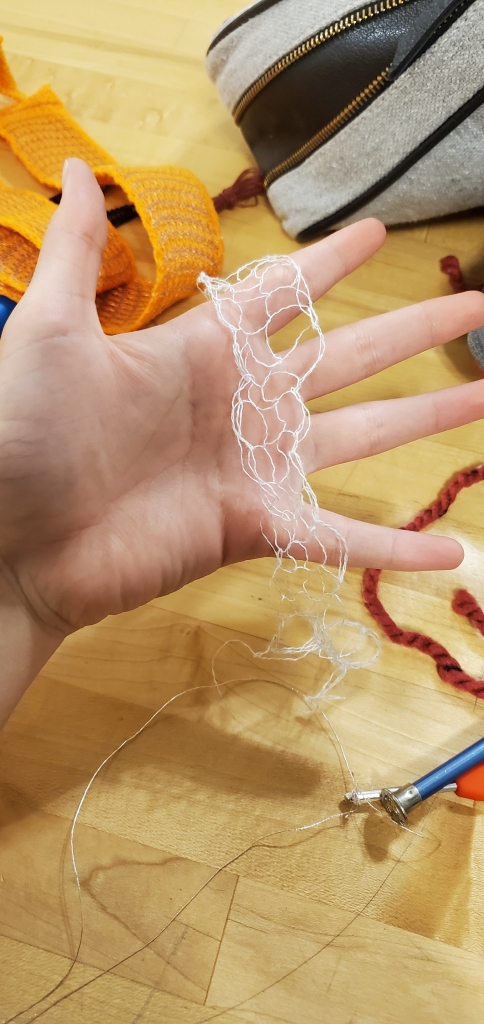
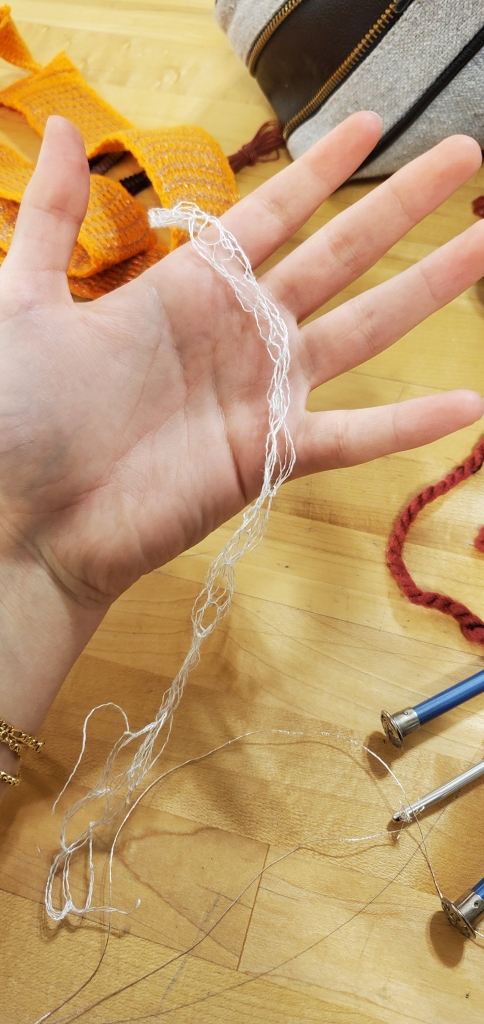

While waiting for the weavings to be completed, I used some conductive thread to do some finger weaving. I thought it would be interesting to test the electrical resistance because the structure dramatically changes when stretched. I crocheted the finger weaving after testing its original state.
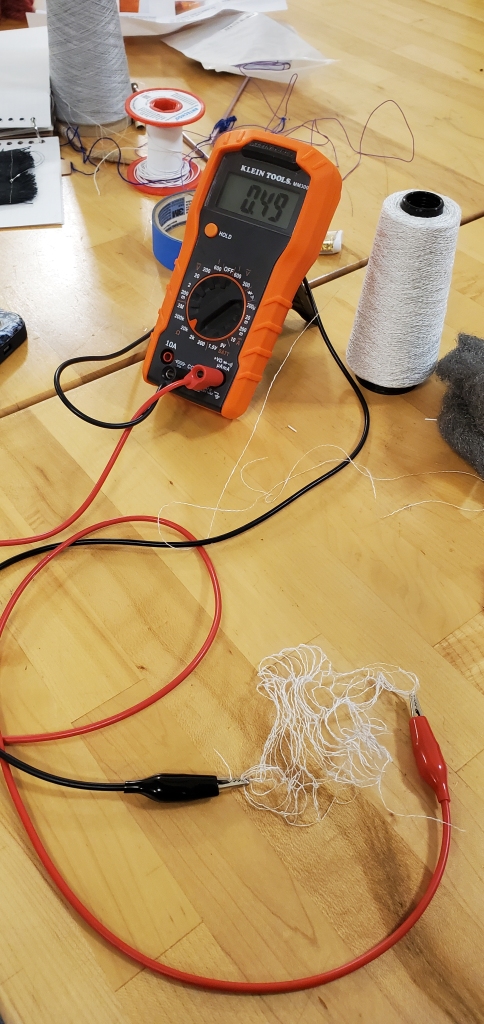


The finger weaving’s resistance in its expanded state tested out to .49 Ohms. It halved its resistance when stretched, coming out to .24 Ohms. Interestingly, crocheting it brought it back to .43 Ohms, almost as much as its expanded state.
]]>
It was pretty rad to see my AdaCAD file made real. From pixels to an actual fabric, all while we watched. It was a cool learning experience, seeing how the designs seen on the screen translated to actual weaving, learning what worked well and what worked less well. I could definitely imagine the benefit of just “testing” several different swatches of several different weaves to further get a sense of this, just as is the case with most new techniques. Practice makes perfect, or at least better, products.
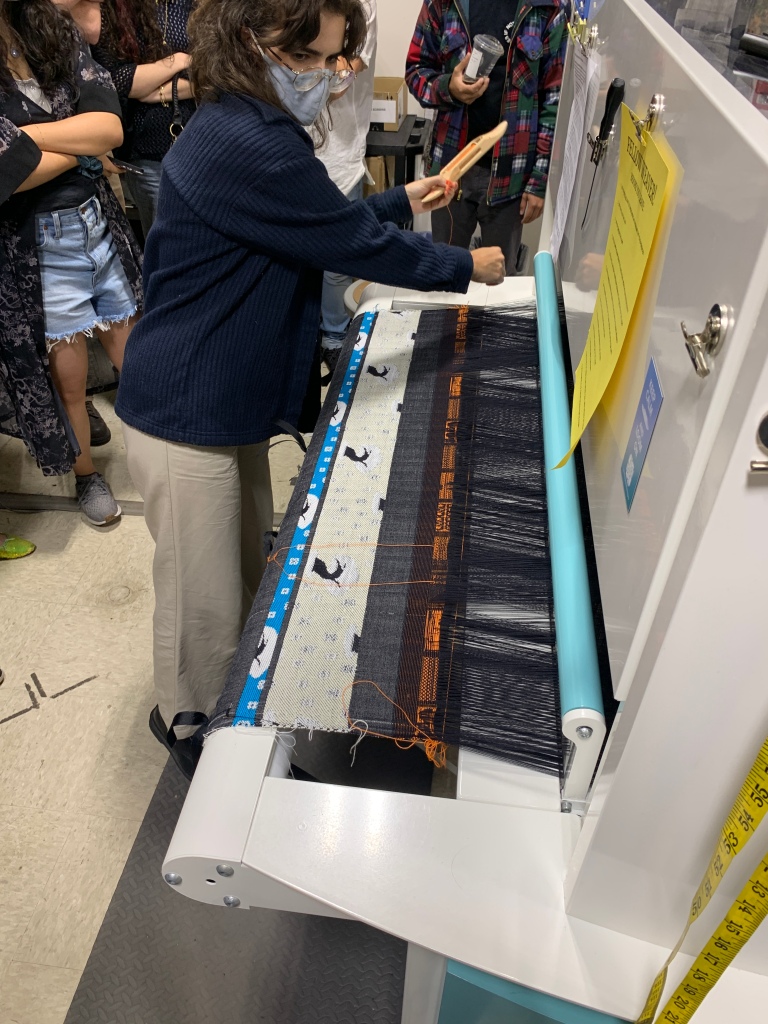
We did our first designs with an orange thread, which feels appropriate now that I am writing this in October. Next, we began on our 2 pic drafts, using blue thread, white thread, and a conductive thread. The shuttle throwing pattern was a bot more complex, naturally. But, it yielded some cool results! I am pleased with both the drafts I made, not really knowing how closely they would translate from the screen. In my case, they seemed to be pretty close to what I had envisioned. Laura then removed the drafts from the loom and we took them back to our desks and cut them apart, realizing afterwards that cutting through the conductive threads wasn’t maybe the best idea? However, some quick troubleshooting meant that Annet could just sew the edges of our swatches with some conductive thread.
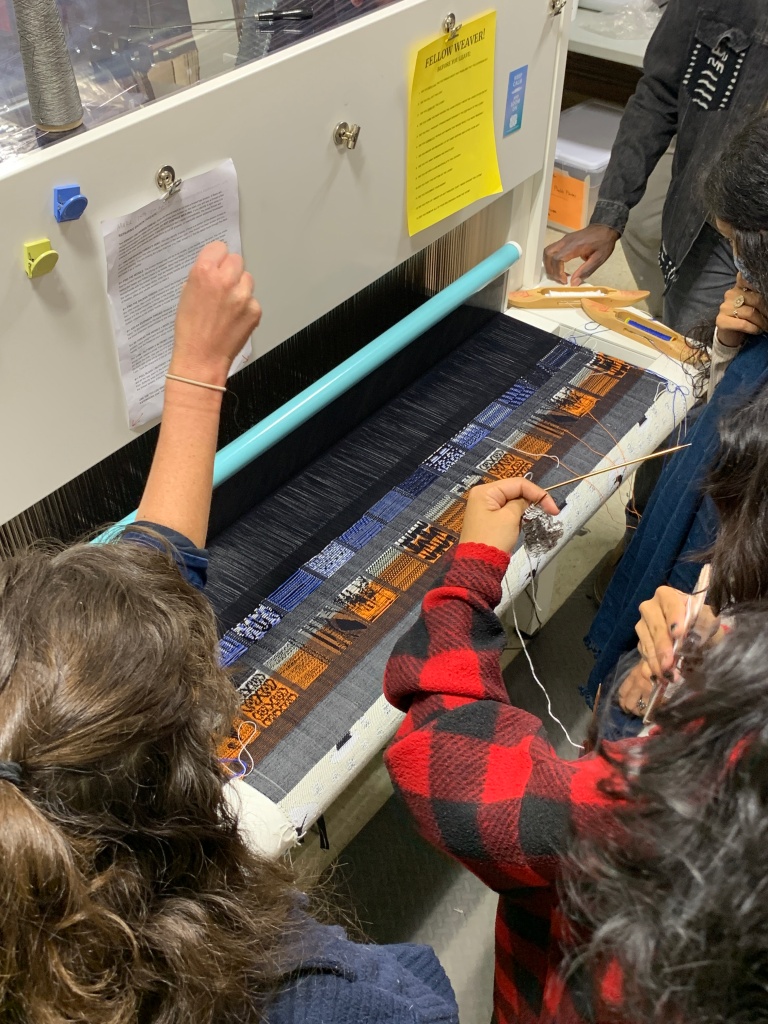
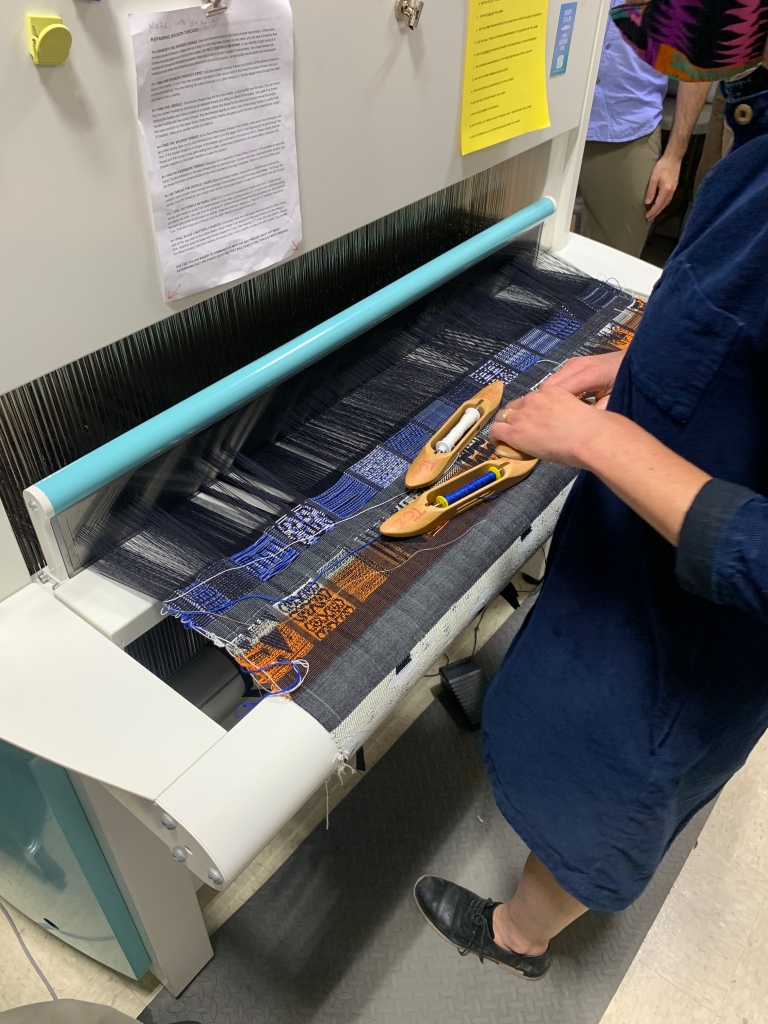
I found that mine was pretty hard to get a reading from initially. We tried rolling it up, we tried pulling it at an angle. I did see some small resistance changes when pulling it at an angle: from about 3.9 ohms when it was flat to between 6 and 8 ohms when pulled at an angle. I saw the most significant changes when it went from flat, again about 3-4 ohms, and when I crumpled it into a ball: about 17 ohms.

Laura also asked us for any suggestions we had for her software, which was pretty cool to hear people’s ideas and even cooler to have the actual developer there, who was receptive and actively listening to any suggestions. Overall a really pleasant introduction/further elaboration on the intersection of weaving, computing, and electricity.
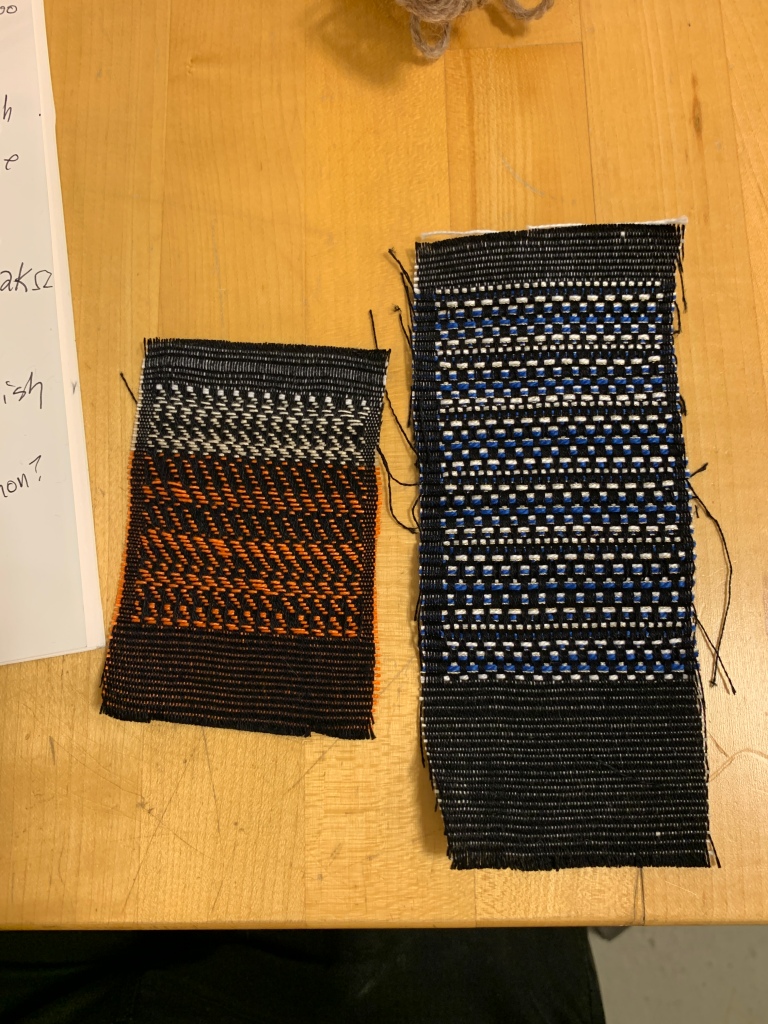

Disclaimer:
These are just my observations, I make no claim to facts
Context:
I wanted to use the plotter to draw some posters for my upcoming show. I was printing these out in batches of 10 to minimize color changes, time, and wear on the paper which will disintegrate after too many passes over the rollers.
Observations:

Question:
Can I use one of these distinctions to analyze the plotter’s sorting algorithm, and ultimately print my posters faster
Research:
Hypothesis:
Experiment 1:
Experiment 2:

Round 2 Questions:
Experiment 3:

Analysis:
Conclusion:
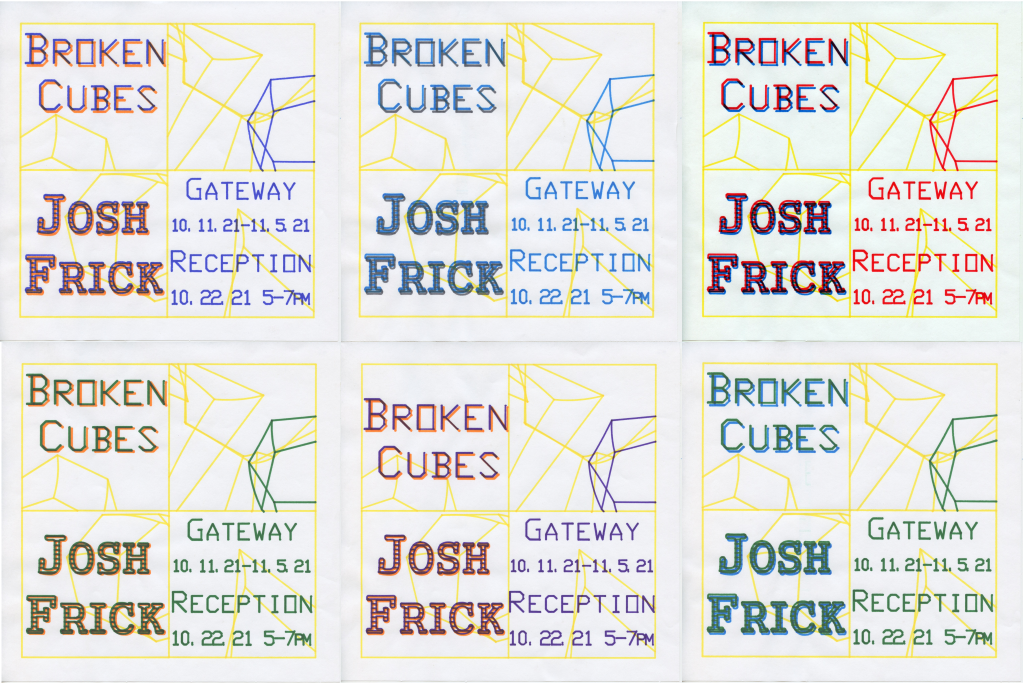
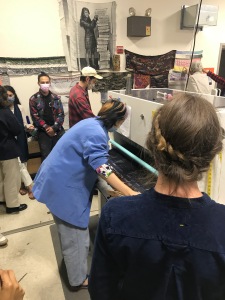
In this week’s workshop, we got to weave our drafts from ADAcad with help from Laura Devendorf, the software’s creator.
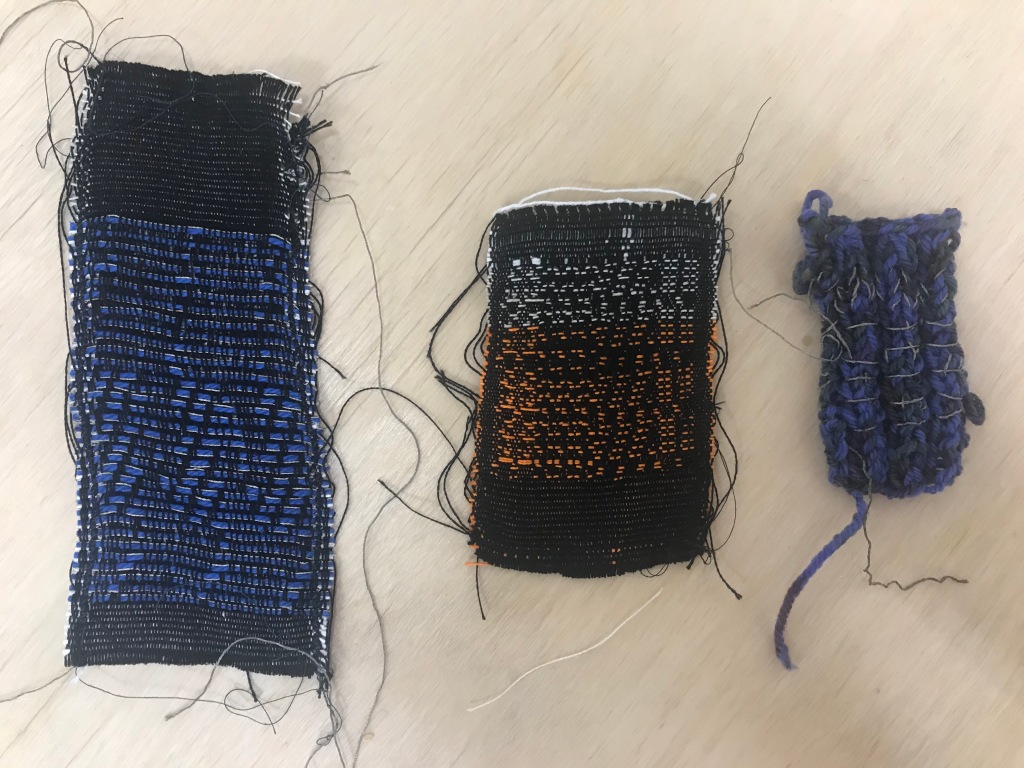
On the left is a 2 pic fabric, woven in black and blue on the front, and black and white on the back. This cloth was also woven with a ‘pic’ of conductive thread next to each weft, creating the potential to turn this test sample into a sensor in next week’s arduino workshop.
In the center is a another draft structure, a single cloth woven without conductive thread. My design in this test was much more structurally sound than the double cloth.
On the right is my knitting intertwined with conductive thread making another sensor. By stretching and compressing the sample, I was able to measure a consistent change in the resistance with a multimeter. This should turn into a fine sensor.
In the pictures below you can see the cloth being made, with all our samples ganged up in a row. Then you see Ryan Hoover cutting them apart to distribute to the class.


During class, I had a chance to talk to Vic about our upcoming class on electronics. I told him about my interest in synthesizers, and he recommended that I pick up a kit to build my own. I ordered three relatively inexpensive kits—the junior theremin, digital echo chamber, and the cicada light sensing kit. All of them are made by Velleman. I am hopeful that these will teach me the basics of how to make electronic instruments like this. Maybe, after building these, I will be able to design my own and potentially incorporate them into my current synthesizer setup. I recently learned the basics of using the laser cutter, so I could use that as well.
View fullsize
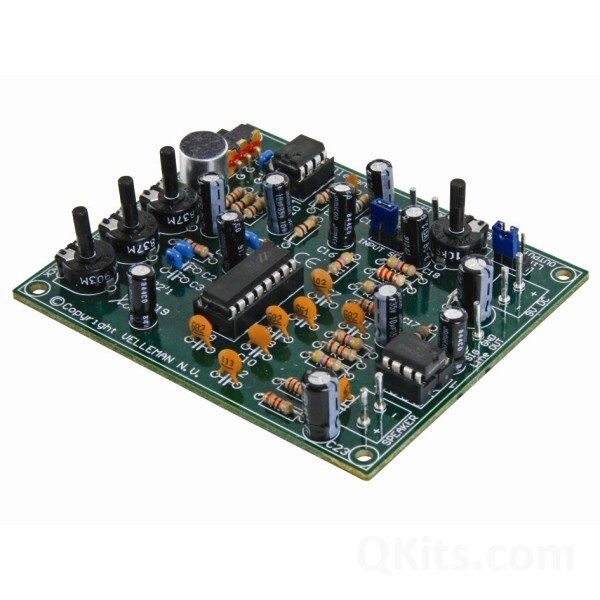

I have also been doing research on audio-visualizers. I took a little one-day intro to Processing several years ago. In my research, I have found a decent amount of audio-visualizers that use Processing. I found this essay about them that gives a nice introduction to both Processing in general and specific audio-visualization techniques.
https://www.cg.tuwien.ac.at/courses/Seminar/WS2010/processing.pdf
I am particularly interested in the generative sketches or interactive projects (like the Atari Video Music). I would like to create animations of some kind that correspond to live musical input (maybe from my DIY synths), but I do not need them to clearly illustrate specific information about the audio. Rather, I am trying to create something that works symbiotically with the music to create an experience.
View fullsize
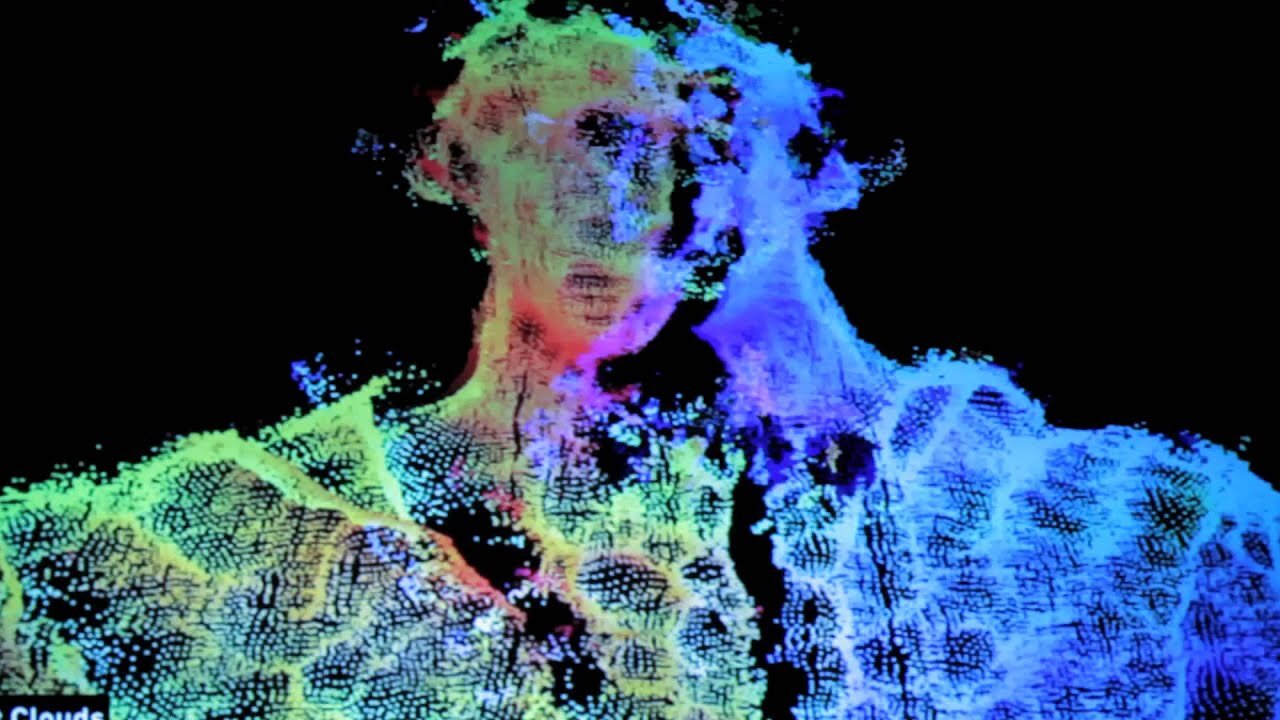

I grew up using Windows Media Player to play all of my music (maostly downloaded from Napster or Limewire). I really enjoyed the various skins that I could choose for the player. I think that has been one of the inspirations for my digital aesthetic preferences.
I also found this simple DIY project to convert a CRT television into an oscilloscope.
https://www.instructables.com/How-To-Make-A-CRT-TV-Into-an-Oscilloscope/
]]>

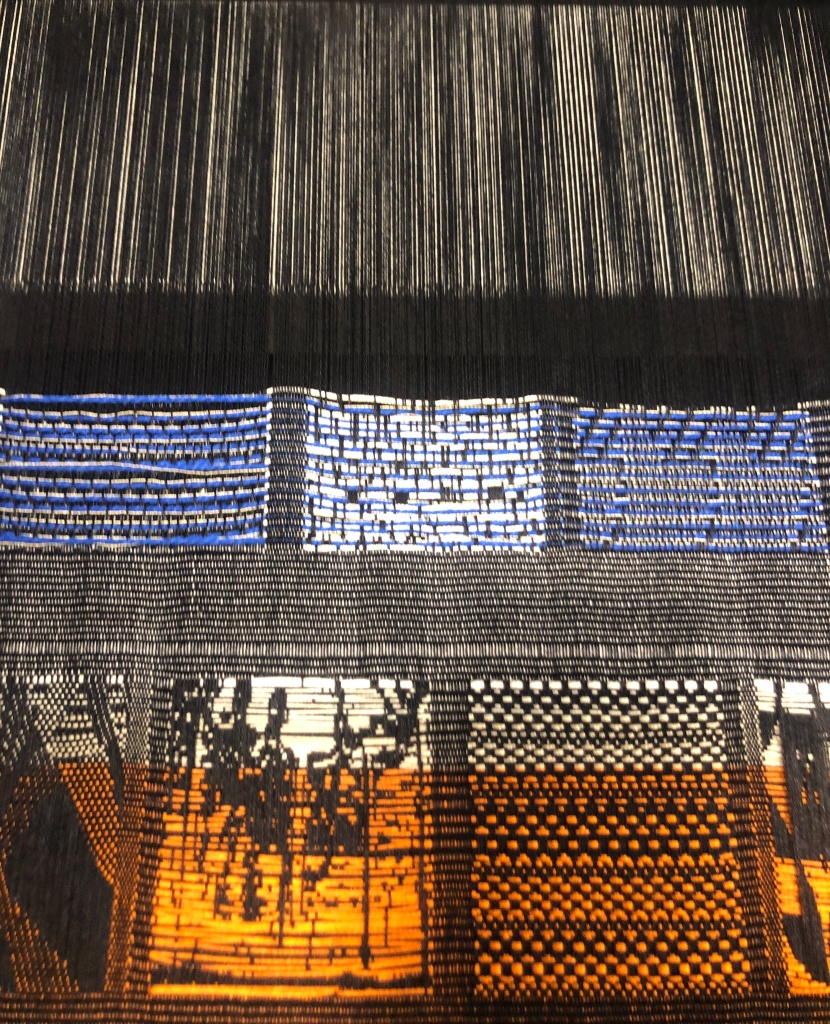
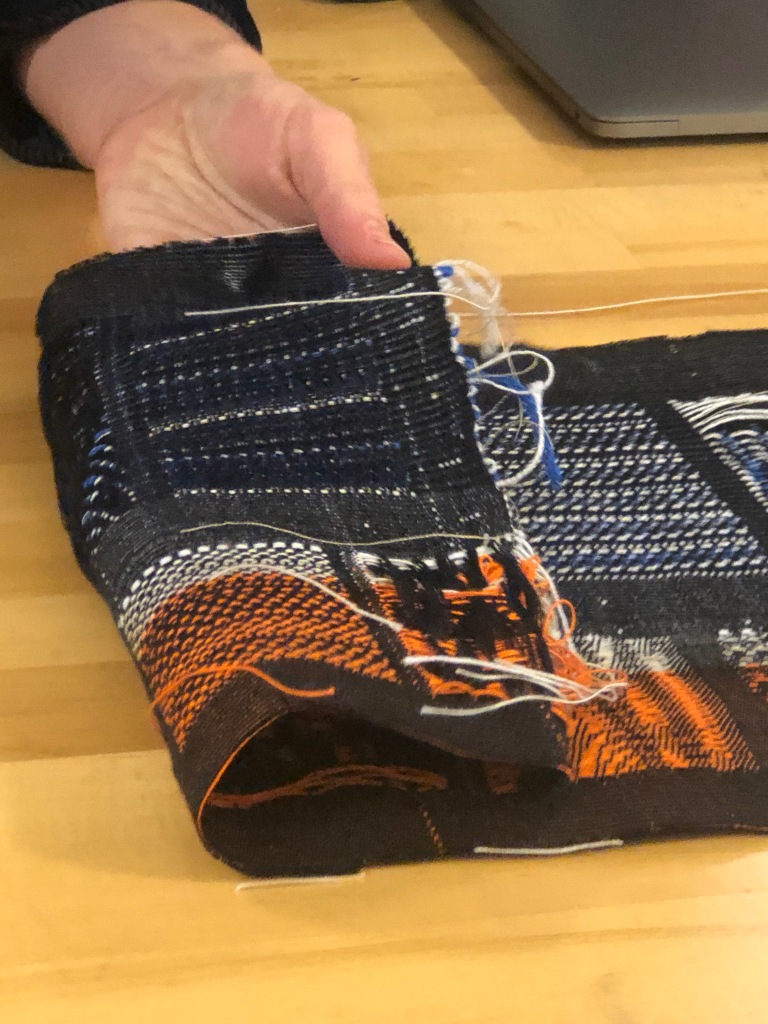

After last week’s introduction to drafting and AdaCAD, we finally got to put some of our designs to the test with the TC2Loom. None of the pieces turned out as expected. The loom squished many of the designs and large sections of white just ended up being a fairly loose mess of threads. The most successful patterns were the ones that had small repeating sections rather instead of large color blocked sections. The first section (orange, black & white) was just with regular thread while the next section (black, blue & white) conductive thread was also woven in.
The second part of the class was experimenting with different structures or weaving/knitting/crocheting/tatting while integrating conductive thread. I chose to experiment with knitting and used a simple cable pattern which I later tested with a conductivity meter.
Cable Pattern:
Row 1: K allThe second part of the class was experimenting with different structures or Row 2:
Row 1: K all
Row 2: Knit the Knits & Purl the Purls
Row 3: K1 *C4B, C4F* K1
Row 4: Knit the Knits & Purl the Purls
Row 5: K all
Row 6: Knit the Knits & Purl the Purls
Row 7: K1 *C4F, C4B* K1
Row 8: Knit the Knits & Purl the Purls
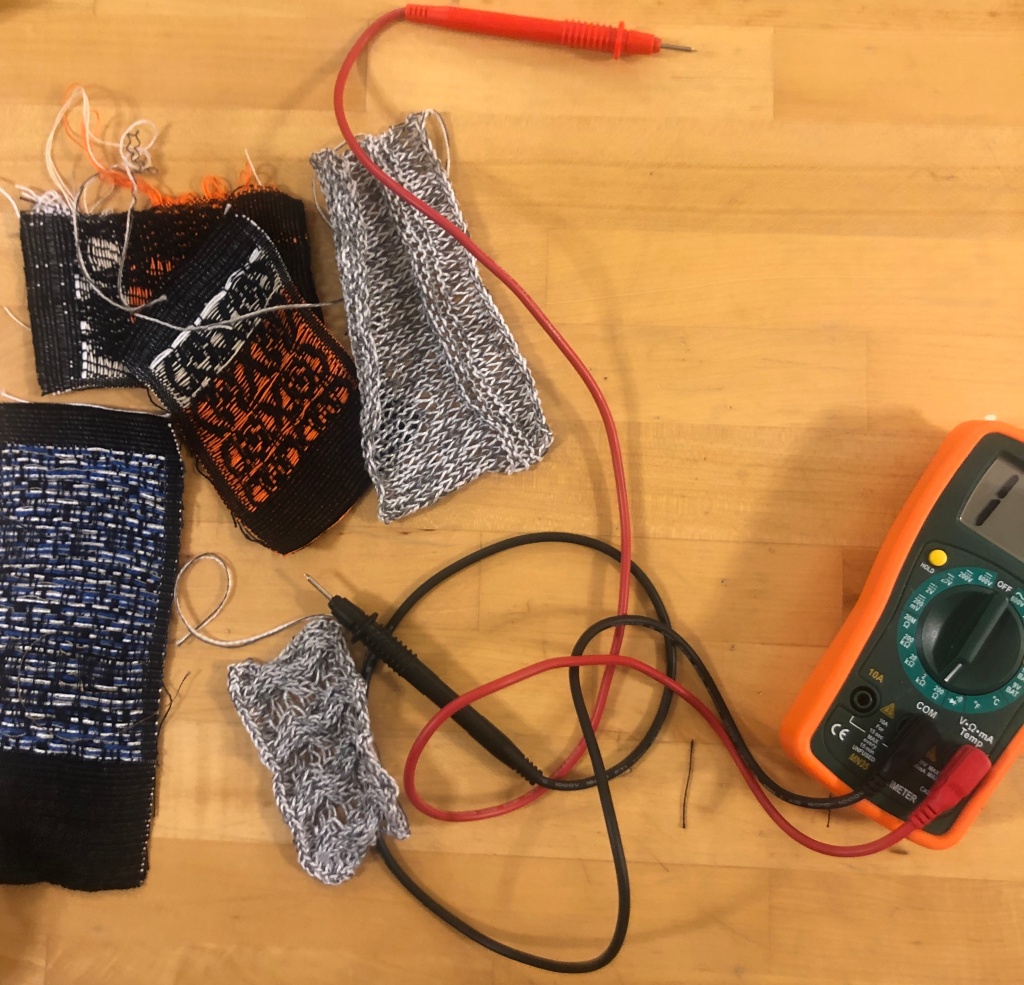
Reading over my notes, some themes have started to emerge. I am interested in constructing alternate experiences that either manifest hidden phenomenoma (such as geotraumatic forces, cybernetic data fields) or create experiences for alternative embodiments (cybernetic reading interfaces, breathing machines).
The materials inside a smartphone are extracted violently from the earth, from far-flung geographies around the world. They are often extracted by violent means, according to the logic of an alien robot from the future (capitalism) and packaged into an alien robot we carry in our pockets. Starting from a new materialist lens, where matter is imbued with vitality and agency, I wonder what stored up geotrauma is embued within our phones? How can we make this stored up geotrauma visible, in order to better understand our visiting alien robots and the context of their creation?
Picking up from the framing of a smartphone as an alien device, I am curious to explore how these robot creatures see the world. A smartphone senses through its camera, its microphone, the accelerometer inside it, as well as touch and pressure on its screen. However, much of how the phone understands the world (and us) is completely opaque to us. I wonder how we may create new cybernetic interfaces that allow us to see or experience these alien senses in a way we can understand.
a machine that “breathes” based on input from its environment. An exploration of the motion of breathing, from the perspective of a machine that is completely unalive…or is it? What can the motion of breathing tell us about our conception of alive/dead? What can the motion of breathing tell us about our bodies? What can the motion of breathing tell us about our perceptions of time? A transhumanist meditations on subject/object (what it means to be a “human” in this lifetime), its organic component and its synthetic component (as well as the nature of the distinction between the organic and the synthetic).
Reading could be described as a series of hallucinations: as we read each page, we imagine the world and emotions the words describe. How could we build cybernetic interfaces, utilizing sensors and technology, to create an even more hallucinatory reading experience, embuing the book/reader with magical powers. Eventually, the psychodelic experience created by these electronic reading interfaces could supplant our own, allowing for powerful new investigations of speculative futures.
By following the workshop and experimenting, I came up with my own weave draft using an image scan of an old family stamp, overlaid onto an interlaced set of tabby and satin weaves.
View fullsize
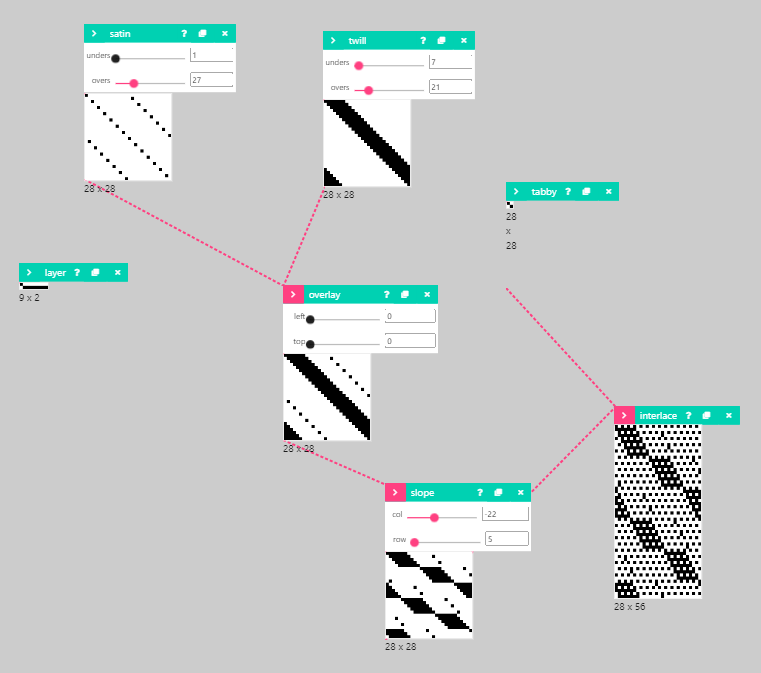
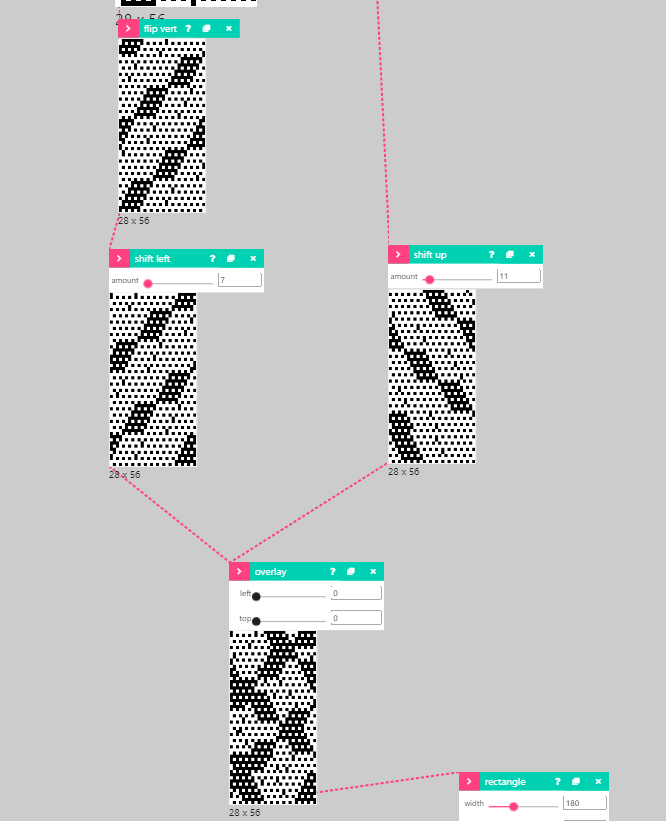
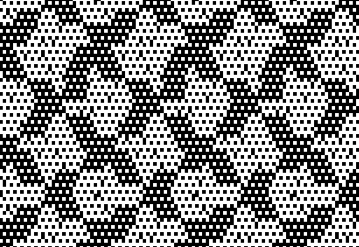
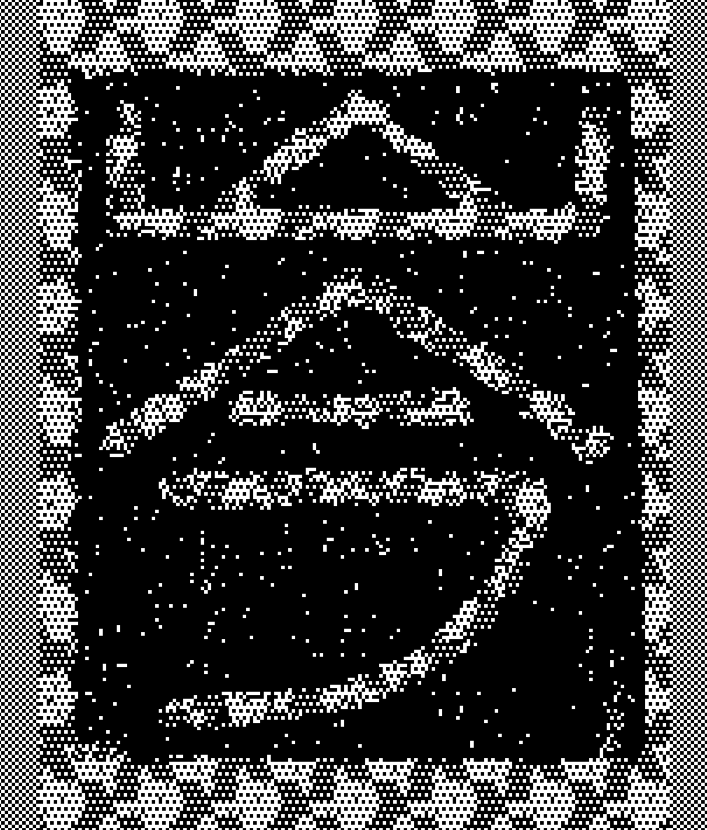
My 2pic draft is more similar to the example uploaded by Laura, but I was okay with that because I didn’t really understand what I was doing at that point.
View fullsize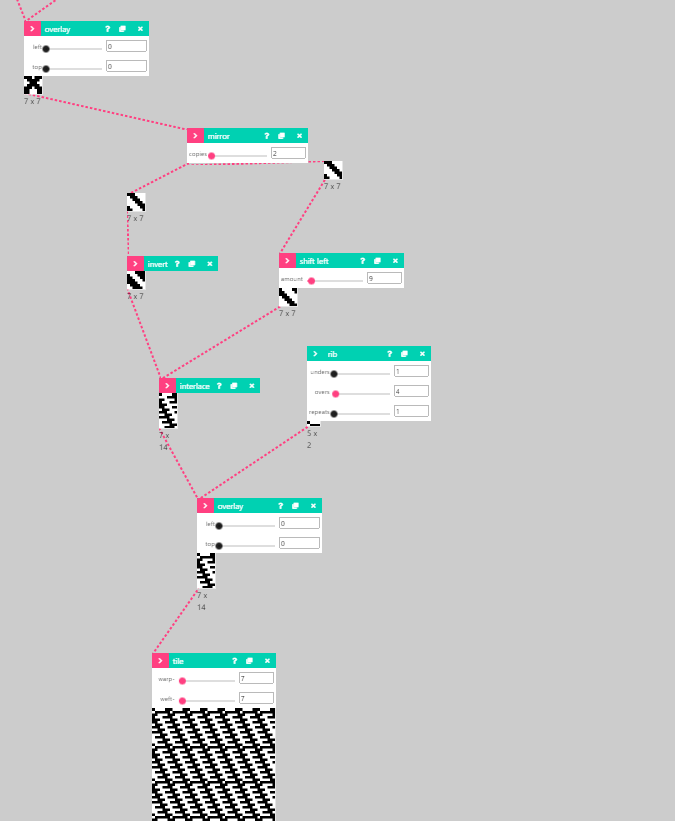
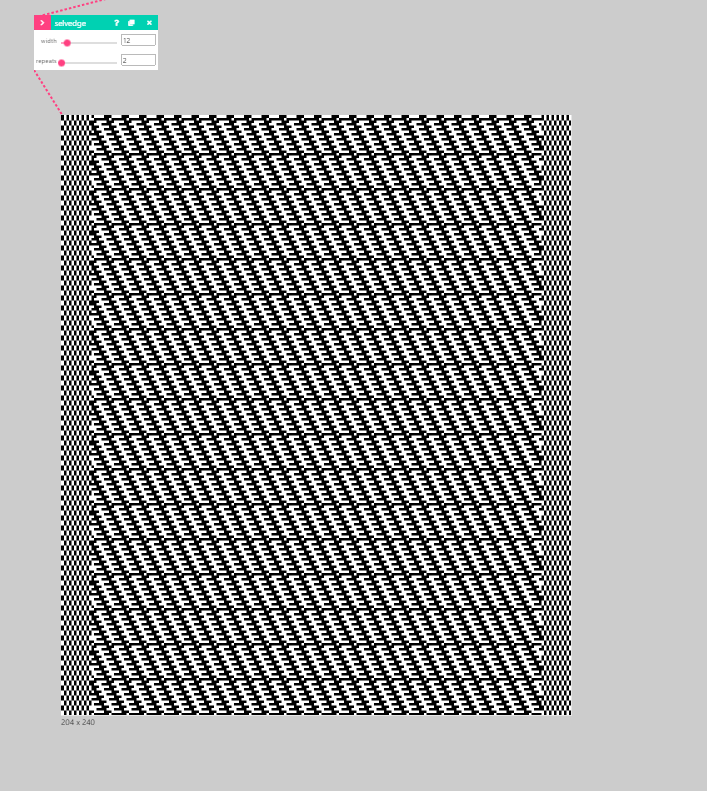
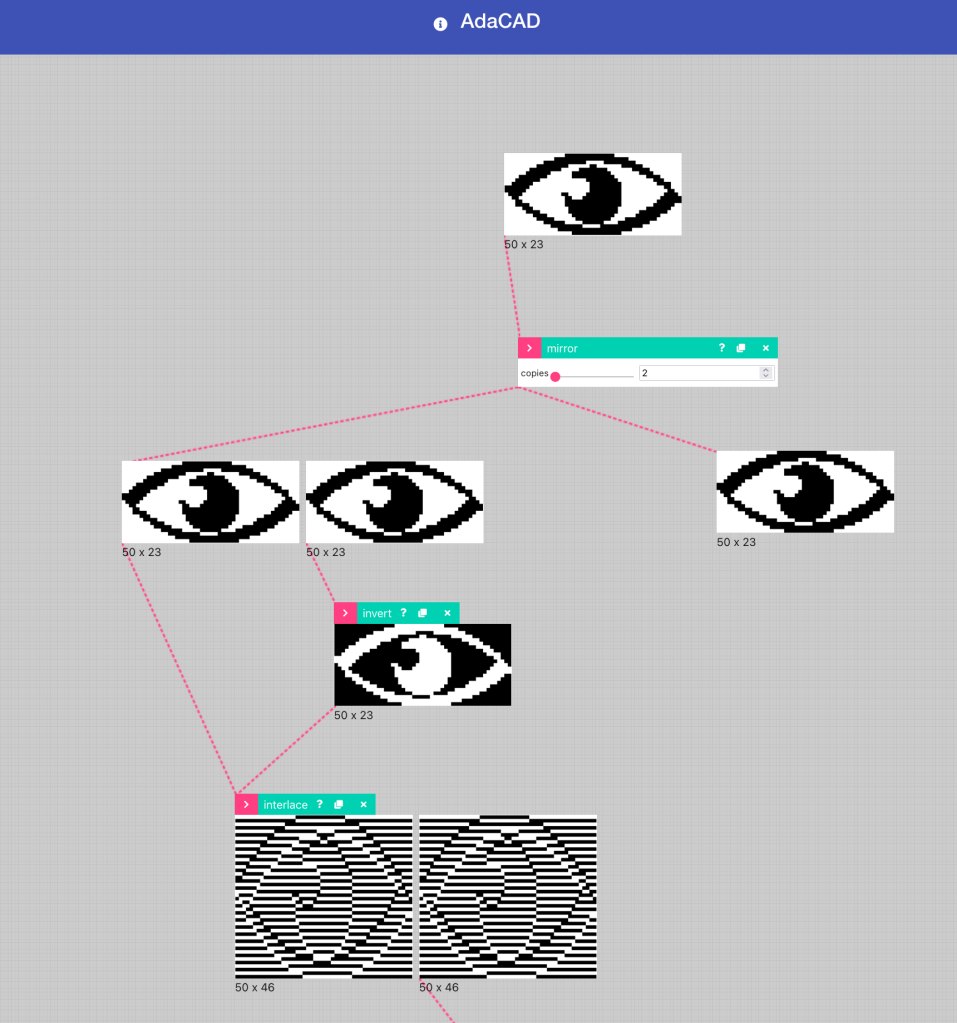


This class we were introduced to a new software, AdaCAD created by
]]>Replicating weaving digitally is fairly simple, though the nuances and glitches of Rhino/Grasshopper are always interesting to deal with. I felt like I reached a level of understanding with the digital weaving, as I felt it responded nicely to Marantha Dawkins’ Pattern Encoding techniques well, and felt like a natural progression.
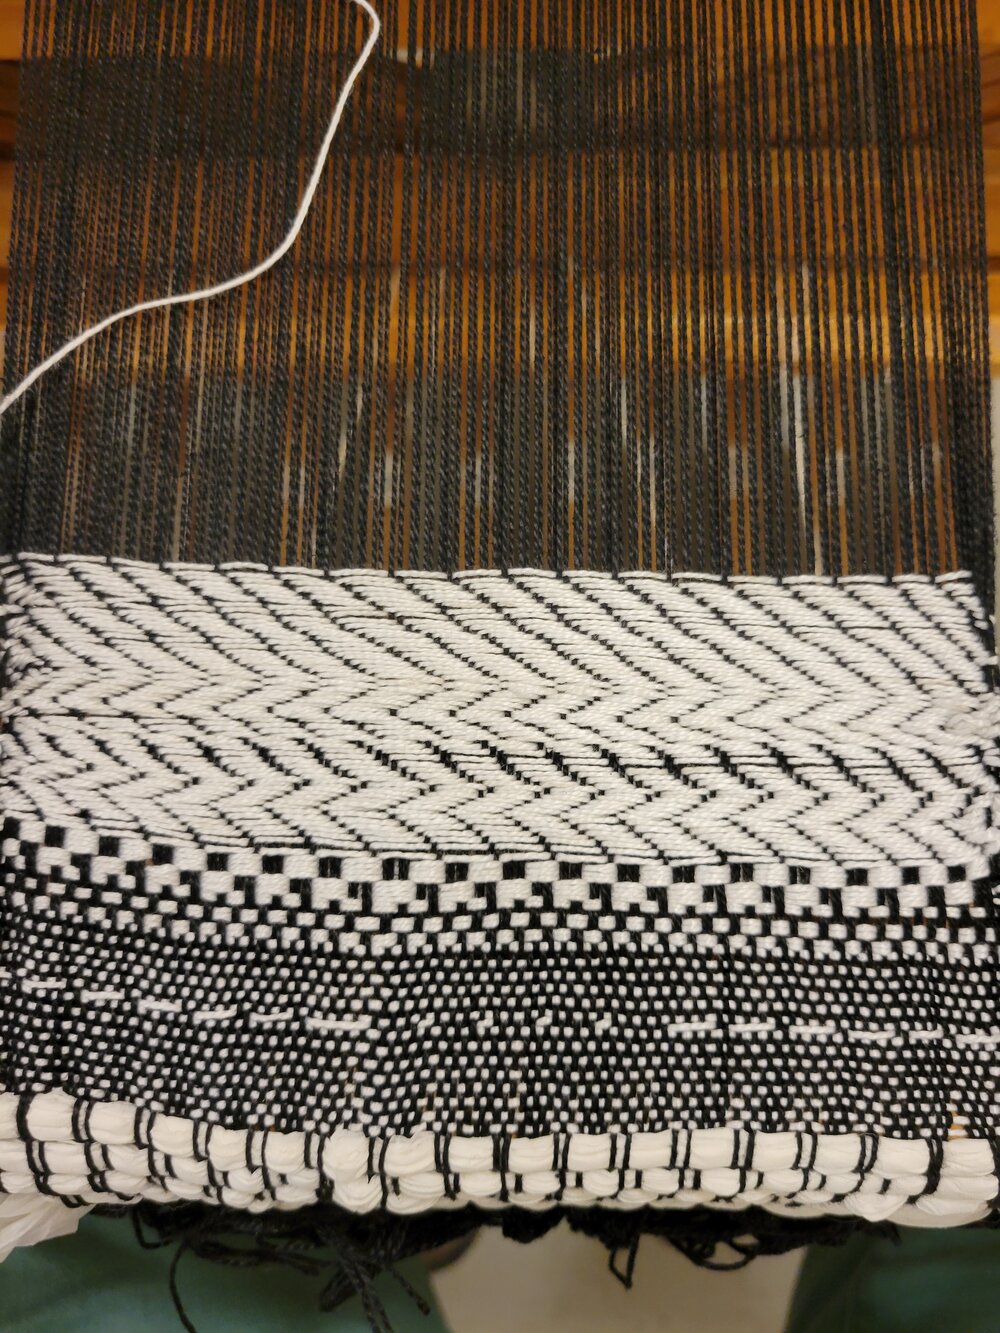
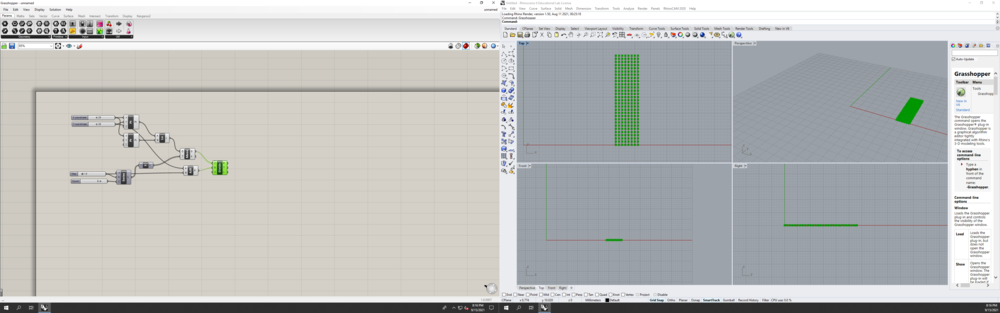


I have always wanted to try using a free standing loom as I have seen its type of capabilities in the past. Now having experienced using one, I believe that having attempted to weave by hand first allowed me to understand the construction of a weave.
I had never before used or understood how to use the free standing loom. I was interested in learning the machinery behind the construction of a weave. Once I was able to maneuver the foot pedals I better understood how the pattern was made on the free standing loom. As I was weaving I began to think of the outcome of the weave while being in the process of making the weave. This sense of understanding and visualizing the outcome made the transition to digital weaving easier.
At times softwares like grasshopper skip the visualization of a process. In grasshopper words mean actions versus in a hand made process, physical action is required to generate a result. Both processes result in visual feedback; the difference is the clarity between a digital process versus a handmade one.
Now having worked in both methods, I find both processes have the flexibility to generate complex weaves.
]]>I was intrigued to learn that the definition of a weave is the interlacing of two distinct groups of threads at right angles. Presumably I had never considered this as the definition of a weave as it seems a very straightforward definition. But now taking this definition and the knowledge about the three patterns, I more strongly understand how weaves correlate to graphics systems. The weave, in theory, becomes a grid structure with a series of patterns and transitions. The structure and integrity of the weave are associated with the patterns used, more consistency in preserving the original weave pattern the stronger the weave.
Before this course I had not imagined constructing a weave in a digital format or relating it so closely to technology. Yet, once I was reintroduced to weaving as a series of systems to create and regenerate, and understanding its foundational elements of construction, using a digital format makes me intrigued to try complex patterns and test the limits of weaving. I felt this thought to connect well with a line shared in the text, it read, “Acceptance of limitations as a framework rather than as a hindrance, is always proof of a productive mind.”Even though weaving is traditionally an art of manual labor, I do appreciate the flexibility of technology to test variations of patterns to construction.
]]>The basis of the workshop was to map a natural element into a constructed algorithm to generate a new pattern, one that essentially mimicked or recorded the variable of the natural object. The pattern of each group was altered by the input of information that was being mapped as well as the selection of imagery chosen to depict the input.
My group and I decided to layer photographs of each of our faces into one to generate one image. The images were edited to be in black and white with a high contrast level. The image of our faces joined together was a close-up of our right eyes. We chose to concentrate on one specific area to get as much detail as possible. We choose to map a total of three different color contrasts for our new pattern.
The symbols chosen to depict each different color contrast became relational shapes that alluded to the form of the eye or the mechanics of an eye.
The high contrasted image of our eyes was placed into the grasshopper script and generated a pattern of overlaying moments, which interestingly enough was a process we had previously created in Photoshop.
After the printing of our constructed pattern was complete, we placed it under a sketched fabric for tracing. We chose to layer glue at the interesting points of our pattern so the end result would be as accurate as possible. One of our chosen symbols allowed for the directional pull of the fabric to create variations of height.
The final product of our pattern resulted in a series of concave and convex elements/moments that were constructed by the selection of our symbols.
]]>I consider myself both a digital and fine artist. I have in the past worked with ceramics, plastics, fabrics, etc, to create sculptures. I best communicate my interest in spatial relationships through sculpture or visual renderings. Both of these processes I enjoy doing and am wanting to expand my knowledge in both realms. I hope for this class to blend both my fine art skills and digital skills.
]]>


Thank you! My bus shelter form was created as a central ‘hub’ feature in a parklet, with a focus on being a shelter that had access to and didn’t close itself off from the surroundings.
It was my first time using the script and having not fully understood how it worked at the time, I did have a lot of challenges with having it follow the form properly. I ended up having to break it up into 5 woven pieces, and even then the weave pattern didn’t fully encompass the beams supporting them, giving the /idea/ of a weave rather than properly showing how the structure would support itself.
LikeLike
]]>LikeLike
]]>I’m also glad you pointed out the TC-2 has a hand-shuttle element, as I had actually missed that in our tour and now everything makes a lot more sense! I do love the idea that the machine still does not have full control over the weavings it produces, there is still a human element beyond the design phase.
LikeLike
]]>
In this workshop we explored AdaCad, an in-development program that is similar to Grasshopper in its structure, but tailored to creating weaving patterns.

To create my own pattern, I started by altering some line art I already created and imported it as an image into AdaCad. I then experimented with different weaving types and layering.
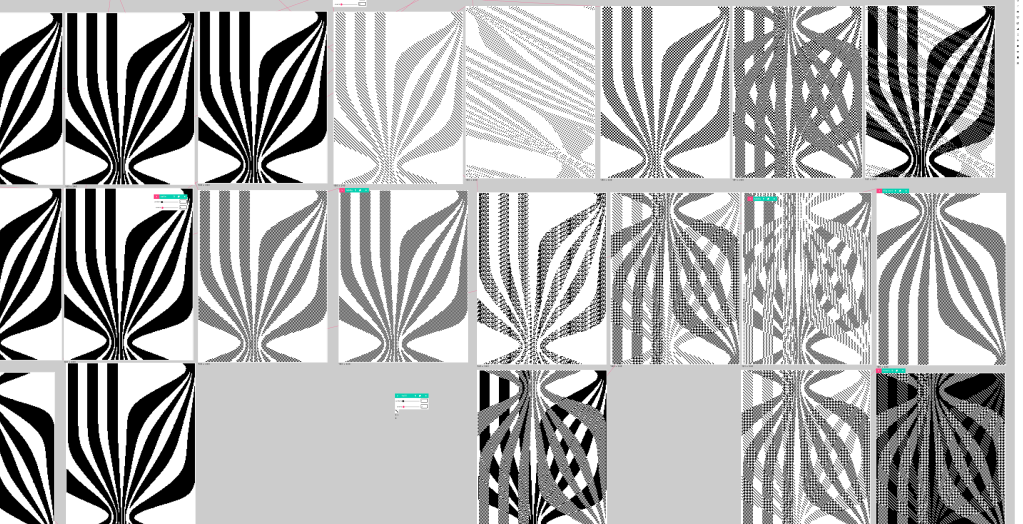
I was really interested to see that when I layered a twill and plain weave, I got a houndstooth-ish pattern. I’m really excited to see how this will look woven! I’m especially curious how the plain black spots will come out.

For my 2-pic weave, I followed the same script Laura Devendorf layed out for us, using a heart, rather than a twill, as the base pattern.


Overall, I found this a really fun experience. The program was easy to get the hang of. I’m really looking forward to using the tc2!
]]>
*
]]>But before we jump into the details of what we performed, I would like to bring notice to Laura’s work in smart textiles, and creating a circuit using copper threads that transmit energy and stitch sensors into clothing, completely changing the meaning of clothing to be just a cover-all, or an attire. I definitely feel like that is definitely something to mull over as I move towards deciding my final piece, and also my MASD capstone. I am really looking forward to when we club the same with an Arduino!

As we began looking into AdaCAD, we realised how when we create a hand draft, it’s often tough to visualise how it would turn out to be, and much of our work is centered towards hand drawing the repeat structures. However, with AdaCAD, we could do a quick job of repeating a few squares, inputting some of the common patterns, and playing around with patterns that have already been created.

For my exploration with AdaCAD, I created one hand drawn pattern (yes you can draw your own too!!) and juxtaposed it with a pre-made pattern, creating slight tweaks to it to get an interesting mix.
AdaCAD is an easy-to-use software with clear labels to the functions one can perform. As a UX Designer, I can definitely identify some of the areas where the product could use upgrades in terms of making it more user friendly, but to see how Laura designed the software herself is truly remarkable!
For our assignments, we have been given two drafts to create, to be able to produce the same on a TC2 loom. I look forward to yielding interesting results with the patterns I’ve created (stay tuned for those!)


The TC2 Loom and its creation!
]]>Think that there is a general expectation to make something with research. (still, I am unsure what exactly is expected) What I have been doing for the past year was to research a real-world problem, come up with a solution to solve it using technology or new media, and pitch the idea of the campaign.
For example, say this was a problem I found : kids grow quickly and have to replace their protective gear(ex. helmets for riding bicycles) as their bodies grow. Generally, protective gears are made with styrofoam and plastic. Replacing and throwing them out constantly may not be great for the environment, so why not make protective gears with biodegradable materials?
That was a very, very niche area of advertising I was engaged with, but I'm unsure if I would be able to do something of this scale on my own. Most importantly, I'm not sure if the thought of campaigning motivates me at the moment. I sincerely do find this vein of work inspiring and important, but I feel quite burnt out at the moment.
From what I know, and I know very little, if I were to make combine a project with a research element, this would be the vague direction to move. But do I want this? What specifically do I want to do? What is feasible?
]]>

Laura Devendorf from Unstable Design Lab introduced us to resistive sensing, smart weaves, and AdaCAD. It seems obvious, but then again, the reminder that "weaves aren't flat, they are 3d" proves just how flexible fabric can get. Never taking any fiber classes before I don't think I thought of fabric like that. Rather than it serving as a form of programmed material that has durability and is infinitely customizable, fabric to me was always something fragile and in a dire need to be mended.

Anyway, throwing my preexisting impression of fabric out the window, the introduction to weaving with conductive material was quite liberating. I kept on tying myself down to thinking "okay, what weird metal can I solder together?" Rather than being tied to a medium that is obviously metallic and distant, maybe I can make something that is more organic and natural to interact with.


Knowing that TC2 will be able to weave illustratively in a way I won't be able to weave in a thousand years, I wanted a design to test out just how accurate of an image the TC2 can weave.

I admire the black and white illustrations by Diptyque and had an expectation that they would look great in fabric.
I scaled and converted the image in Grayscale, and then into a Bitmap image so that it would be easier to bring into AdaCAD. Using the selvedge feature, I added selvedge on both sides with 12 warps.
]]>Wiener points out that there are countless suggestions and attempts of replacing the supposed "ineffective" human behavior. He draws the parallel between the machine’s input, reaction, and performance to that of the human body.
In Wiener’s conclusion, he notes that it is inhumane to reduce human beings under a “higher nervous organism”, whether that be a different social organization or structure, noting that reducing the human being from their full status is a “degradation and a waste”.
I quite enjoyed the analogy between the machines and the sense organs. Wiener compares the photoelectric cells to be paralleled to the organ of the human body. He noted that every scientific instrument is a possible sense organ. After reading that I started piecing together different types of sensors, trying to see if they can replicate the five well-known senses. If cameras and illuminance sensors serve as “sight”, then microphones would inform the volume for hearing, and so on. Still, it was a refreshing take on rethinking the “message” exchanged within the circuits. It’s easy to get tied down to the simple switches with Boolean logic, where the performance would take place if there is electricity flowing. If these electrical sensory organs can intake more complicated messages, maybe it would enlighten new types of interactions to take place.

This actually reminded me of Tender : It's Where People Meat by Marcello Gomez Maureira. It's basically a piece of chicken flipping over the Tinder app.
We think as if phones are this amazing piece of magical technology that does wondrous things (and yes, they are). In reality, a piece of chicken on a motor can replicate how we interact with our phones.
As most people are aware, this is a transition period. The development of technology in many cases precedes what we are capable of comprehending. There are sensors out there that can get a variety of data, where do we go from here to further communicate and make the best use out of these?


First encounter with looms / weaving! Spent some time on my own to experiment with the twill weave.
I’m quite fond of the herringbone pattern, so while doing the twill weave I have stopped in between the treadles and went back and forth. Specifically, I would continue the weave in order by stepping 4&5, 5&6, 6&7, and so forth until I reach 3&4, and then I would go backward by stepping 3&2, 2&1, 8&1, and so on.
Not so certain if that is the correct way to weave, but it made a nice zigzag pattern on top.
There is something meditative on weaving, maybe due to its repetitive nature, but it also felt like a rhythm game in a way. The moment I ask myself, wait, how was I doing this? What was I supposed to do next? I lose track.


A few Inspirations.
• The reprap and 3d printing communities at large. Many professionals and hobbyists alike have created and modified printers and accessories to enhance these machines.
• This Guy who added a sharpie to his plasma cutter. This modification improved his fabrication skills and times
• The MPCNC (Mostly Printed CNC). I really like this project. While it’s probably not the most rigid cnc for router milling (and there are some serious safety concerns from reading the forums) This project’s ingenuity amazes me and creates opportunities for super interesting modifications like one user who turned theirs into an embroidery machine.

• The Pancake Bot, I saw at the DESIGNS FOR DIFFERENT FUTURES show with my Art and Algorithms class. This opened my eyes to uses of 3d printers outside of rigid materials, and the sense that these machines can be used in humorous and frivolous ways.
While the machines on campus are fantastic at creating repeatable forms in a limited number of materials, a question arises from their uniformity. Could I build an xyz based machine to deposit other materials or processes? The answer is most certainly yes. Besides the pancake bot, there are already machines to 3d print wax, metal, clay, concrete, and more. So, I began thinking of other possibilities:
• Silly string
• Liquids
• Jell-O
• Paint
• Liquid metal
• Propane torch, for wood burning?
• Wood Burning tool
• Spray Foam
The two ideas most interesting and plausible in my opinion would be a wood burning tool for a simple conversion, and a spray foam dispenser for a more complicated build. The spray foam ventures further into my ideal realm of precision dispensing mixed with an unpredictable material, creating a form left partially up to chance. However, connecting a wood burner up to an old 3d printer sounds like a better place to start. The parameters and controls would be easier, and through grasshopper, I can sample images, than map the brightness value to time values for burning pixels into the wood. I’m not married to this idea, but I like it as a jumping off point.
]]>I went with my colleague Alfie to work on our respective weaves. I had drafted a simple plain weave to work with, but later decided to explore the weave as I play around on the loom. I created a twill weave halfway through, but decided I wanted to experiment and change the direction, and study how that little change in the way I approach the treadles would affect the pattern.

As I began the process, all my senses were directed towards the working of the loom. The loom is a very sensory experience, as you’re utilising your visual senses as well as your hand eye coordination, coupled with the audio of the beater beating against the beam. While you’re making sure you get the treadles right, you are also ensuring the pattern comes out in a neat fashion, for which you have to ensure the beater does its job perfectly.
As I wrapped up all my senses into the functioning of the loom, I began to realise how therapeutic this experience is, and how much I missed this as a meditative practice. I began to picture myself weaving as an act of anger management for me haha!


After I finished my one inch. I wanted to help Alfie with a basket weave she had drafted, but lacked the support she needed (which we realised was funnily enough, a third foot!). We began the process by splitting the roles between who is incharge of which treadles. The overall process was really fun, and also really satisfying to see the basket weave come life, bit by bit!
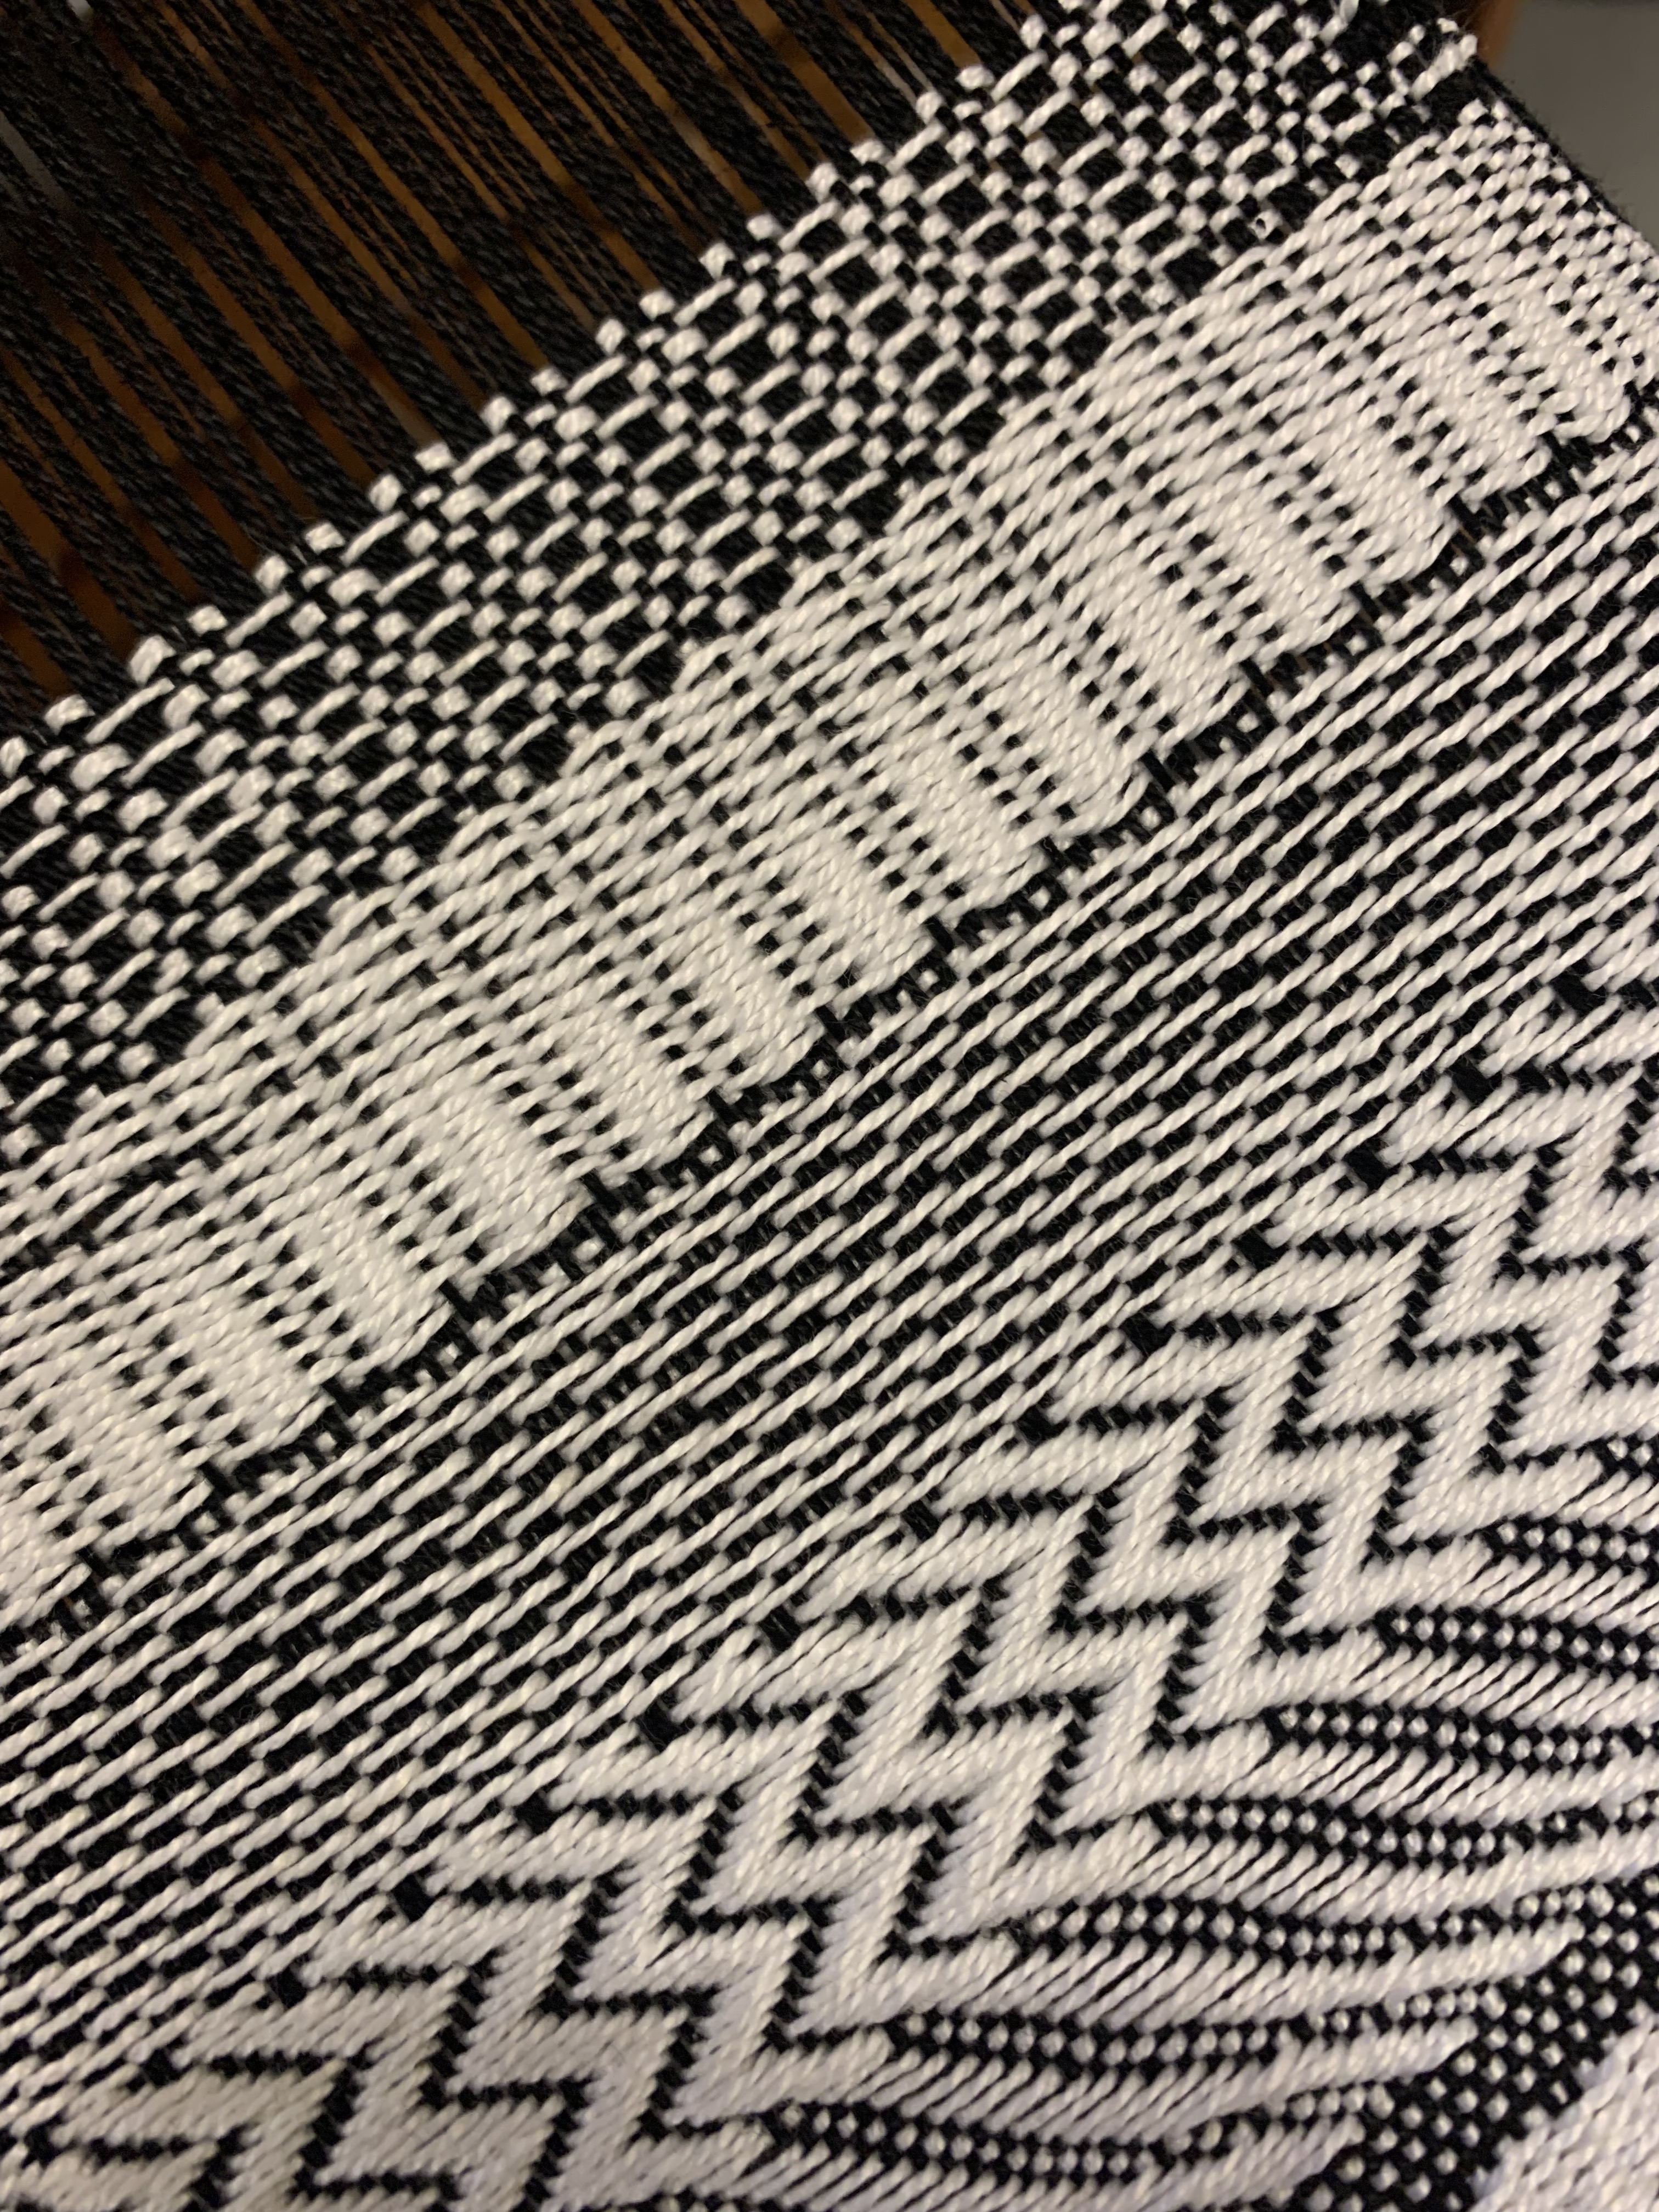

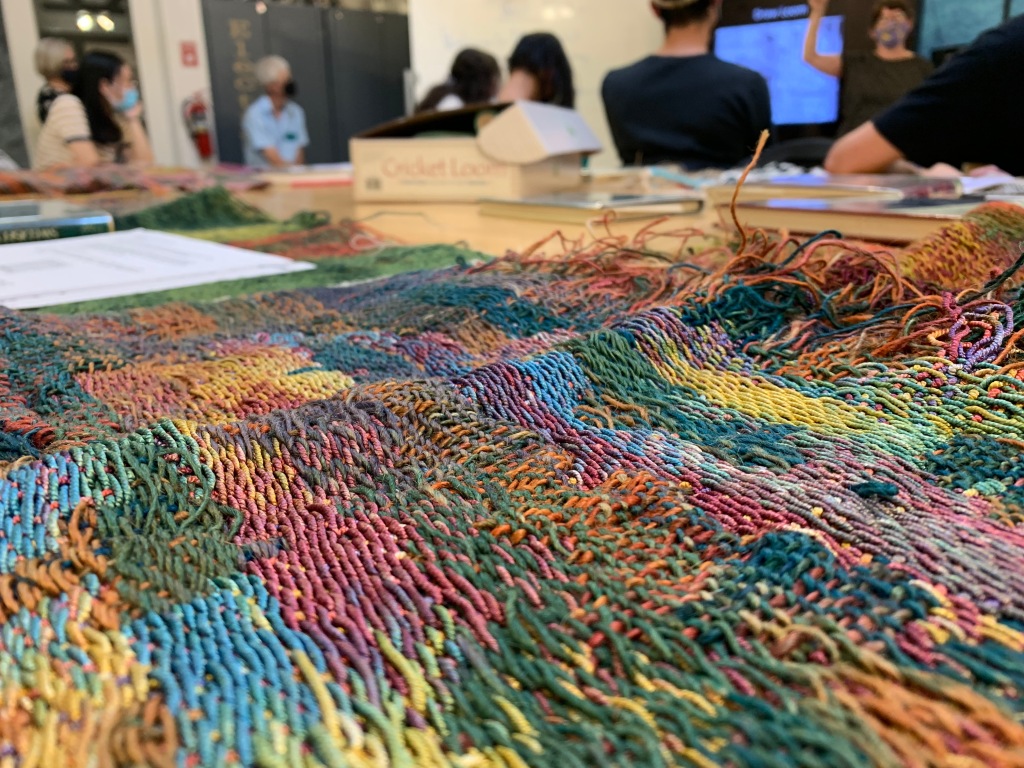
As our exploration with weaving began, I couldn’t wait but experience the tactile approach to the process. Having weaved before, I felt fairly confident with this exercise, however, receiving a completely different perspective from a new culture opened my eyes to many aspects of weaving I had previously missed out on, or understood differently!
We started the class with a few glimpses into various types of weaves with our guest speaker, Mary Smull. She gave us a quick history into how weaving takes place across cultures, and how it has evolved into powerloom from handloom. I wish we could speak a little about how weaving created livelihood for many communities across the globe.
After this discussion, we jumped into the technicalities of weaving. These specifically discussed:
We discussed the application of all these weaves, and created a weave draft on paper to understand how one would read the same in order to create a pattern out of a draft.
Post the theory, we looked into how the loom actually works. We looked at a multi harness loom and learnt the differences between raisers and sinkers, and many other technical components a loom consists. I must say, it was extremely thrilling to be back to the rhythm of the beater binding the threads together tightly!
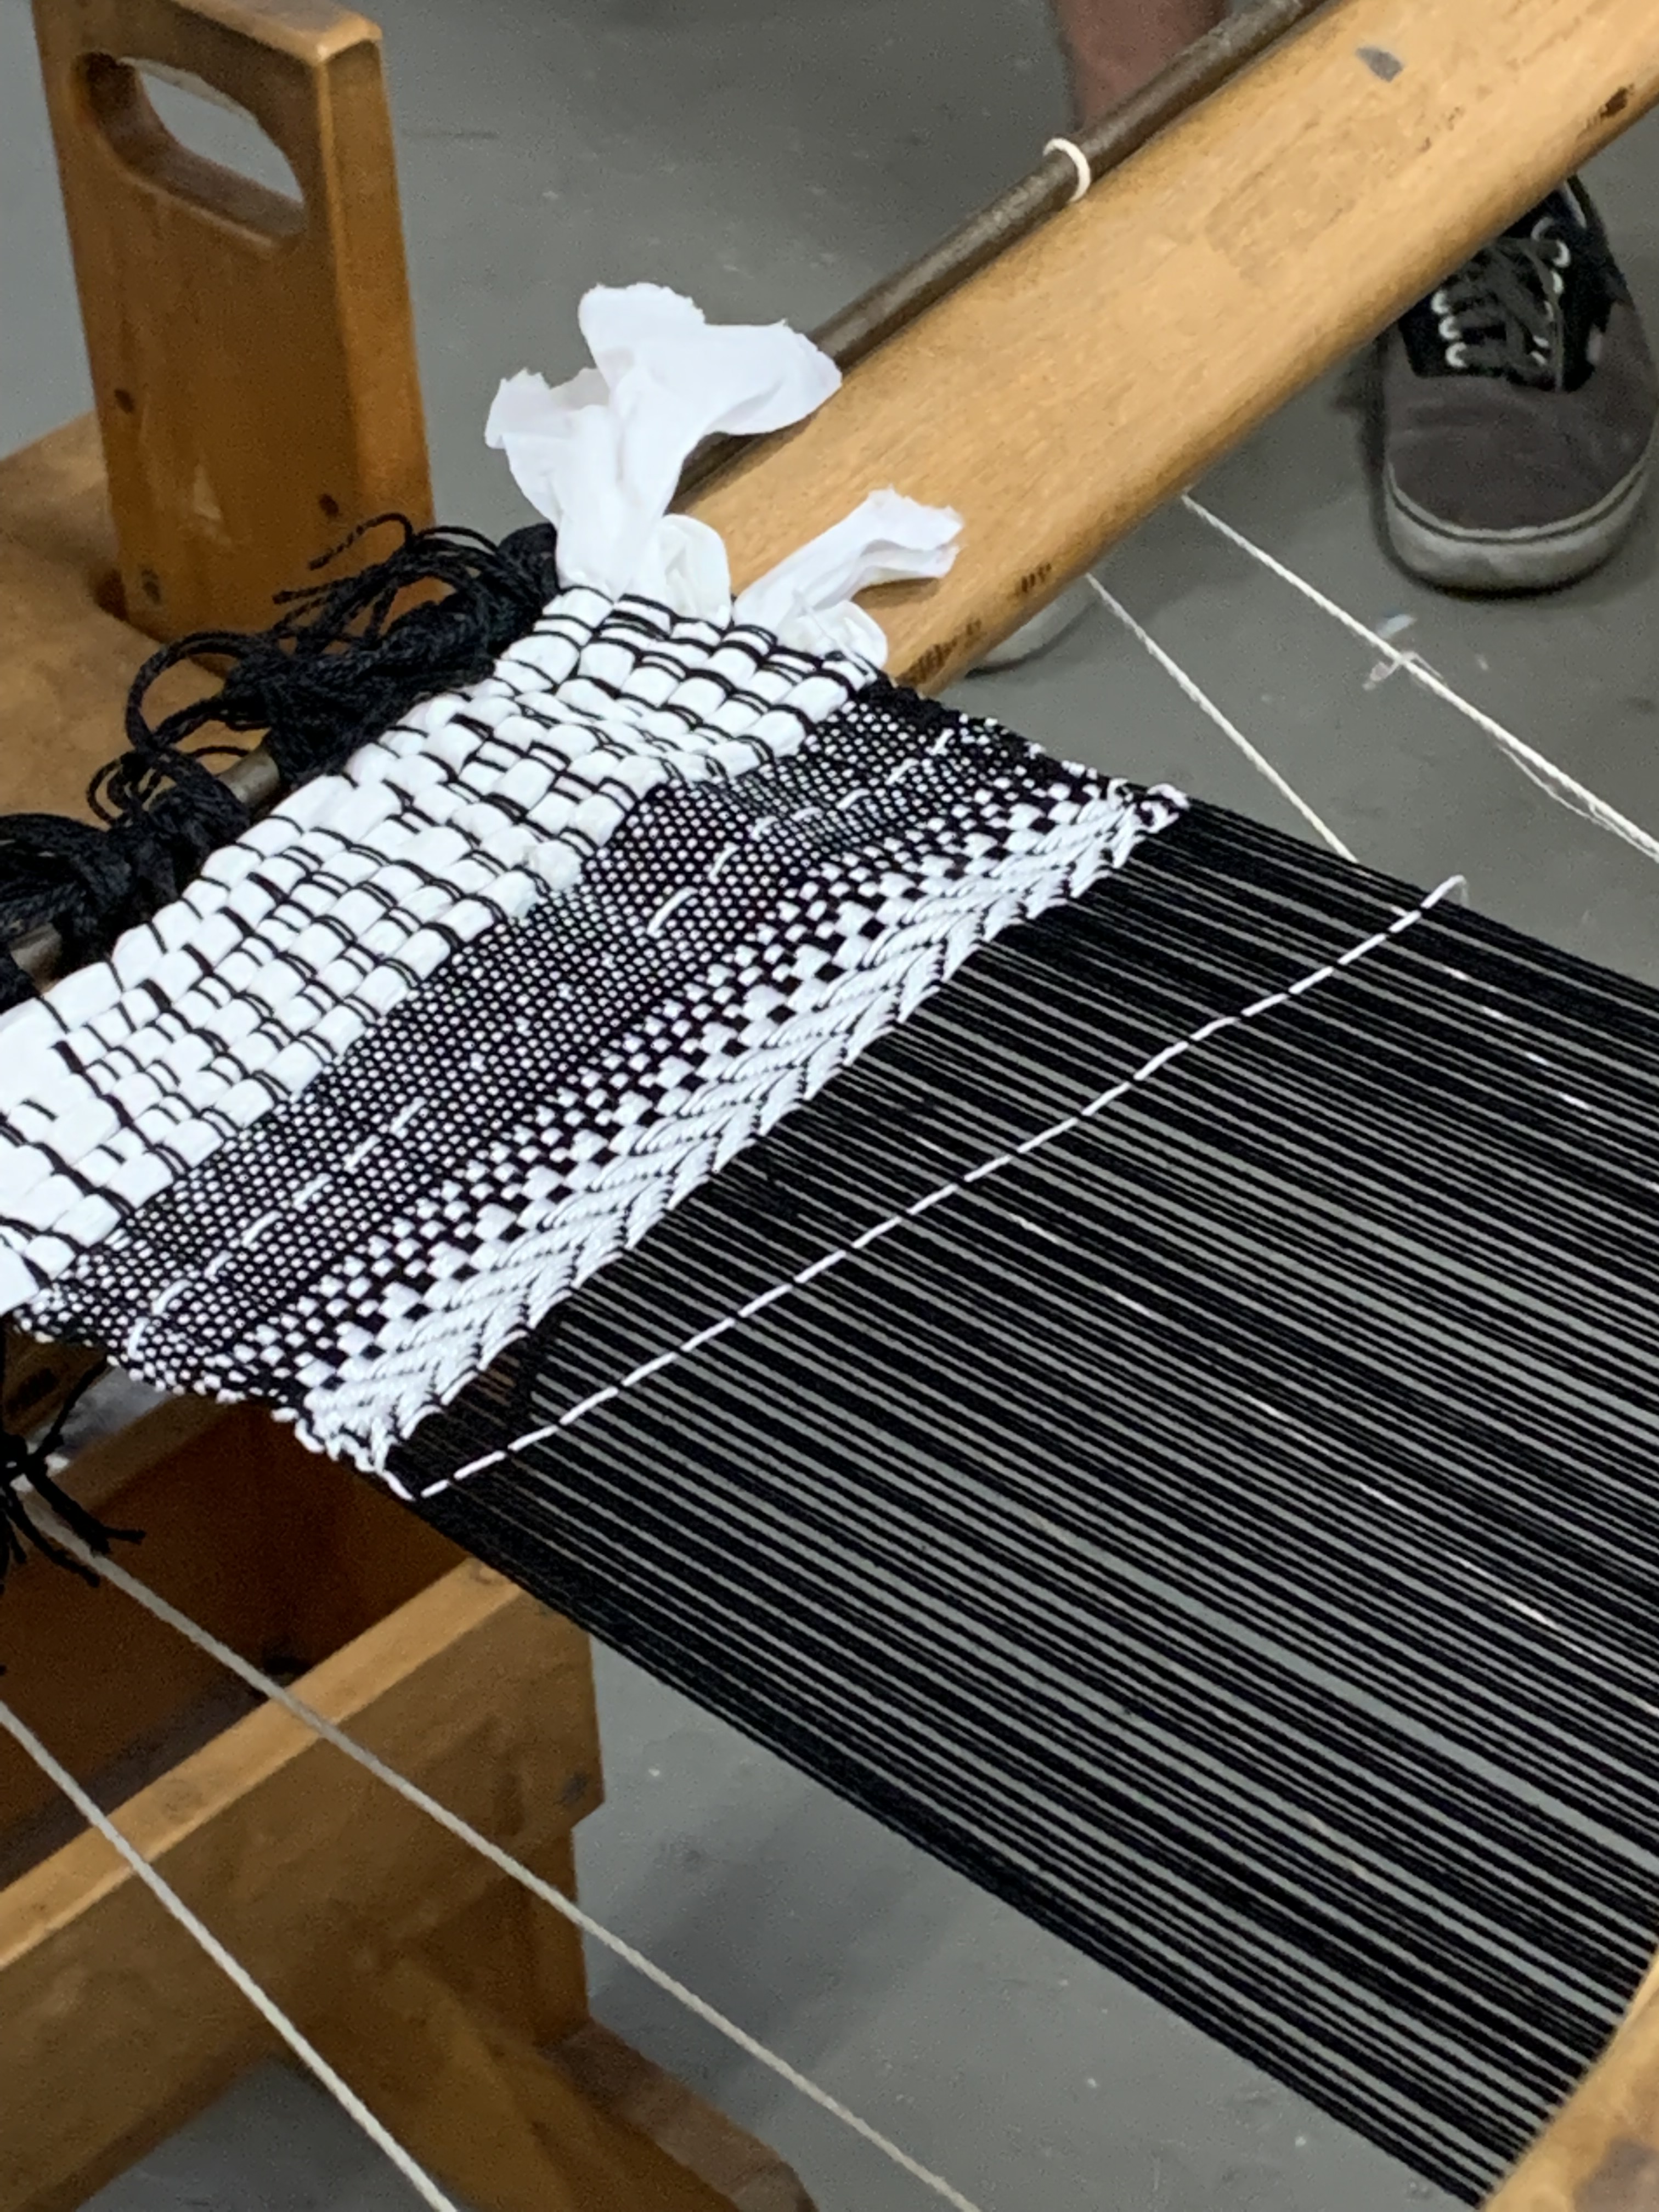
After we watched Mary Smull demonstrate a quick weave through the working of the loom, it was time to imagine this very tangible activity in the realms of the intangible – Ryan with his expertised in Grasshopper!

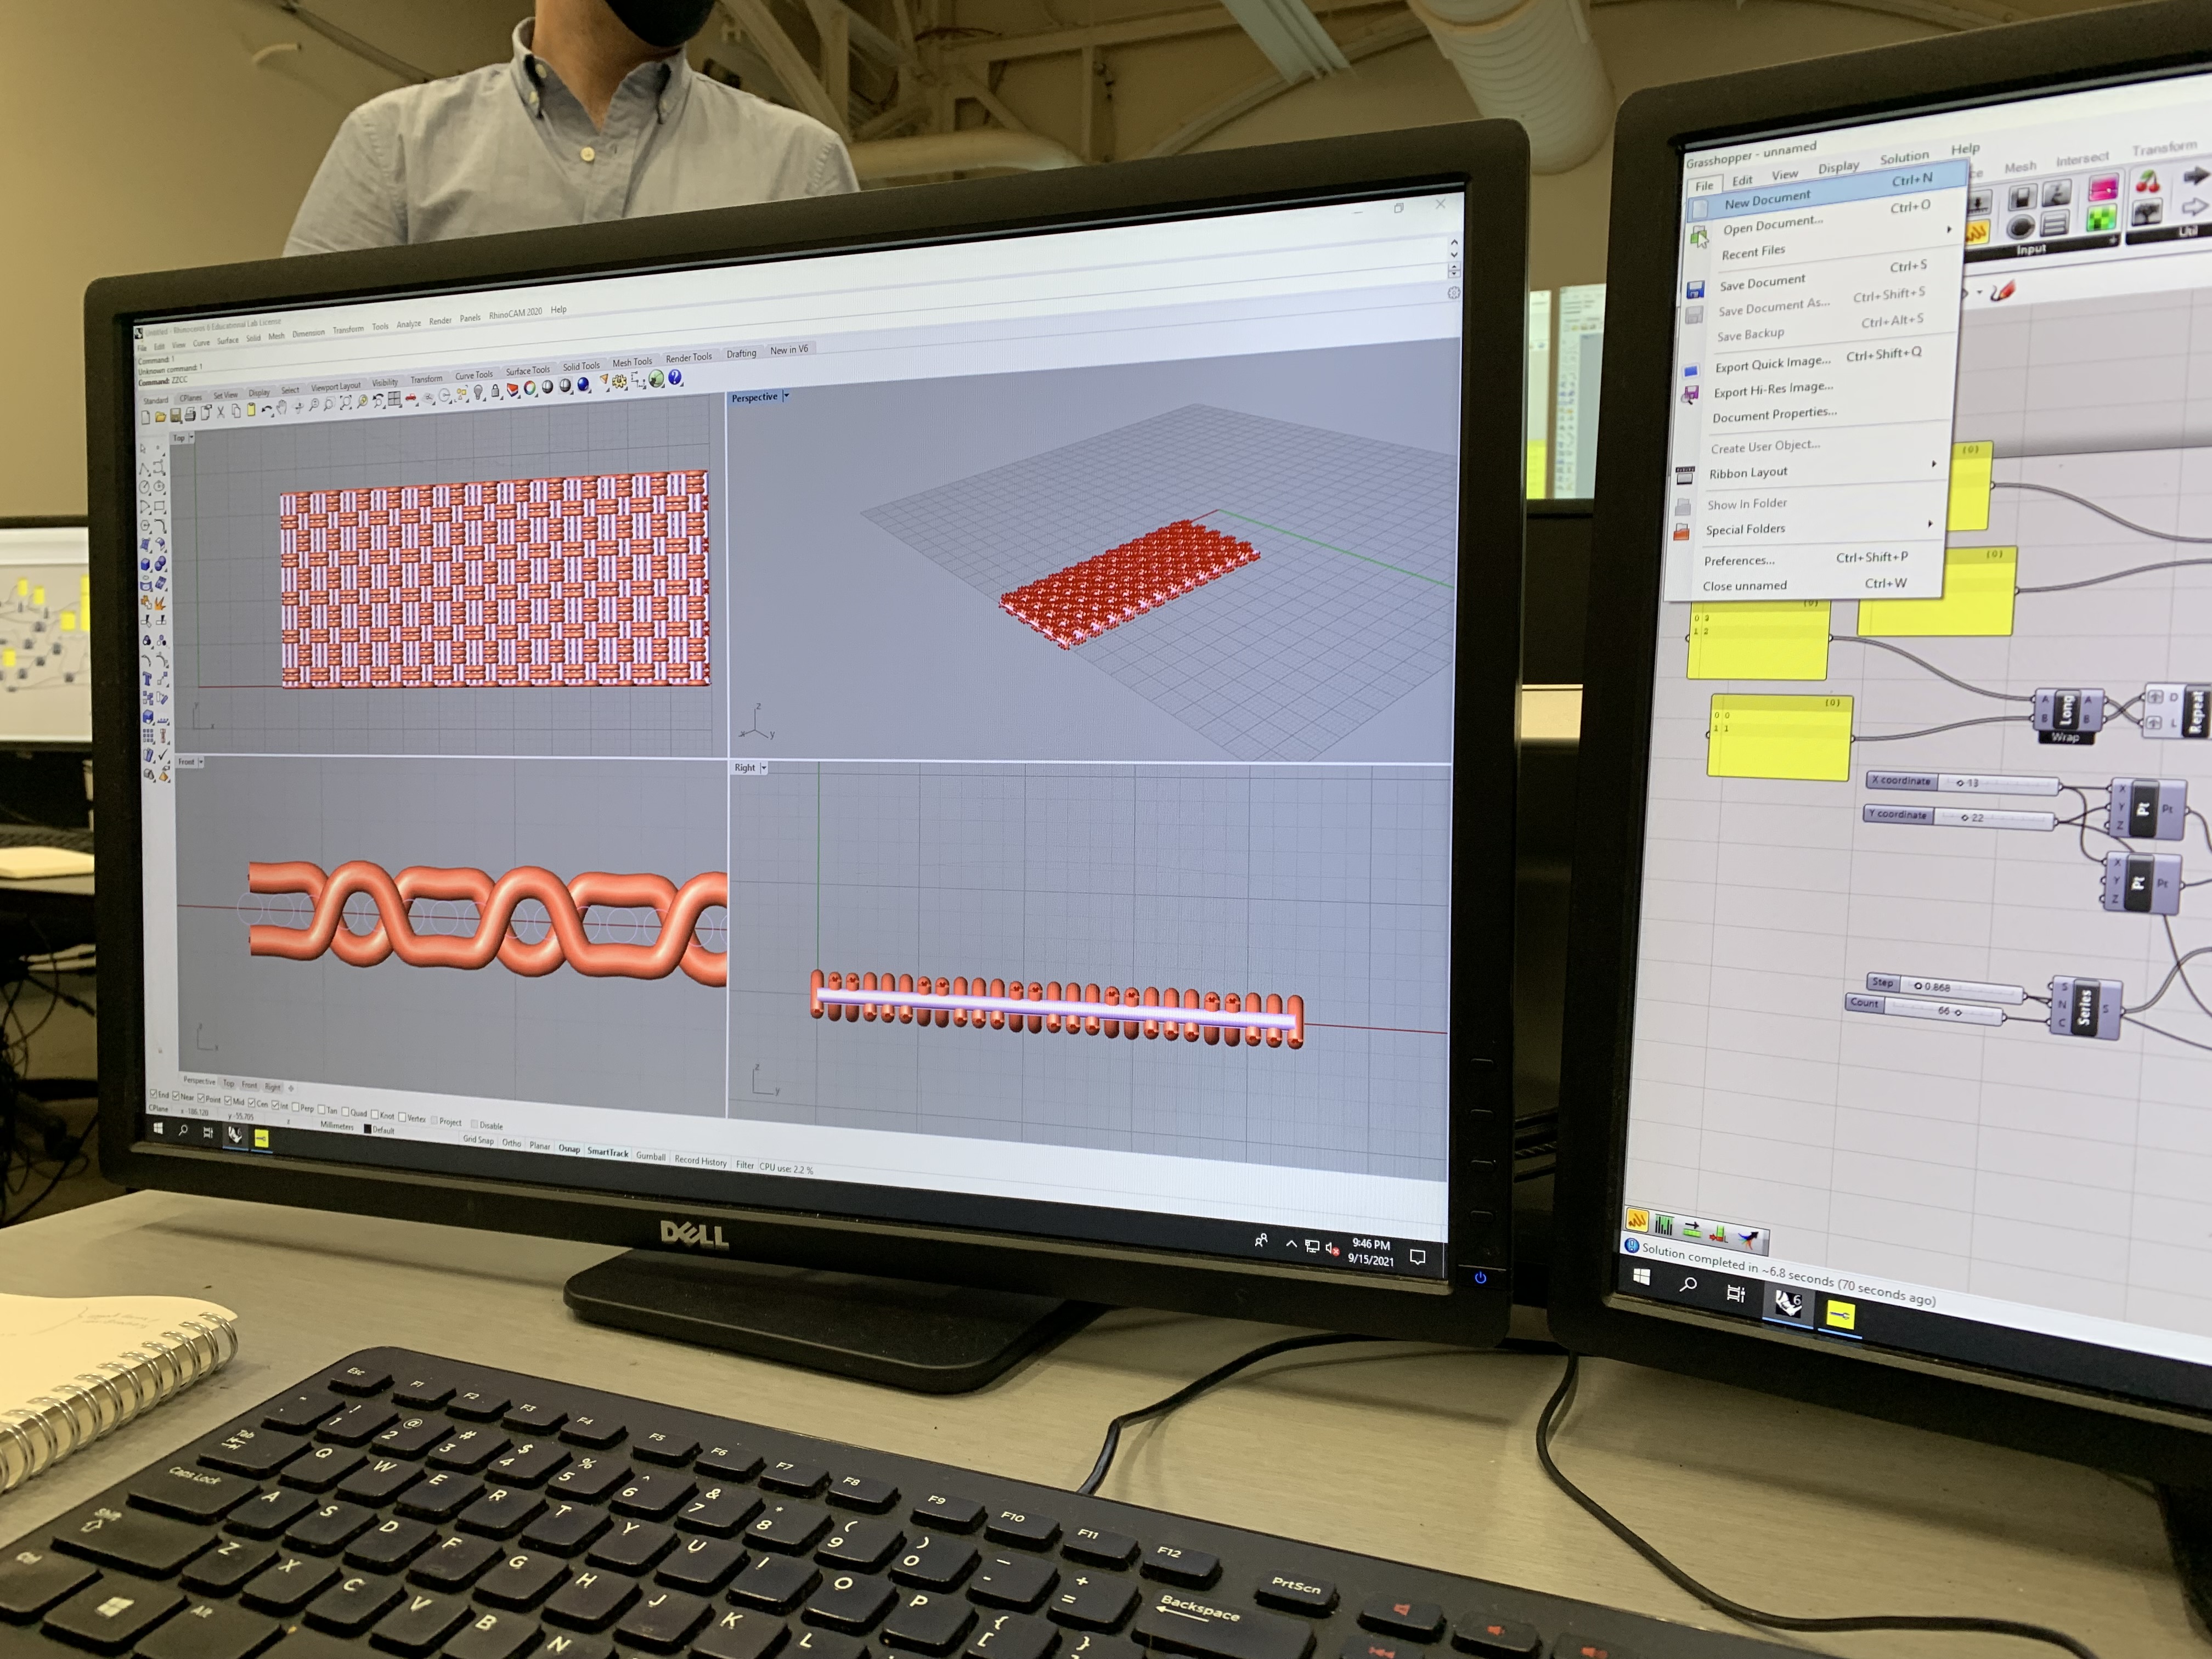

Through Grasshopper, we experimented with various modules and components that Ryan walked us through. Compared to the first use of Grasshopper I was lesser intimidated this time, so was able to grab a seat all by myself. Ryan made the process real easy for us to understand the capabilities of the software in a space where we would like to envision a weave before we actually get onto weaving it.
I found it rather playful, and felt the software was in turn giving me design suggestions in place of me telling the software what is exactly to be done.
A great way to conclude the lessons for the day was to work on an actual piece on our own, and our assignment filled in that learning experience. Look out for my next blog to discuss how the weaving experience went!
]]>This class was not what I expected in some ways I like how I’ve unexpectedly renewed my interest in weaving and been introduced to academic theories around craft practices.
At the same time, I’m starting to feel the same disconnect that drove me from industrial design > back to grad school for social design. Industrial design a field focused on products and physical objects is built on consumerism, mass-production, and marred by excessive waste.
Many talented designers are actively working against these flaws, but others like myself choose to move out of it into other areas in hopes of creating more tangible impacts on our communities.
Having been in this class for a few weeks I am confronted with the same thoughts I had that pushed me to return to school. There has been little talk of social impact, the impact of colonization on these practices, sustainability, or equitable access to these skills.
Are we just creating for the sake of creating with no consideration of our impact on the world and those around us?
Maybe I’m being premature in my critique?
A strong technical foundation is always helpful in any creative practice. And yet I feel it is our responsibility as makers to consider and discuss beyond just the technical.
Either way, my mind is starting to turn on how I might combine some of my technical textile skills (weaving, knitting, sewing, etc.) with my social impact work. How I’ll do this I’m not quite sure.
]]>Part 1
Last class we were joined by Laura Devendorf for an introduction to some of her work and a tutorial on her software AdaCAD used for drafting weaving patterns. The workshop was straightforward and the software easy to use. Although throughout the entire workshop I wished someone had designed something similar for knitting as I could see myself using that if it existed. Maybe it does? I’ll have to do some exploring.

Part 2
My favorite part of the day was getting so see the TC2 Loom in person! I was amazed at how many threads were being used and how detailed some of the woven pieces were.
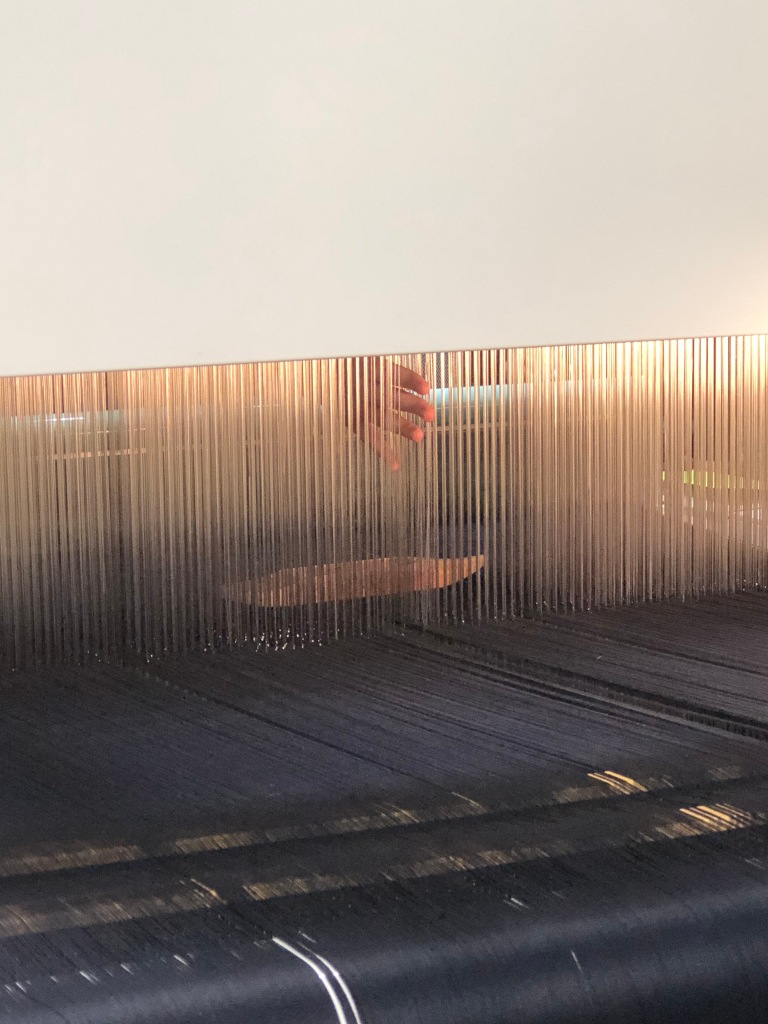
The example of the use of cybernetics by military forces and spy agencies to shape the local situation is a powerful example of what Wiener warns against in The Human Use of Human Beings: technological development mediated through exploitation, and connected to the exploitation of the surrounding peoples and culture.
The same can now be said for corporations, which in some cases have overtaken government agencies as the primary extractive machines.
As we explore these concepts we may wonder what makes us human, what makes our life, our values, our culture, what it is that we hold sacred, that we seek through our culture. Many of these values and concepts are created by what happens in our world. We are shaped by our context and relations. What concerns Wiener is the use of cybernetic machinery to propagate extractive values. To reframe Wiener: how can we create machines that transform us into more liberated humans rather than dehumanized products?
In A Third University is Possible, la paperson argues that even in machines designed explicitly for colonization (such as missionary schools or large research universities) glitches can arise which lead to unexpected decolonizing behavior. One example is the rise of decolonial Martinique philosophers such as Fanon and Glissant, both of whom were educated in France, in the same country that colonized their homeland.
la paperson proposes the creation of a type of ghost within the machine, a scyborg that emerges as a decolonizing agent of technological subversion–subverting in the sense that it interrupts and outgrows technological hierarchies.
The scyborg is also necessarily paradoxical. In order to be a scyborg the machine must, in the first place, be objects or technologies constructed for colonization, that is, in cultures where such artifacts were used to institutionalize and reproduce hierarchies.
How can we engage with the machinery of our local university setting from the point-of-view of such scyborgian agents? How can we corrupt the signals and create new modes of social relations, both human to human, machine to human and human to world?
]]>Oh, and I can’t wait to see that optical illusion manifested on the loom!
LikeLike
]]>LikeLike
]]>It definitely helps! With the ease of access to information, sometimes it is easy to get caught up in the bigger picture of things (which of course, is not to say that it’s a bad thing to be informed on issues outside of your own microcosm). It’s nice to be reminded to think about my own small little part of the world, too. Certainly seems a more functional approach!
LikeLike
]]>
It was pretty enjoyable, and reminiscent of the Grasshopper weaving we did the week prior. Though, I found the AdaCAD software much more fun and easy to use overall. The interface has some quirks (which is totally understandable given it is a one person dev team!), and the controls took a little getting used to, as happens with any new program. It was even fun to just see what others were coming up with, or to try to upload a bitmap image just to see what would happen.

I actually found myself just playing with the software in my free time, without any outcome or goal in mind. As a “graphic designer,” I found it a nice change of pace to work in more of a binary way. Plus, the changes were easy to say in most cases, which is kind of refreshing when a lot of my work sometimes relies on micro changes that are unnoticeable to most people.

We also got to look at the TC 2 Loom, which was a fascinating piece of machinery. I suppose I was expecting some large, complex looking machine that took up an entire room and that was hard to make heads or tails of. But, it turns out, it pretty much just…looks like a big box and also a loom. I didn’t realize that it still required the user to use a shuttle for the weft. Here we have this (what I consider to be) complex machine that produces lovely, beautifully complex weavings, but still contains a human element. Though I don’t know that I could visibly tell the difference between something purely woven by hand via the clicks of a mouse, the notion of the hand passing the shuttle through the shed certainly feels more endearing and somewhat romantic in this increasingly digital age.


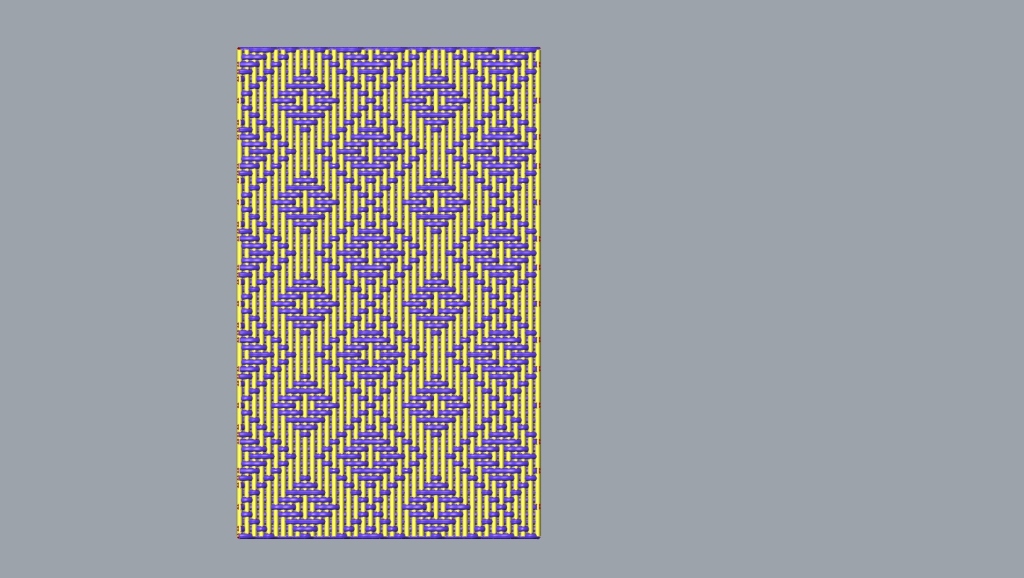


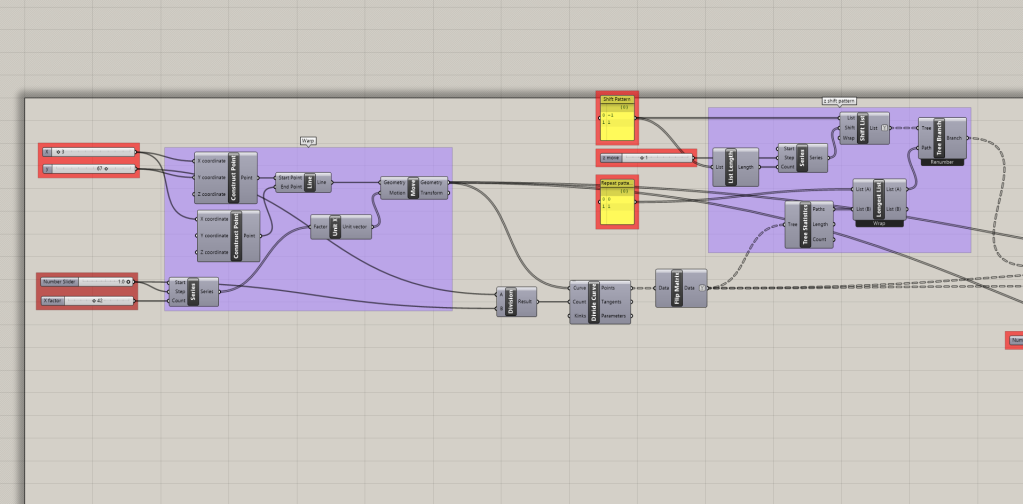
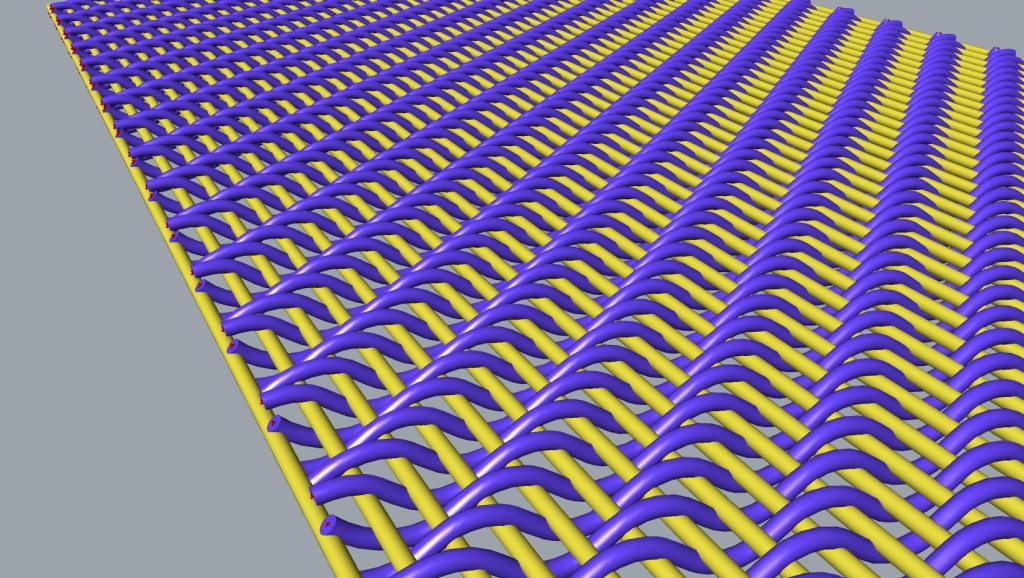
This workshop followed our lesson on traditional weaving, and the demo on the floor loom. Having seen that demo on the traditional loom, the risers and sinkers in grasshopper made a lot of sense in visualizing the simulated cloth. In this exercise, we created digital cloth through a progression of grasshopper components which created a series of evenly spaced pipes as the warp and a set of perpendicular pipes in the opposite direction which oscillated over and under the warp according to a set pattern. With this set-up we were able to recreate several traditional weave structures such as plain weave, twill, basket, diamond, reverse twill, etc.
While this was an interesting demonstration of the technology available to us, I think there is a lot more room to explore this process further. In the reading, the authors weaved on complex surfaces in grasshopper. I think that’s a place to start, but from there could you take that data and weave a structure which naturally conformed to the modeled surface after coming off the loom? How could this be used to reduce waste in the fashion industry?
]]>
two-pic
Coming into this week, I was very excited to learn more about the TC2. I think this will be a rare opportunity to access this machine, which I might use for my final project. I am considering trying to translate some of my instax square photographs (slightly smaller polaroids) into weavings, specifically placemats. I like the idea of ephemera storing personal memories (notes in the margins, shoeboxes for past romantic relationships, pictures on the wall behind my favorite bar). I have been shooting with instant film on an almost daily basis since the beginning of 2018. This year, I started to use the photographs in different ways (performance, video, bookmaking, archive, etc.). I like looking through my pictures. I like seeing my friends, places I’ve been, and people I miss. By turning the photographs into placemats, I will add an inviting softness to my pictures (I hope). In my head, I imagine friends and family sharing a fun meal with each other (using my placemats). At the end of the night, they’d collect the placemats, now with a couple new stains and loose threads, and put them back in the drawer.
picture of my mom
picture of my friend jc holding my other friend’s dog’s (rae’s) paw

My favourite feature of AdaCAD is the ability of the program to read a photograph and translate it into a weave draft! For the home work we were instructed to create two weaves 180 warp but 240 weft, with 12 rows of selvedge. Below is a sample of one of my patterns, based off of an optical illusion image.

Can’t wait to see the patterns come to fruition in next week’s class.
]]>What an utter pleasure to weave on the loom. I had no idea how therapeutic the act of weaving would be. Our homework was to weave an inch on the floor loom, but had it been a greater length of weave I could envision reaching a meditative state.
For my personal inch I improvised with a left-leaning twill stitch. I had drafted a pattern for a basket weave but discovered whilst making the pattern that I don’t have 3 legs! I went with Rhea to execute the weaving so after we each completed our personals we decided to collaborate and co-weave the basket pattern I had drafted. It turned out to be absolutely beautiful and yielded the powers of collaboration!


In class we had the opportunity at last to discuss the readings. I really struggle with the acoustics in the classroom so had little awareness of what was being discussed and still feel lost in some of the texts we have covered, in particular Spuybroek’s The Sympathy of Things.
I will follow with a collection of notes from the discussions:

After learning how to use a tie-up draft to manually create diagrams of different weave patterns, Ryan Hoover collaborated with us to create a Grasshopper script, which allowed us to use parametric design techniques to quickly test out different weaving patterns in Rhino.

The result is a simulation of a basket weave:
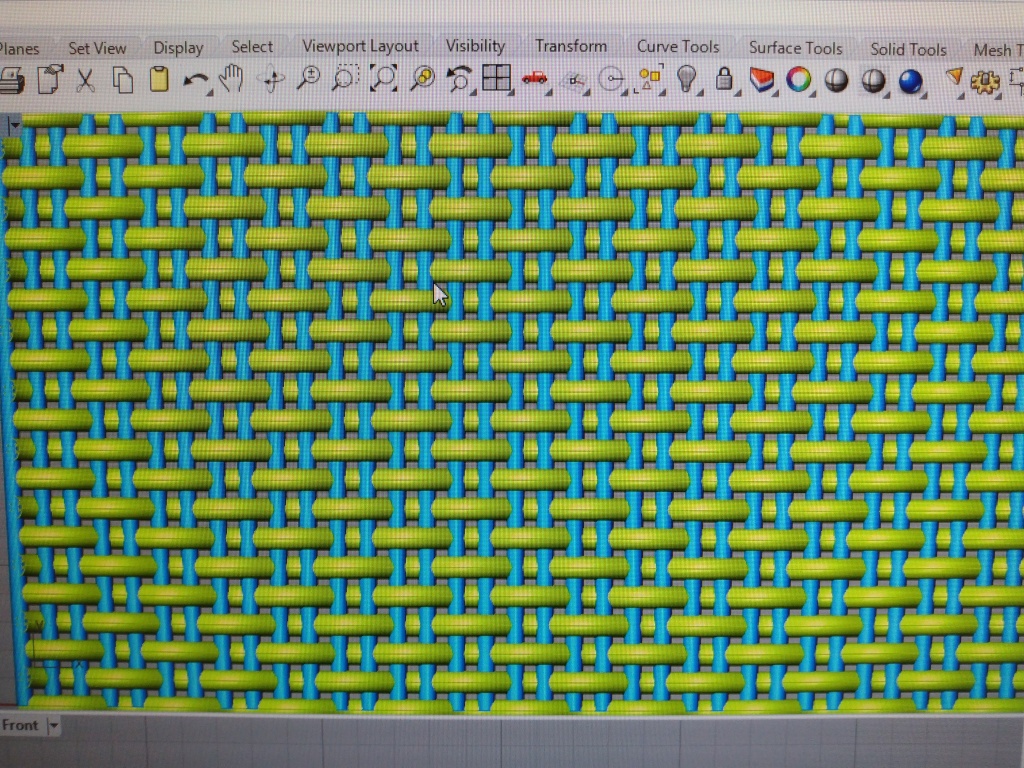
With just a few parameter tweaks, we can get a diamond twill weave:

Finally it was time to do some of my own weaving in the loom. I started with a simple basket weave…

…moving to something slightly more complex, I tried my hand at a twill weave…

…finally I thought I’d go free-form. Thinking back on our class discussions and readings of the loom as a digital machine, I was inspired to see what information I could encode through my threads. Using the template of the numogram (which is based on the number 9), I encoded by raising the treadles so each pair would add up to 9 (1+8, 2+7, 3+6, 4+5, 5+4, 6+3, 7+2, 8+1). What ended up was this interesting diamond pattern…

Cybernetics – the science of communications and automatic control systems in both machines and living things.
Human beings love control. At least I think so. When we feel like we lose control, we subconsciously seek out ways to get even more. In the reading, Weiner defines control as a way of sending messages to change behaviors of the recipient. After spending way too much time on definitions and explanations, he finally reaches the most powerful point of the chapter…that we shouldn’t exploit humans for power and control…the inhuman use of human beings. A point I wholeheartedly agree with.
Part 1:
The first part of the workshop was taught by artist and weaver, Mary Smull. As a class we went over a brief history, technical terms, and a tutorial of how to operate a loom. The final part of the workshop was a brief intro into pattern documentation and instructions on how to write a weaving plan.

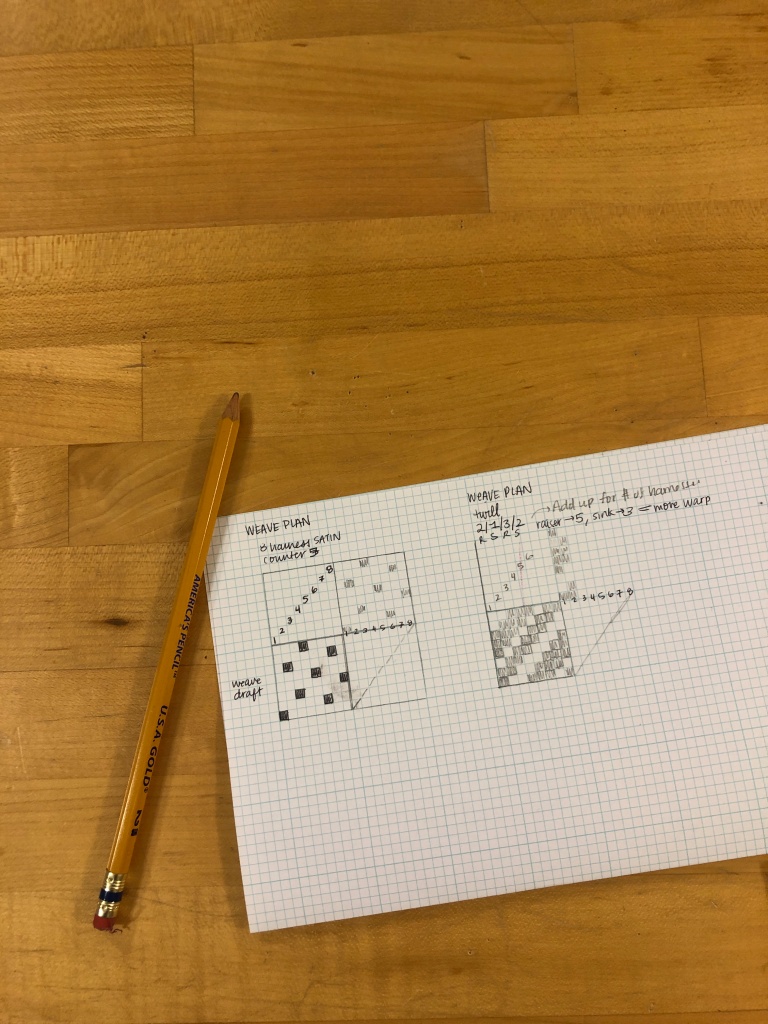
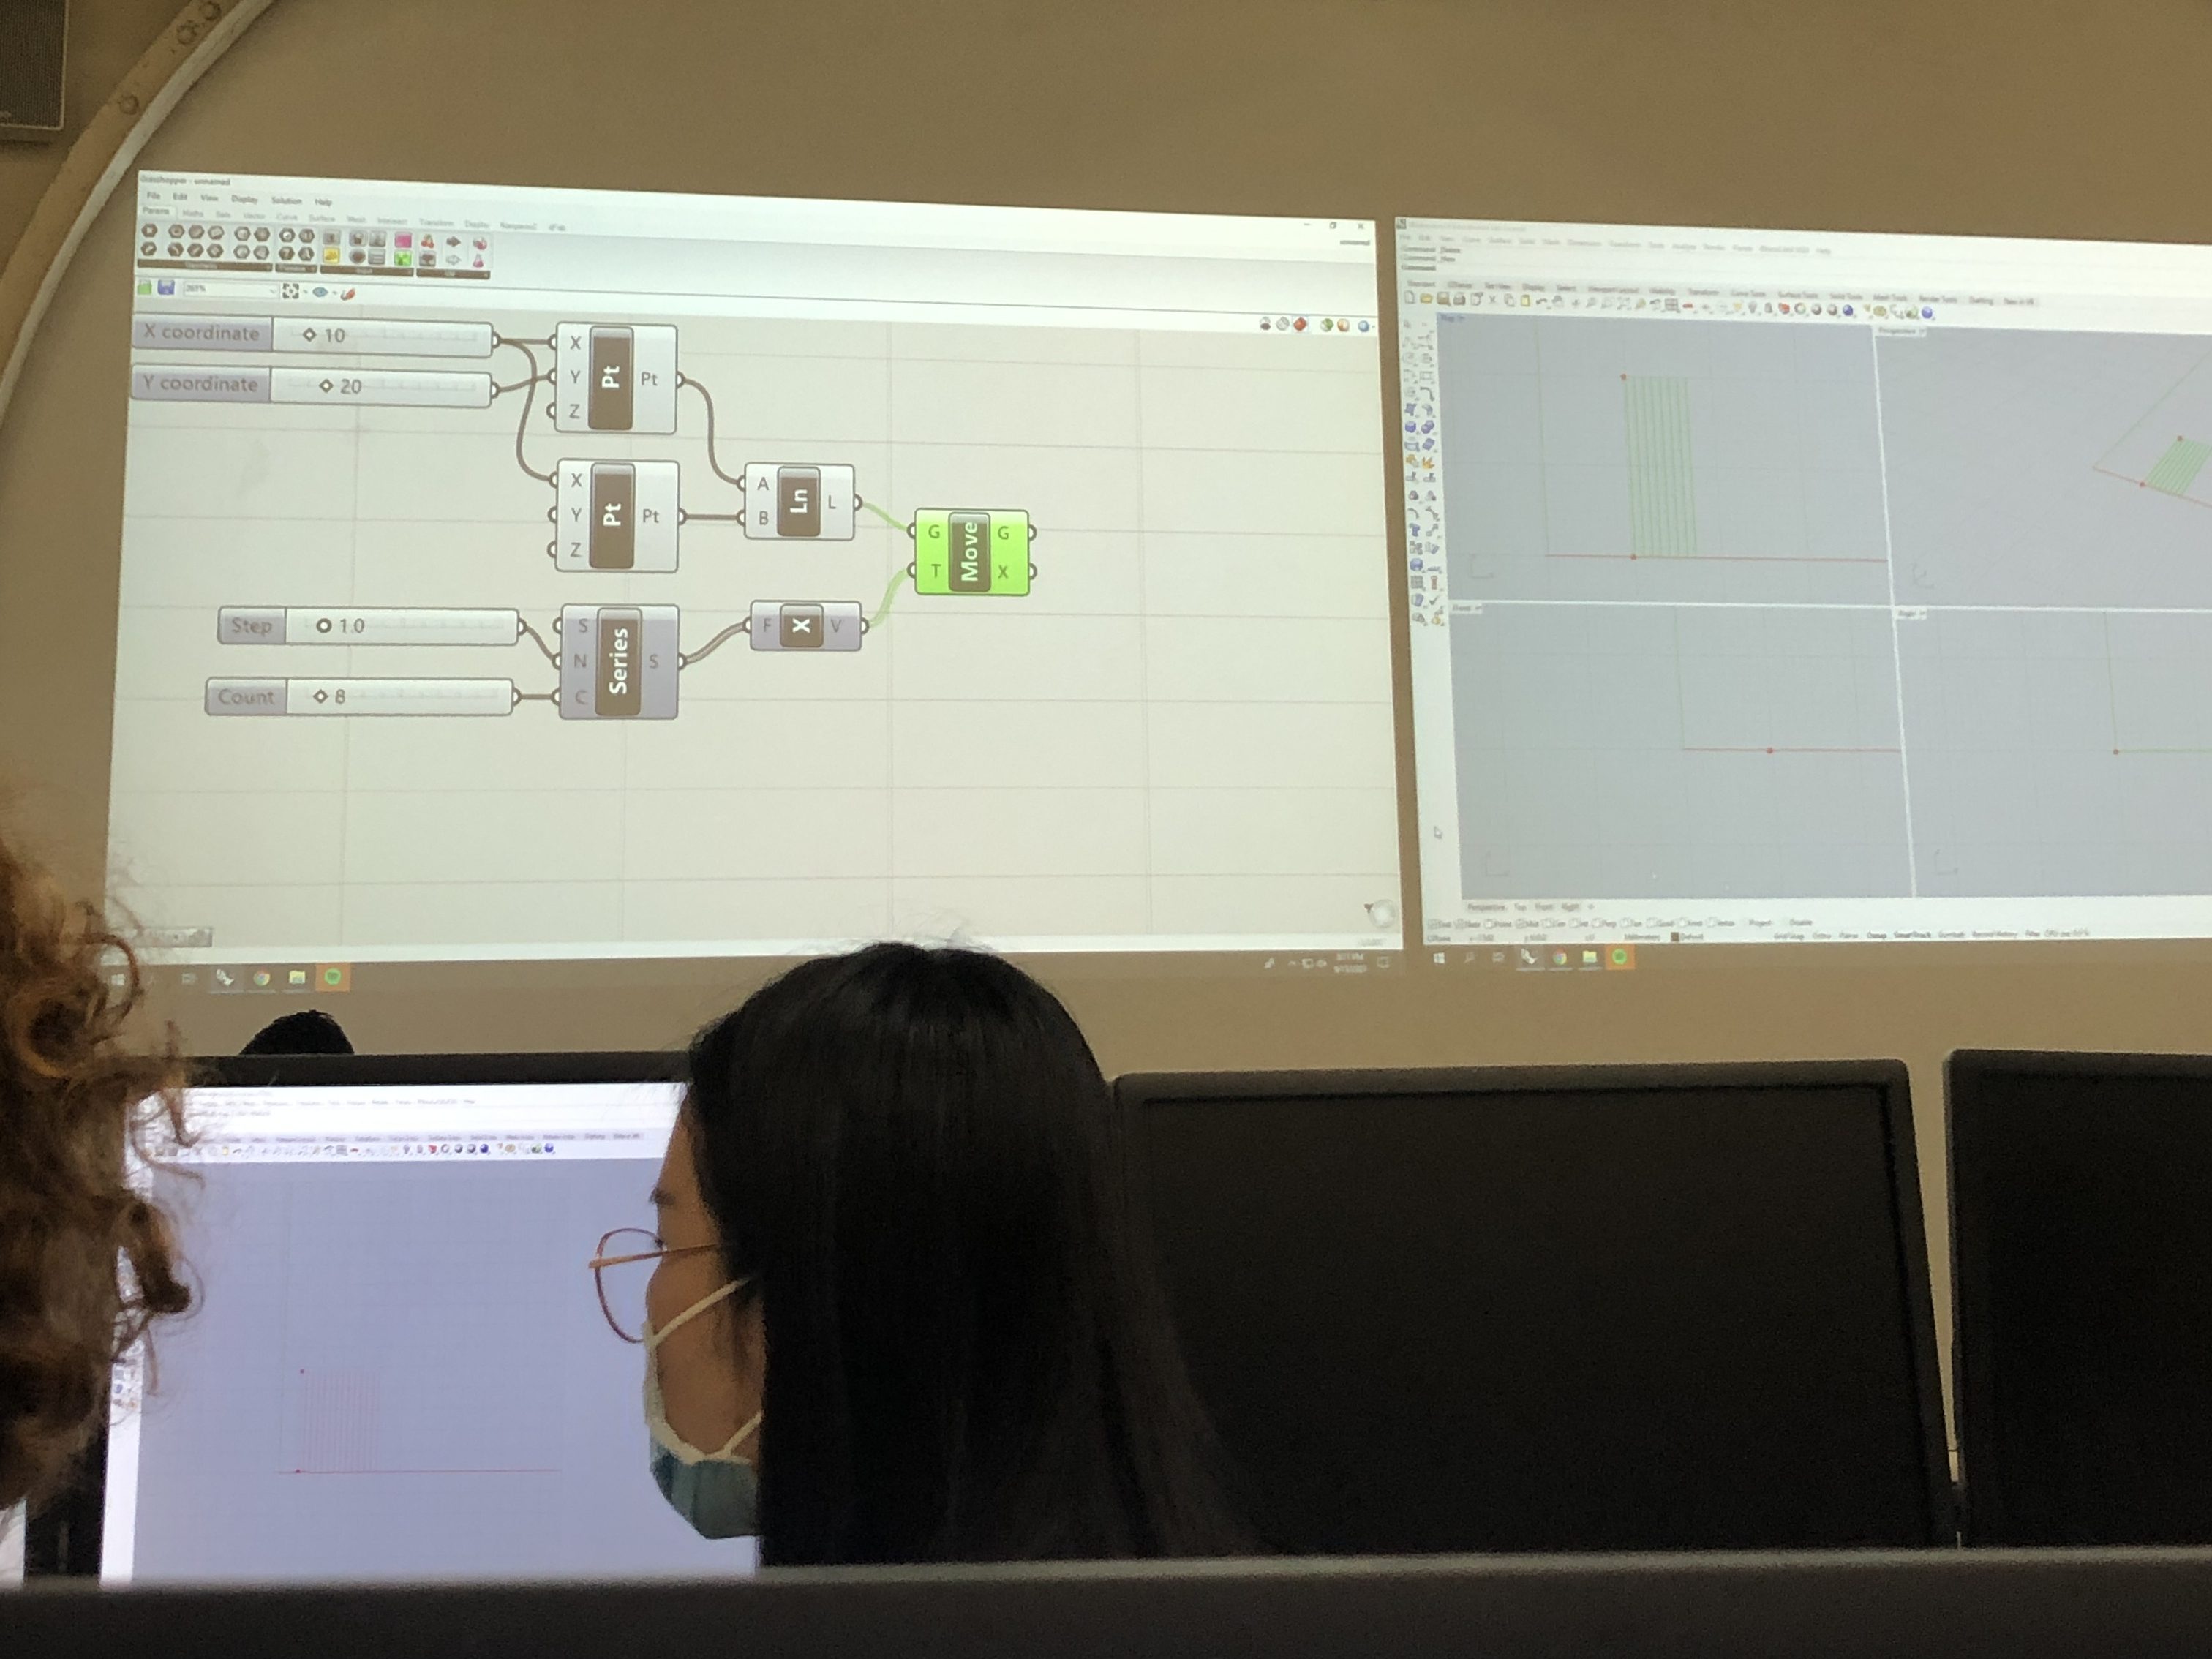
Part 2:
The second part of the workshop was a “digital” interpretation of weaving as a method of making. Using Rhino, we followed a tutorial on how to model a woven fabric texture in Rhino using Grasshopper. We experimented with different types of weaving structures including plain weave, basket weave, and twill weave.
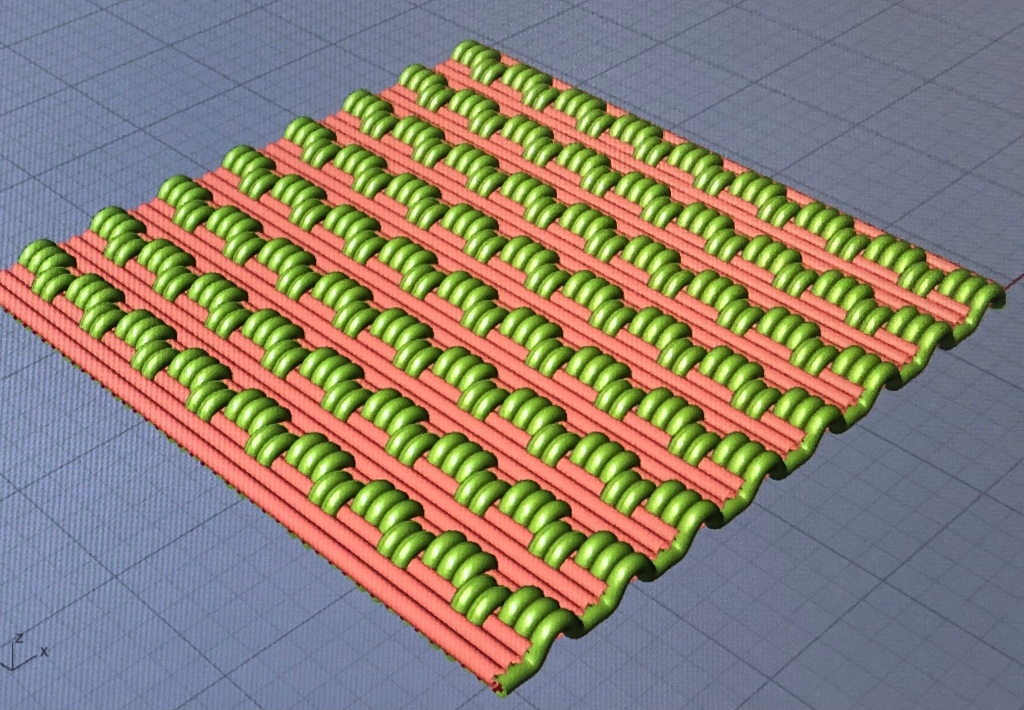

We are at an interesting junction of creation as a society. A place where we can question the way forward, a place where we can make amends for the damage done, while also applauding the human race for its technological achievements as a whole. But before we question the way forward, I think we need to enter a place for us to pause and reflect.
Pause and reflect on – What crafts mean to us? What is our criteria from bringing machinery into our lives? Was it solely comfort? What is our idea of control when it comes to leading our very humanistic lives, living in very humanistic bodies that are yet to evolve, and we are a very long way from there, evolve into systems of functions that can compete with the pace of technology we’ve built for ourselves.
Through a series of these readings, I came to a realisation that we are running to be a society that likes everything easy. We are lazy. We crave comfort. We crave ease of life. And my fellow counterparts to this argument would bring in the idea, ‘what is wrong with that?’. But this is where we need to reflect, comfort – at what cost?
And this very thought echoed in my head as I read Norbert Weiner’s ‘What is Cybernetics?’ From the Human Use of Humans. In his chapter, he says
“It is a degradation of human to assign him to a purely repetitive task, which demands less than a millionth of his brain capacity.”
We are visual creatures. We are creative creatures. We are creatures of art, of aesthetics, of culture and creativity. We are social beings. We emote. We express. We create. And we destroy. Then why are we heading in a direction that restricts this creative expression?
In Spuybroek’s excerpt from ‘The Sympathy of Things’ (read my reflection on it here.), he mentions how
‘If all craft must move to design, then all labour must move to robotics’. I say it must not.
This statement appalls me. It appalls me as it is devoid of what human labour, can bring to the table. Where I cannot completely dismiss the impact of labour moving to machinery, it would be rather destructive to the concept of craft to devote all its creation to machines. In David Pye’s book ‘The Nature and Art of Workmanship’, he mentions the idea of how even the machinery requires human intervention. Even the tools used to create craft and design require the human mind to peep into the process, ideate the process, and automate only the mundane practices, the ones with repetition, the ones that cannot be left alone with creative autonomy.
I strongly associated with Weiner’s statement in the aforementioned chapter –
Those who suffer from a power complex find the mechanisation of man the simple way to realise their ambition
Norbert Weiner, What is Cybernetics.
This was one of my favorite quotes, as I can directly associate it with the result of the attempts of the Chinese mechanising most of the Indian handicrafts, and passing it as ‘handmade’. Where machinery is a work of art in its own, provides its own value, and brings forth confirmation of consistency and quality at its finest, it was never meant to compete with craft. Craft in its inherent way of existence was never meant for the purpose of mass-production. It was associated with the rich, who understood the value, who kept it alive, and who were willing to undertake its exorbitant price. Many artists, craftsmen and artisans realised the power in this, in reducing their art to a mere means of livelihood and putting their economic bystanding before the craft itself, and began selling these machine goods as handmade goods, thus reducing the very beauty, ability, and also the quality of the craft itself.
We’ve come a long way from wide eyes at crafts, to lost of trust in its practice. Culture is rooted in trust, and we gave the same in the hands of machinery.
]]> ]]>
]]>
Response to Postscript on Societies of Control
Gilles Deleuze in this essay analyzes the transformation of our society from the disciplinary societies, a concept put forward by Foucault, to the societies of control. In the disciplinary societies, controls happens in a more visible way as the members in the society were mostly regulated under the enclosure in both time and space. Quite different today, the control are merged into institution, economic system and technology, which are more variable, undetectable, and welcomed for us who are enjoying the benefits of the changes. According to Gilles, the corporation replaced the factory, the market replace the production, the computer replaced the machine.
Getting out of the enclosure in the disciplinary societies brought about new narrative. The society is more dynamic and fluid than the previous version, but so are the human inhabit in it. They are given more choices while facing competition on a wider scale and higher level, and unrestless request on them to keep lifelong learning. They are tamed by the “passcode”, which, in the disguise of social narrative, guards the access of information and resources, instead of the “watchwords” in the disciplinary societies. The new societies controls people with the illusion that they can take the control, and thus people acquire the motivation to comply with the rules of the game.
]]>part 1: traditional weaving
This workshop is an interesting combination of traditional craftsmanship and the digital interpretation of it. First Mary Smull led a lecture on weaving, introducing us to a list of alien terms of the craft. It was the first time for me to learn about the structure of a loom, and how to read a weave draft. The weaving patterns mainly falls into 3 categories: plain weave, twill and satin.


part 2: digital weaving
Ryan led us through the process of building up the script for virtual weaving. As a graphic designer who always draw or build model directly in the softwares, I was amazed by the behind logic that controls the outcome, and to some extent, overwhelmed.


Response to Generative Algorithms
A comprehensive introduction to weaving and the digitalization of the very traditional craft. Though I still feel alien to grasshopper, the chapter patiently leads me through the logic of how weaving can be realized in the virtual space. The reading also answers my question from last encoding the environment workshop that why some geometries are overlapped in pattern, which created unexpected dimensional texture in the outcome.
I think the reading serves as a nice handbook which breaks down the overwhelming script into small steps for people who are new to the area. It also shows how computer translate the schema of the human craft into a numeric way that creates a new language for both human and machine.
]]>Yes, machines are the present and the future, we created them through a process that feels like craft, but they are only tools. Tools capable of this “workmanship of certainty”, which is useful, which allows us to enjoy the world by helping with the basics, but just that, the basics. They will never take over crafts, not in quality, emotionality, or even quantity, even though they usually do, we’re still capable of mass production. An example of this is Ai Wei Wei’s exhibition “Sunflower Seeds”, which are literally 100 million small sculptures, hand made and hand painted in porcelain. We don’t see this often, but art gives us a way to understand that capabilities are still there, still present.
In the end our bodies function a lot like machines, they respond to stimulus, they react, they move in an almost unconscious way, so why keep wondering about the job of machines, when we are one.
*
]]>Thanks for the well written post. This is a great summary of the class with terms and everything. I like that you included your notes/illustrations from class. I like that you are adding some humor to this (“ramen noodles”). Also, I feel exactly the same about the Grasshopper stuff.
Best,
David 🙂
LikeLike
]]>Thanks for the thoughtful post. I agree with you that the Deleuze essay was pretty depressing/pessimistic (in a way that is difficult to disagree with). One thing I thought about was the scale of it. By that, I mean that I feel like Deleuze is talking about society as a whole (which is a lot of people/space/stuff). I like to think about things on a smaller scale sometimes (like my family, friends, or smaller community stuff). Not sure if this totally relates to your post, but I hope it does.
Best,
David
LikeLike
]]>- The appreciate of amateurism (Pye). (This is a main part of my artistic practice)
- The importance of feedback as it relates to communication (Wiener).
- The increasing complexity of institutional influence/power (Deleuze).
I did not fully understand Wiener’s transition from communication to anti-fascism, but I like that he saw a need for anti-fascism within the discussion of technology (This makes sense given the post WWII timing of this publication). I liked the end of Pye’s essay much better than the beginning. I feel like he tried to make a sort of grandiose and unnecessary semantic point with “workmanship of risk” and the “workmanship of certainty”. Seeing Pye’s work, particularly with his fluting engine helped to clarify his writing. Deleuze’s writing felt dated. Considering it’s from 1992, this isn’t so much a criticism as an observation. The notion that institutional power has changed from the standard family, school, military, and factory systems to the corporation seems fairly mainstream at this point, but I could be making an incorrect assumption.
]]>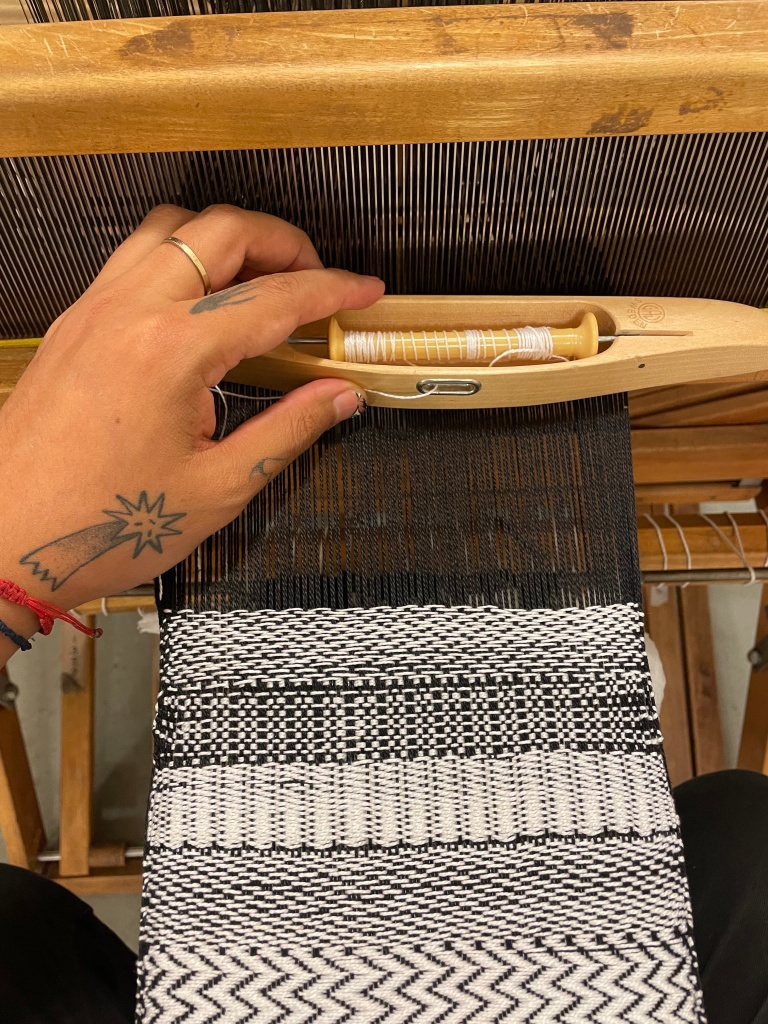
LikeLike
]]>
Mary went over the history of weaving, discussing the variety of looms. She brought in a plethora of weaving examples, and then showed us a variety of types of weave drafts (plain, twill, satin, basket, etc.). All of this was new information for me, and it found it to be fascinating. Some highlights were how different weaves create different structures and effects, and the punch-card system for jacquard looms. For example, a lot of towels use a waffle weave to increase absorbency. I didn’t know that punch-cards started in weaving, and I am glad to now know that lineage.
For the second part of class, we used grasshopper to create digital weavings. I was able to learn a little more about grasshopper, and the renderings themselves were interesting aesthetically. They reminded me of things I would see on the internet growing up, around the Y2K era.
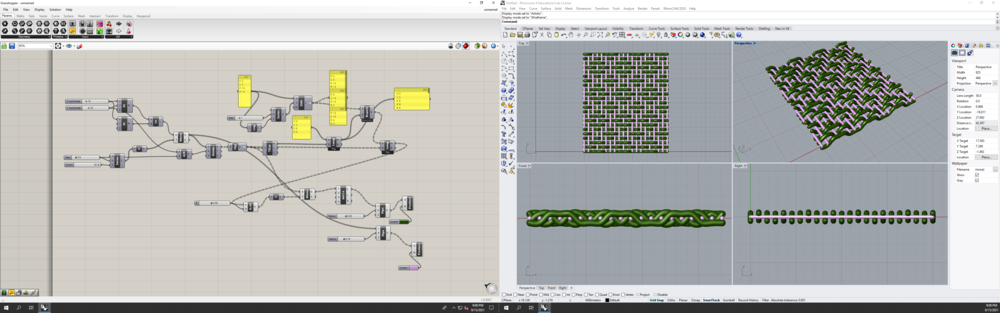


Later that week, I contributed an inch or so to the class weaving. I made up my own pattern based on spelling out texts on the phone keypad. The pattern was 4,5,6,8,3,9,6,8. It spells “I love you.” Because of the way the loom was set up, I had to use one of the plain weave treadles as “9”. For the most part, this resulted in only 1 of every 8 threads acting as a raiser on each row at a time. In turn, the weaving is very weft heavy, which made it feel very soft. I feel like that softness goes with the theme of the weave I chose.
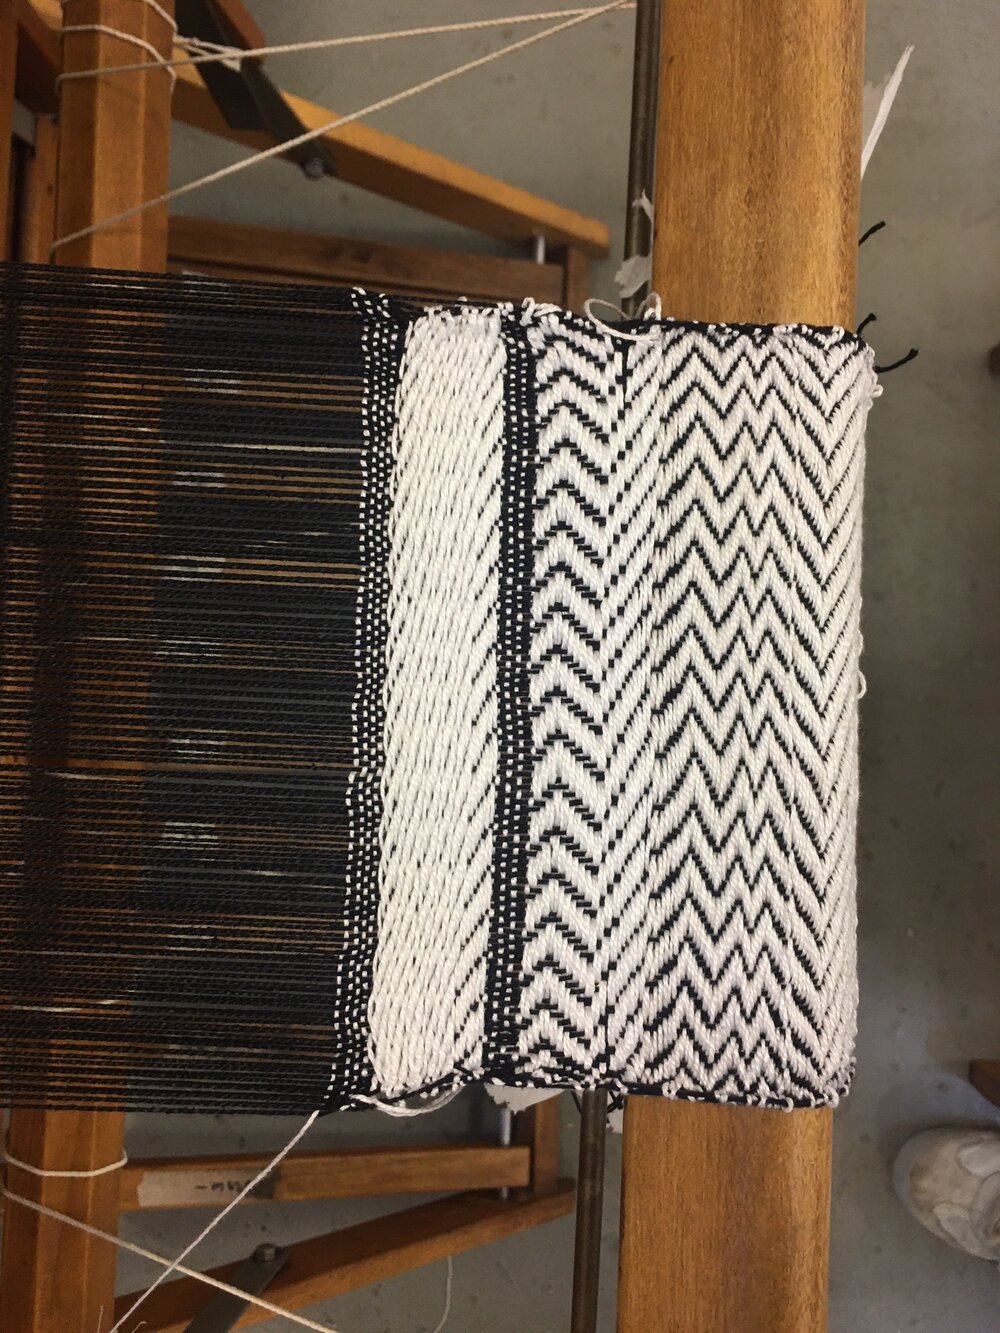


I was familiar with some of the terminology such as warp, weft, shuttles, and shed sticks, thanks to a GTI with Liz Ensz last spring, in which we made and wove on a frame loom. But learning new terms like raisers and sinkers was cool (and these were aptly named, which I appreciate). Plus, seeing a multi harness loom in person helped me grasp just how many variations are possible, even on relatively small and simple looms like the one we practiced on. Though I had some familial background in both loom weaving and basket weaving, I don’t think I had ever sat at one and tried it. I am pleased to say it is as fun as I imagined! I could definitely get a sense of the semi-meditative aspect of it and see how time might fly by quickly while doing it.

Next, we moved into weaving in a digital space using Grasshopper. Ryan walked us through how to build and link the components to create a digital weave, which was pretty cool. While I don’t always understand the behind the scenes of what the component is actually doing, the ability to be able to change variables and instantly see the difference in output is really, really cool. I worked with Augusto, who had some experience navigating through Grasshopper. Together we created some pretty cool looking weaves. Every time we thought it couldn’t look cooler, we tried changing something else and continued to be in awe of the output.

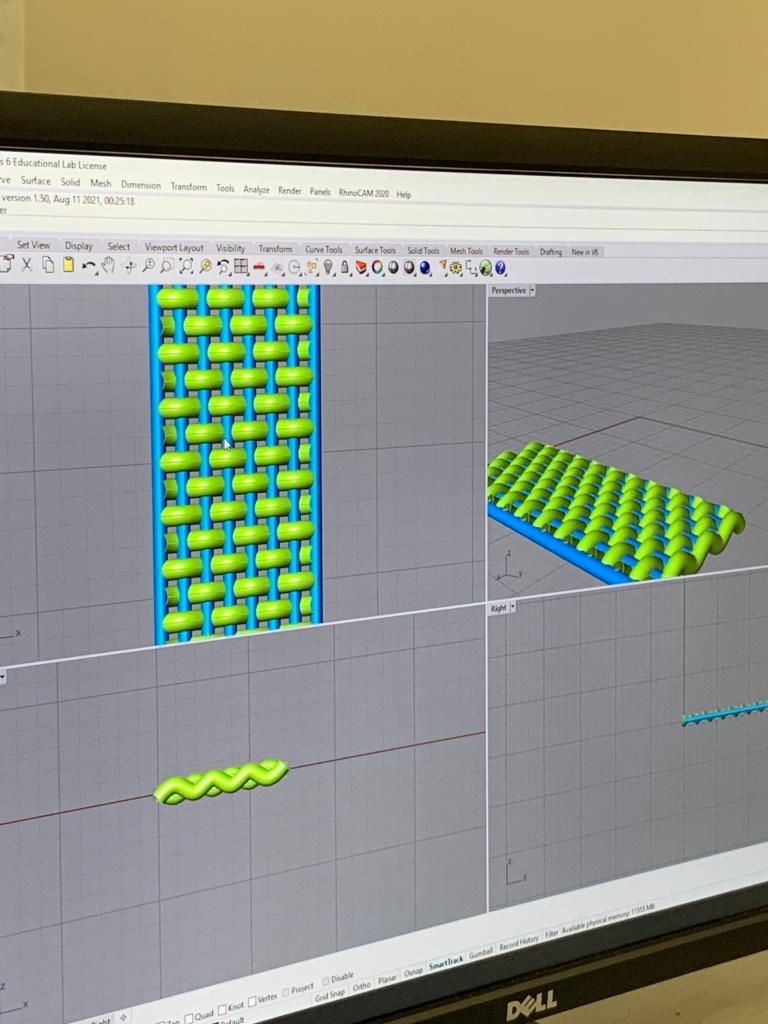


Our weaving workshop was one that greatly excited me and perfectly fit my interests. We started by learning about how weaving patterns are drafted, how patterns are created and followed, and how the floor loom is operated. Using a floor loom was something I’ve wanted to do for a while, and I was impressed by how simple it was to operate yet entirely mind-consuming to focus on the correct order.

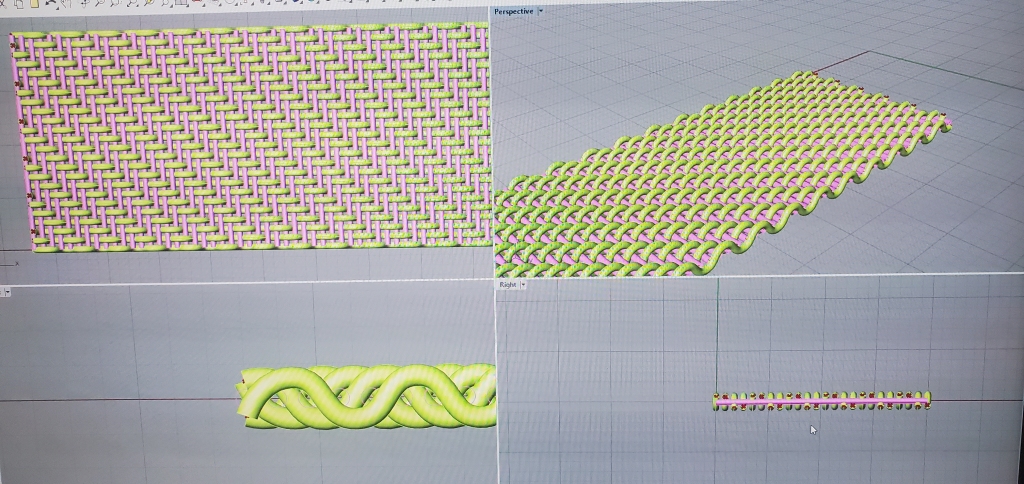


We then moved onto digital weaving using grasshopper. Rather than working one row at a time and weaving over and under every strand, the grasshopper script subdivided the “warp” into evenly spaced points, horizontally (along the “weft”) spaced the points above or below the “warp” alternatingly, then connected the points to create the “woven” “weft.” By altering the input lists, we were able to experiment with different variations of the twill weave.
Last year I already experimented with this weaving script to create the respective pavilion and bus shelter shown below. Although I was unaware of the pattern variations I could input, I did do my own slight variation in which I made both “warp” and “weft” weave above and below each other.


Following these two projects I created a lifesize woven structure using reed, creating a more organic form and surface pattern. I really enjoyed these projects and therefor found this workshop extremely helpful in my process. It was a great refresher on how weaving scripts work and an expansion upon what I already knew.

My first introduction to weaving was when I was back in my first two years of undergrad. Sarah Saulson, a very talented weaver and teacher, introduced me to a new method of making. I had extensive experience in knitting, but through various textiles classes, I learned how to dye, sew, and weave. Reading this article unlocked all those early lessons. It’s been about 2 years since I sat at a loom and reading the familiar terms “warp” and “weft” made me realize that I missed the practice.
]]>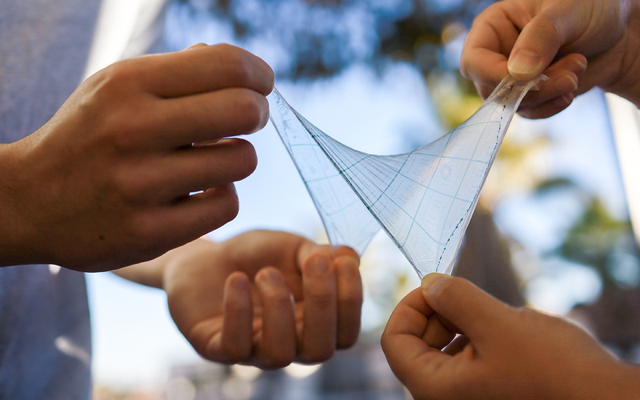
https://physics.aps.org/articles/v14/130
Seems to be real flexible circuit: transistors made out of flexible stuff.
To make stretchable electronic devices, it’s not possible for us to simply swap the silicon with a polymer
Zhenan Bao of Stanford University
]]>The method developed by Bao and her colleagues fabricates 2- μm-wide transistors from semiconducting polymers using ultraviolet light. The first step is to coat a silicon wafer with a water-soluble material and then with a stretchable, inert material, which acts as the base for the “skin.” On top of this base, the researchers deposit a roughly 150-nm-thick layer of a conducting polymer. Rectangular structures are then created in this layer by passing ultraviolet light through a patterned mask. Exposed regions form bonds, or “crosslinks,” between polymers. The crosslinked parts become the gates of a transistor, while unexposed polymer regions are washed away.

She reinforced that weaving really is just two perpendicular intersecting yarns at a point on a x and y axis. However the variables of material, scale and spacing can produce infinite combinations between the three types of weaving (plain, twill and satin). It dates back as early as 7,000 years ago in the middle east and the equipment has gone through many a transformations.

Some additional vocabulary that I found helpful from the workshop was that in pattern drafting, the black squares are raisers (is above the weft) and the white squares are sinkers (sitting below the weft). So a pattern with mostly raisers will be more weft dominant and vice versa!
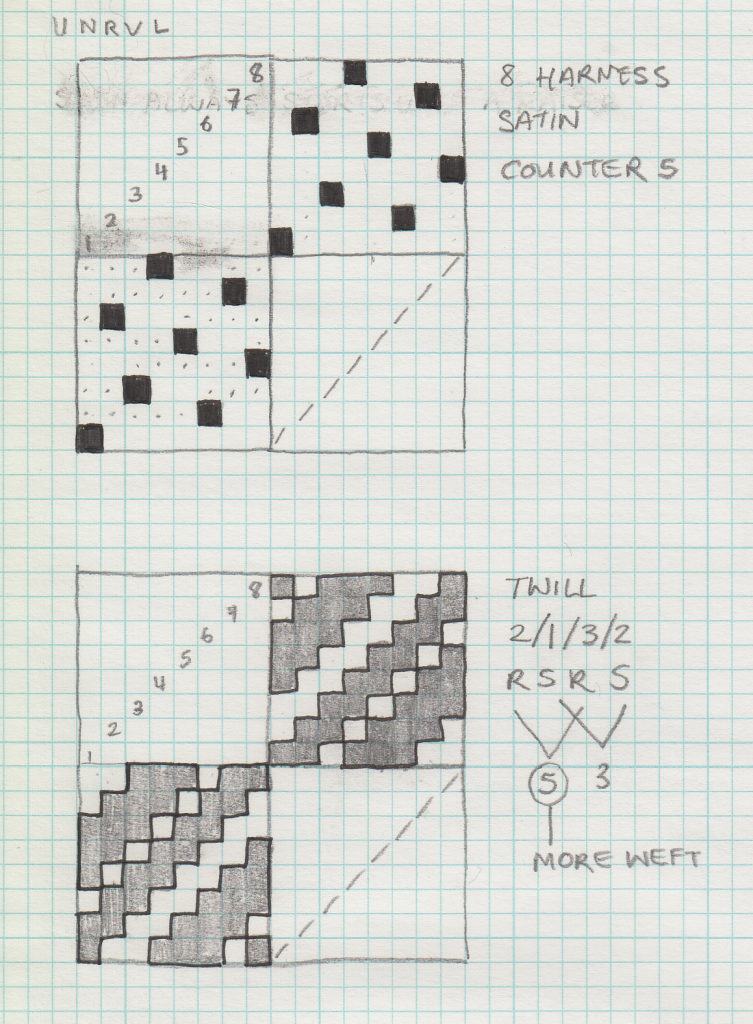
During the second half of class we had a workshop with Ryan on Rhino and Grasshopper to produce digital weaves. As per usual with Grasshopper, I got the hang of the functions without fully understanding what I was doing and had my mind absolutely blown by the results. I managed to keep pace (barely) and produced some of the following weavings:
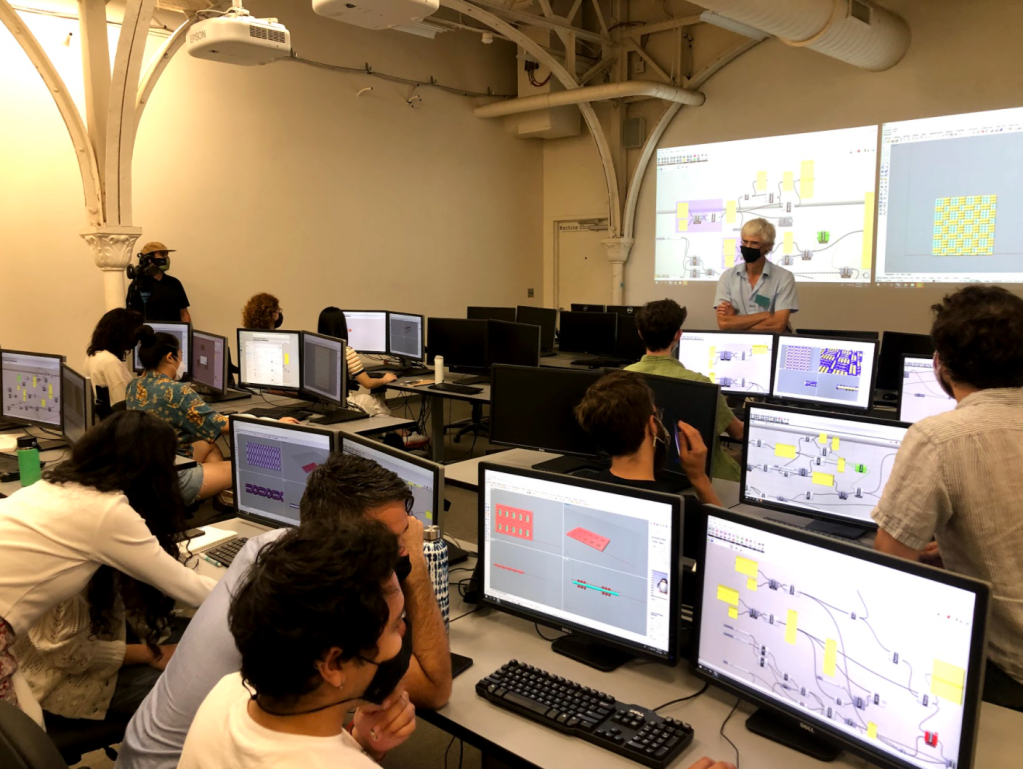


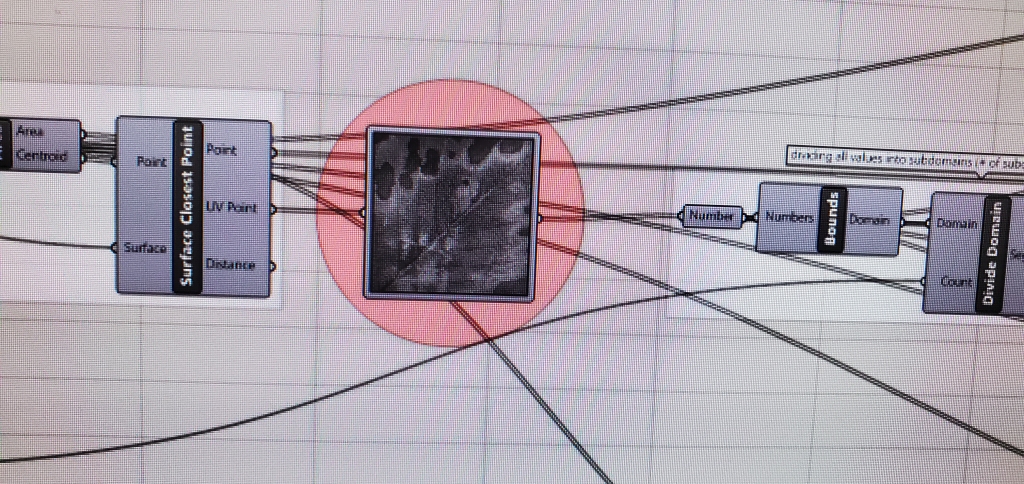
We started by finding an image – we chose a close up of a leaf – that we brought into Grasshopper code that broke the image down into pixels by tone.

We then created our own vector-based based pixels that the Grasshopper code replaced in for the pixels by tone, effectively abstracting the image beyond recognition.

After plotting our new pixelated image out, we stretched fabric over the image and proceeded to trace over our lines with hot glue.

When unstretching the fabric, the hot glue acted as a barrier, ensuring the parts of fabric it merged with remained stretched, creating an incredibly interesting 3-D topographical-in-some-areas-shirred-in-others almost sculptural piece that was inverted from the front to the back.

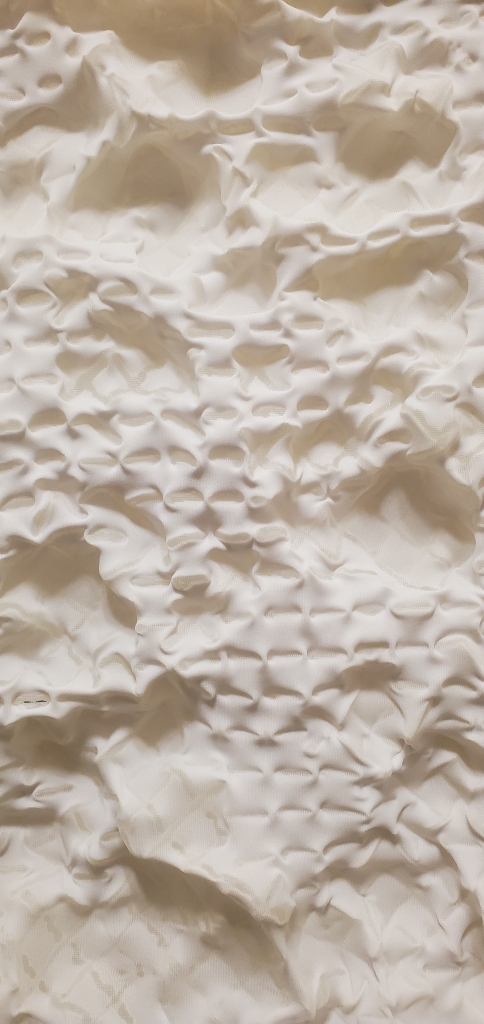


I enjoyed photographing it from multiple angles, seeing how the shadows exaggerated the forms when seen from a side and how light seeped through and highlighted the hot glue lines when looked at from underneath.

Overall, the process was extremely fun and just to my liking. I’ve always enjoyed going back and forth between analogue and digital mediums and this experiment showed me a new way to do just that.
]]>Plain weaves are noted as the strongest, most common, and most prone to variation. They are balanced, in which the weft and warp threads appear equally on both sides of the fabric. They also lend way into tapestries and pictionary based weavings. Each weft thread goes over and under every other warp thread, then reversing that order on the following row.
Twill weaves can be either balanced or unbalanced, in which case the fabric’s face would be the reverse of its back. The weft threads in a twill move over a group of warp threads, each row starting one warp thread to the left or right of the last, creating a diagonal pattern and fabric that is best suited for work clothes and suits.
A satin weave creates luxurious, smooth fabrics by intersecting its warp and weave threads as far apart as possible. It must be unbalanced. This weave confused me a little as it feels to me as though it is a variation of the twill weave, based on how I understood it.
]]>I was daunted by Rhino and Grasshopper at first. BUT the fun experience eased my anxiety about learning a new complicated software, and triggered my thinking on how the technique and pattern-making can be utilized in my project.
1 Image to Pattern
Our team made an image out of the overlapping portraits of ourselves and cropped it around the eye. The grasshopper script, though intimidating, showed its magic in turning a pic to a piece of unexpected pattern according to the grey scale. We added geometries resembling eyes and eyelash.
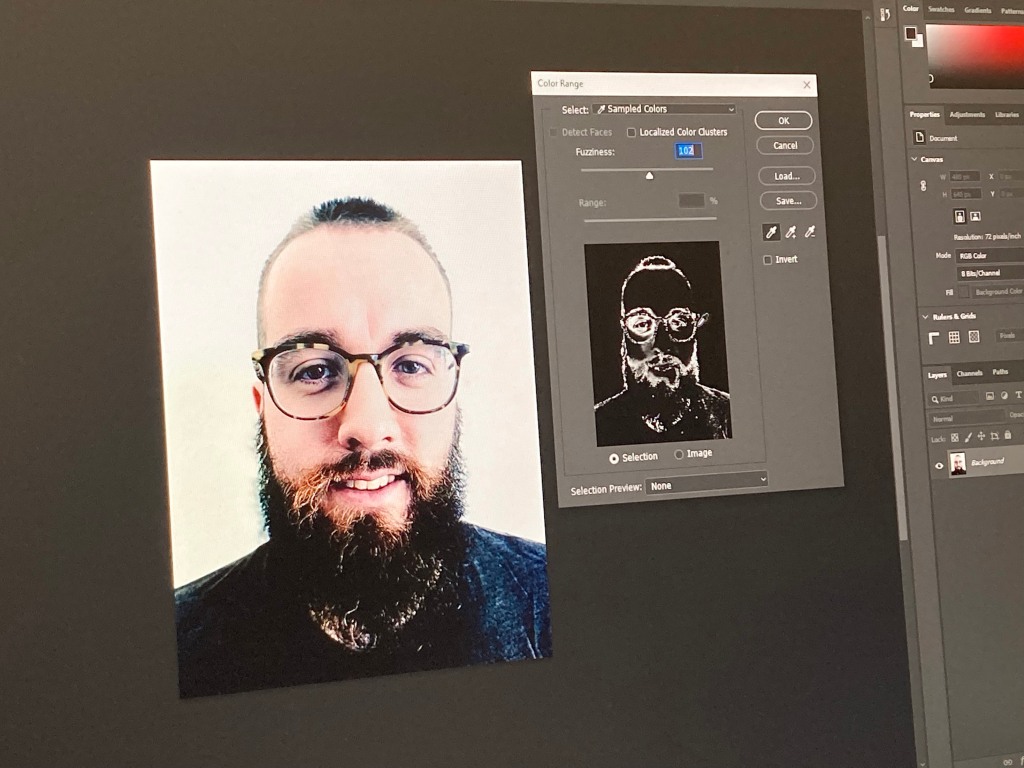
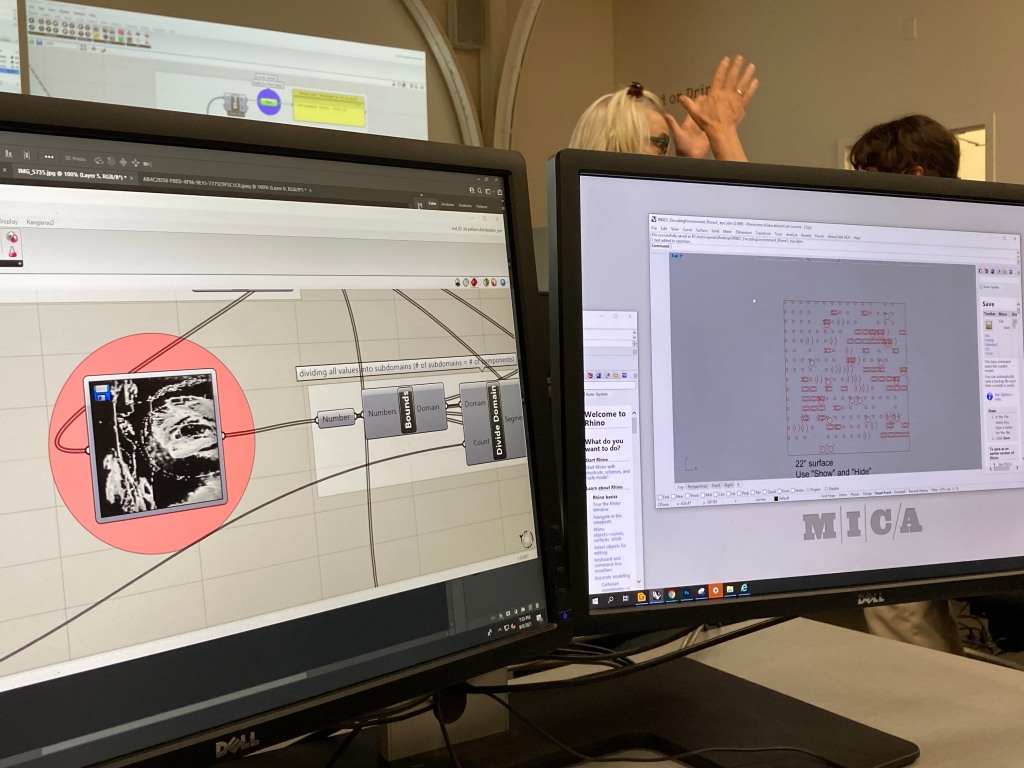

2 Pattern to Form
Plotter, a mechanic drawer, printed out our pattern. It took over 10 mins to draw each piece. It’s been a mystery that how it thinks and decides the order of drawing, as it did not follow strict spacial order.

We tied the fabric to the printed pattern, and traced it with glue gun. When we loosed the fabric from the wood board, it naturally formed a more dimensional pattern with diverse visual feelings.


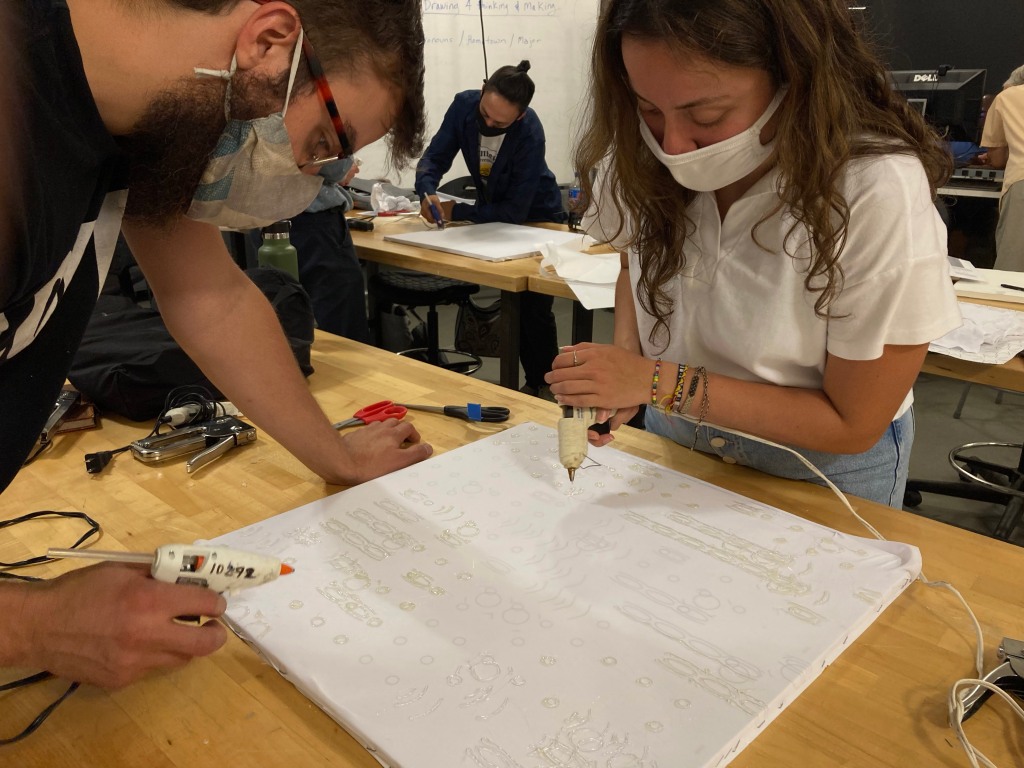


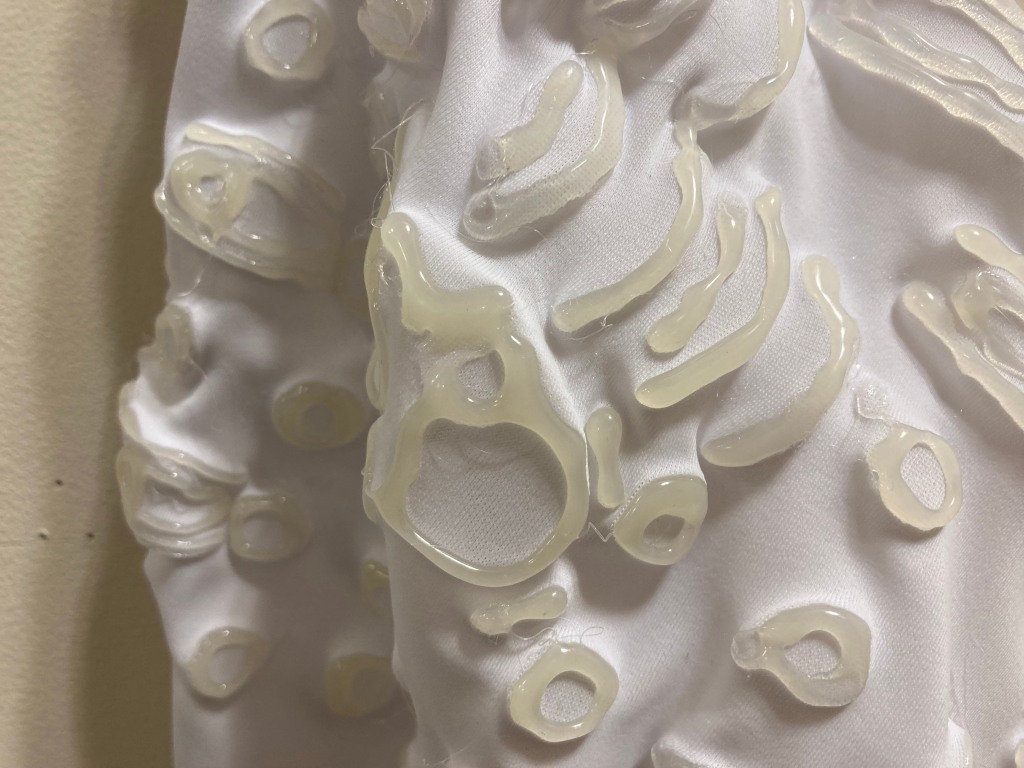
Question: In addition to image, can words be translated into patterns through algorithm?
]]>https://www.space.com/24233-3d-printed-hubble-photos-blind-aas223.html
LikeLike
]]>My group made the pattern from four inputs: a star, a series of dashed lines, a dense squiggle, and a blank. After printing the pattern and applying the glue, the stretched fabric was released from tension and allowed to settle into its new shape. We learned that areas left blank contracted and remained relatively flat, while areas with more glue rippled the fabric into an undulating landscape. In areas with several squiggles, peaks and valleys were formed, running up and down along the grid structure. In contrast, areas with several stars created round bulges expanding upwards. Once finished with the formal workshop, we used the lessons from the patterns to create a freehand composition with experiments such as folding the fabric, using the glue as a coloring template, and applying the glue in new ways. This resulted in a composition of free flowing, almost geographical ridges, and a spine-like figure on one side.
This project was interesting, and surprisingly fun trace the pattern with the glue. Although I probably won’t be adding hot glue drawings to my studio practice, the pattern generation from an image is definitely an idea worth exploring further.
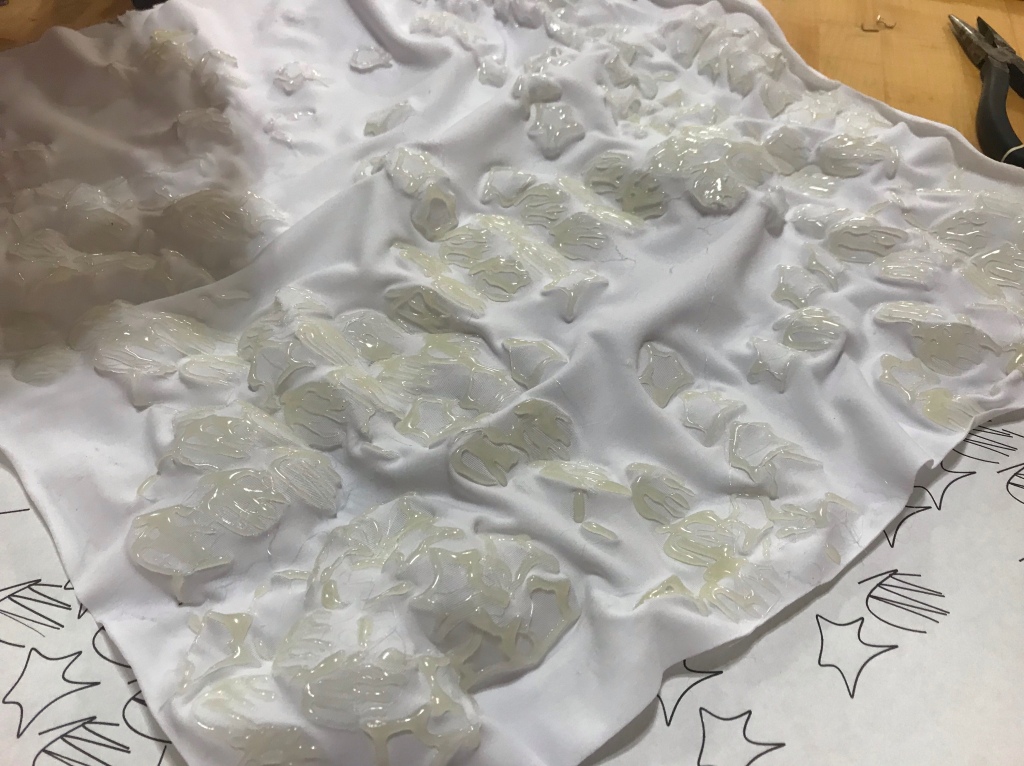
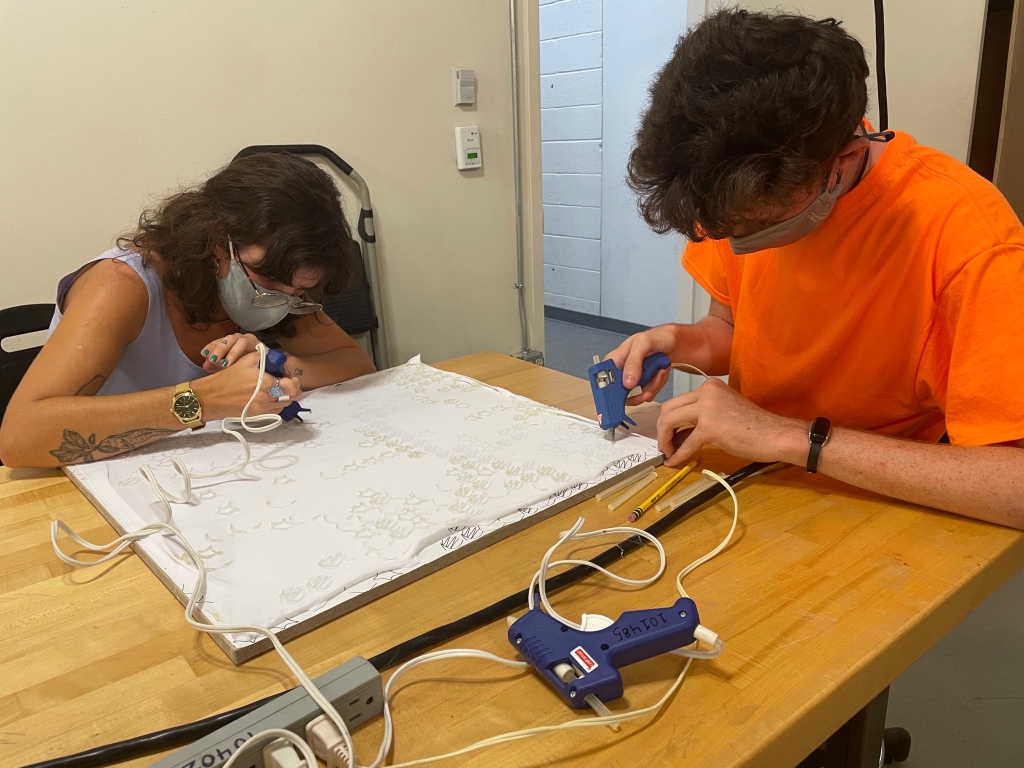


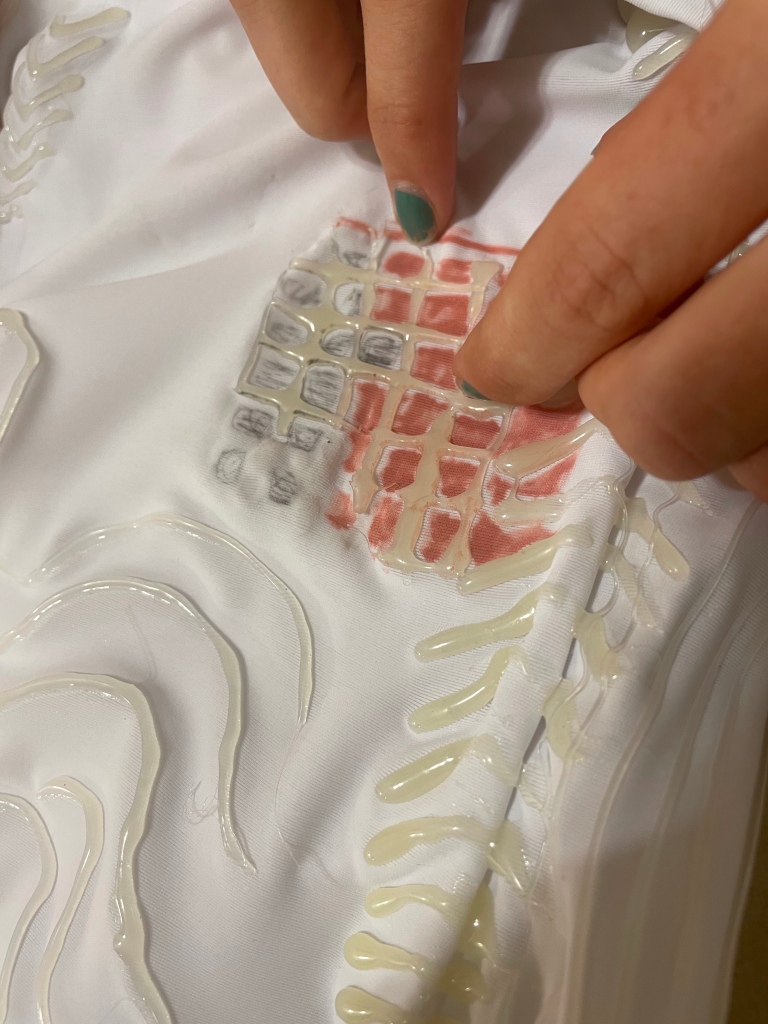


Spuybroek delves into parametric design, analyzing it as though it were a tangible thing. While I was often confused by his phrasing, I found it really interesting to consider parametrics and computer-aided design in this more physical way. I appreciated Spuybroek advocating for how parametric design can create the variation and changefulness (that Ruskin argues for in handiwork) in order to break out of a world of sameness and smooth polished-ness.
Spuybroek’s take on ornamentation greatly interested me as it’s something we often discuss in architecture. I enjoyed reading about how “strong decoration” (aka ornamentation) is inlaid within the design, it becomes and elaborates on the edges and corners, rather than being a façade of a “decorated box” in which the decoration has no impact on the physical form.
]]>Explanation in full, as well as Grasshopper screenshots, to come soon.
View fullsize


Acceptance of limitation as a framework rather than hindrance, is a proof of a productive mind.
As I began reading the chapter The Fundamentals of Construction in the book ‘On Weaving’ , the quote mentioned above greatly stuck out for me. Having extensively watched, observed, and endorsed the art of weaving in its most primitive art, I realised how very often our minds tend to be limited to the very act of weaving in a continuous manner. We practice the same, but try an break out of the norm under the idea of ‘experimenting’. However, the fundamental nature of a weave lies in its strength, and the author project the same in a detailed manner.
The author talks about the beautiful synchronising of raw material and the weave structure coming together in order to ensure a strong suited end product that can be designed to serve many functions. The author talks about three core weaving patterns –
As I think about the plain weave being the most serviceable, I also realise how rhythmic the movement for this, it is sort of intuitive, and plays on the artisan’s muscle memory. I also realise how technology could harp on the predictability of this practice, while the creativity could be left for the creator to play with.
As a designer, I find the nuances to weaving something to live, nuances to creating art, patterns, and a story through weaving an extremely intelligent practice for our humanity. Weaves have the ability to reflect strength of a culture, the depth of symbolism, and the idea that fluidity of a fabric lies not in its complexity, but rather simplicity.
]]>
As our session for the day began, we were first thrown into the fast pacing world of mapping the unreal into the real. Marantha Dawkins, a landscape architect with phenomena theories applied to her work, inspired us with her understanding of the intangible aspects of our environment, and translating those into tangible outcomes.
As we moved into our smaller groups, we spent the first hour acquainting ourselves with Rhino and Grasshopper, understanding how the functioning of one impacts the other, and how our input into the software would impact the output. The task for the day was to take any visual, translate it into a 2D concept that plays with light, shadow, and complexity of the structure, and print the visual to create a 3D form out of it using a glue gun on a fabric.
2D —- 3D

Step 1: We went out into the open space, and observed textures that spoke to us, contained depth, and played with the environment through light and shadow. These were a few visuals we collected, and finally settled on a leave with multiple veins and textures as a result of its interaction with the environment.
Step 2:
We translated the image onto Rhino, that resulted in a pattern that studied the play of light and shadow, and translated that into interesting geometries. We played around with points and different shapes to see which would work best, exploring how are chosen shape would interact with the fabric we put it out on.
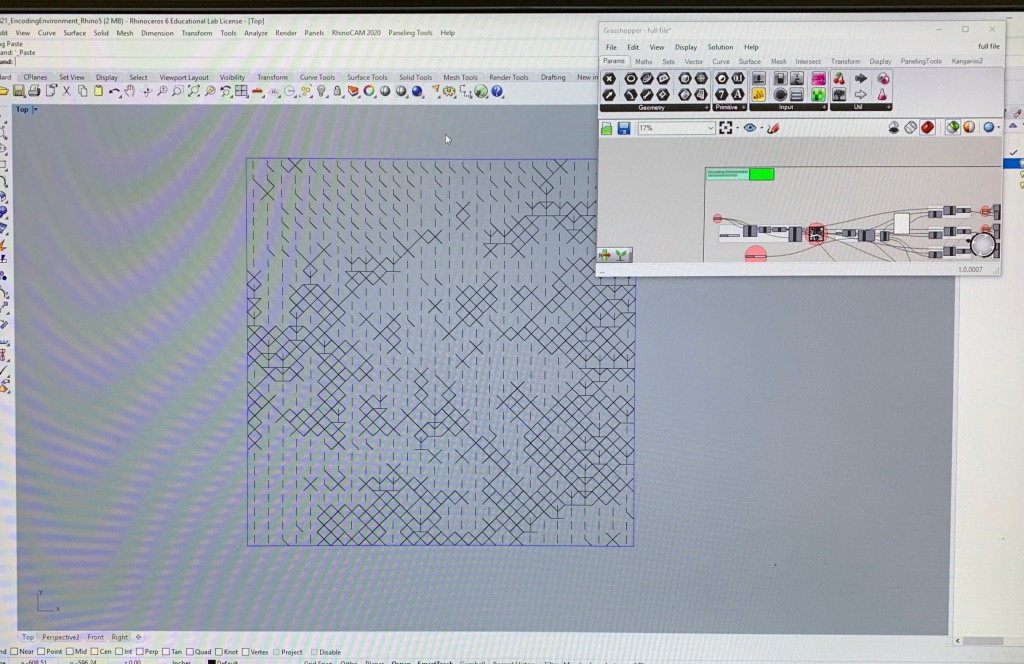
Step 3:
The pattern was then printed on a 18×21 sheet of paper. Each row was printed in isolation, in a steady, smooth but slow process, till it all finally came together. At this point, I was really intrigued by how the machine made sense of the many lines and angles that the pattern consisted, and how it chose to print each segment in the most optimised manner.


Step 4:
Once the plotter finished printing the pattern, the next task was mounting the pattern on an MDF, and layering it with a stretchy cloth material. We stapled the fabric to its maximum stretching capacity, so once the cloth is released and the glue gun has been applied, it really comes together to play with the 3D variation of this pattern in order to give it a new life.


Step 5:
This was my favorite pattern! I simply love working with my hand, I feel a deep meditative presence while doing so, and I saw that translate into my teammates as well. We started working from three different corners, and moved our way closer to the centre. As we moved upward, we realised that our minds were at rest after the whole confusion with technology, and realised that we are now the masters of where this goes, instead of the machines being the master and bringing a sense of unpredictiability to the outcome. We entered a therapeutic state of mind.
I strongly believe that crafts is a communal practice, and it was amazing to witness the same as we started talking and discussing a lot of interesting topics about design, ourselves, and our lives. We got talking while our hands did the work.

The Final Outcome
When we finally finished, and unwrapped the cloth from the board, the result was remarkable. The fabric interacted beautifully with the glue gun, gave it all sorts of textures as well as surfaces. The result was what I truly not expected, and was inturn much better than what I imagined!


LikeLike
]]>The second reading, On Weaving by Annie Albers was very enjoyable and descriptively captured the fundamentals of both what constitutes as weaving, and as not weaving. Below are some comparative notes I made between the three weaves:

What I found most interesting was being able to better understand the structural intent of picking a weave and which purpose each of the three is best suited for. Fascinating to inspect my own clothing and identify some of the weaves!
]]>Thanks for sharing your thoughts on the reading. I appreciate you bringing up the idea of uniqueness as a potential defining factor of craft. The idea that craft is not defined as physical vs. digital, but rather as unique vs. mass replicated is interesting to think about (and something that I feel like I agree with right now). I wonder what parts of “the craft nature” of your work you are missing.
Best,
David
Albers lists the principle of textile construction as these three: the plain weave, the twill, and the satin weave. The plain weave demands less material and can be produced much faster, and Albers states that "the usefulness is evident. There is probably no weave produced in more million of yards the world over, now as in former times, than this plain weave."(The Fundamental Constructions, 39) Albers mentions the Gothic, Renaissance, Aubusson tapestries were executed in this construction, and states that the "process reduced to just the essential allows for the broadest application."(Albers, 40)
On the other hand, the satin weave produces a uniform, soft surface without visible structural effects. Compared to the plain weave, the satin weave is a luxurious one, demanding more thread count to be constructed while plain weave requires less.
Here, I find myself conflicted in both the extravagance in materiality and simplicity. In terms of design and craft, I do believe it when people say that simple is the best. Simplicity allows for more application, and anthropologically speaking, the convenience of the plain weave gives advantages to anyone with limited resources.
Nonetheless, I still can't help but admire the craftsmanship required to create intricacies like the satin weave. Sure, it may not be practical, but still, I do believe that there is value in creating something that requires a certain level of craftsmanship and skill. As from the last reading, it is a form of craft and endeavor that potentially may not be compensated. For example, the stained glass windows from cathedrals aren't necessarily more practical compared to a regular glass window, but still holds their value by simply being mesmerizing. Even if craft, like the satin weave, may not reciprocate by providing practicality, I trust that there is still value in learning and developing that craft.
]]>It may be a loose analogy, casting, "copying" can be compared with acting in theaters. In a way, theater lives on by the repetition and use of identical reproductions.
The playwright may write the scripts and monologues with hopes that the actors will stay true to the script. The actors may have different interpretations of the script or their characters, and express their delivery differently as they please, however, going off-script is generally frowned upon. Actors' interpretations and character analysis live on as "imperfection", which Ruskin stated was essential, but does not alter the production itself, meeting the "threshold of variations".
Overall, productions should stay true to the playwright's intent - if the audience is here to see Romeo and Juliet, they should get the congruent plot. There is value and sense for some productions to remain identical.
On the other hand, his criticism of ornaments is questionable as well. Ruskin notes that "All ornamentation of that lower kind is pre-eminently the gift of cruel persons... it is their peculiar gift; not, observe, that they are only capable of doing this, while other nations are capable of doing more."(97)
If every ornamentation is considered to be "cruel", and considered a sign of extravagance, then aren't we repeating the same history as when the Church rejected iconoclasm and intricate adorations of reliquaries?
I'm quite fond of the notion of "art for art's sake". I'd like to think that ornamentation can exist without the inevitable ties to value or exuberance. The maker may feel joy merely in the process of creating, designing, or ideating. Isn't the value of what is "lower" and what is "higher" kind of ornamentation relative anyway? Who's to say which is lower and which is cruel?
Ornamentation and design have shifted their value while moving in time and geography. Novel pieces were always valued highly. Japanese prints that were used as mere "wrapping paper" for pottery were shipped to the West and were appreciated greatly. Design and craft in Ruskin's era may seem monstrous after few centuries, and there is no ultimate rule. One particular type of design or craft does not dominate the other.
"The point is to not make the same machine do the same thing more slowly, at a human pace or in a friendlier way, but to make machines do things differently."(32)
"as all craft moves towards design, all labor must move toward robotics."(39)
"Yet imperfection is essential, it means that a system that nests figures in all kinds of configurations must meet its limit at several thresholds."(40)
"...abstraction is cruel and perverse, because it wants to rip the clothing off everything, to present everything naked."(98)
"...ornament is in itself a sign of caring and act of sympathy; cruelty only surfaced when we are confronted with an absence of ornament... Ornament represents care and tenderness, by its nature, because it is a form of sacrifice, in the sense that it is uncompensated work, and without the return of user value. In a way, it is pure work, because it is perfectly useless; we only have 'to dress it and to keep it.'"(98)
]]>
Image to Data
Since I joined the class last minute, this day was my first day. I was sorely underprepared on what to expect.
With very little preparation (my fault), we brought in images and translated the image into code. We selected the light flares for the image.

Rhino + Grasshopper
Using Rhino and Grasshopper, we translated the image by dividing them up into areas with higher values and areas with lower values.
The image was split into grids, like the very pixelated version of the image. Reference curves, in this case, stars, were drawn on top of the grid. Later, when the grid reflects the image, the reference curves would be plugged in, creating a image drawn with stars.
Plotter
Using the plotter, we printed out the image.
We mounted this printed version on top of a frame, and then stretched a canvas on the image.
After we traced the image with hot glue, giving it some structure in designated areas, we took off the staplers holding the canvas, and then let go.


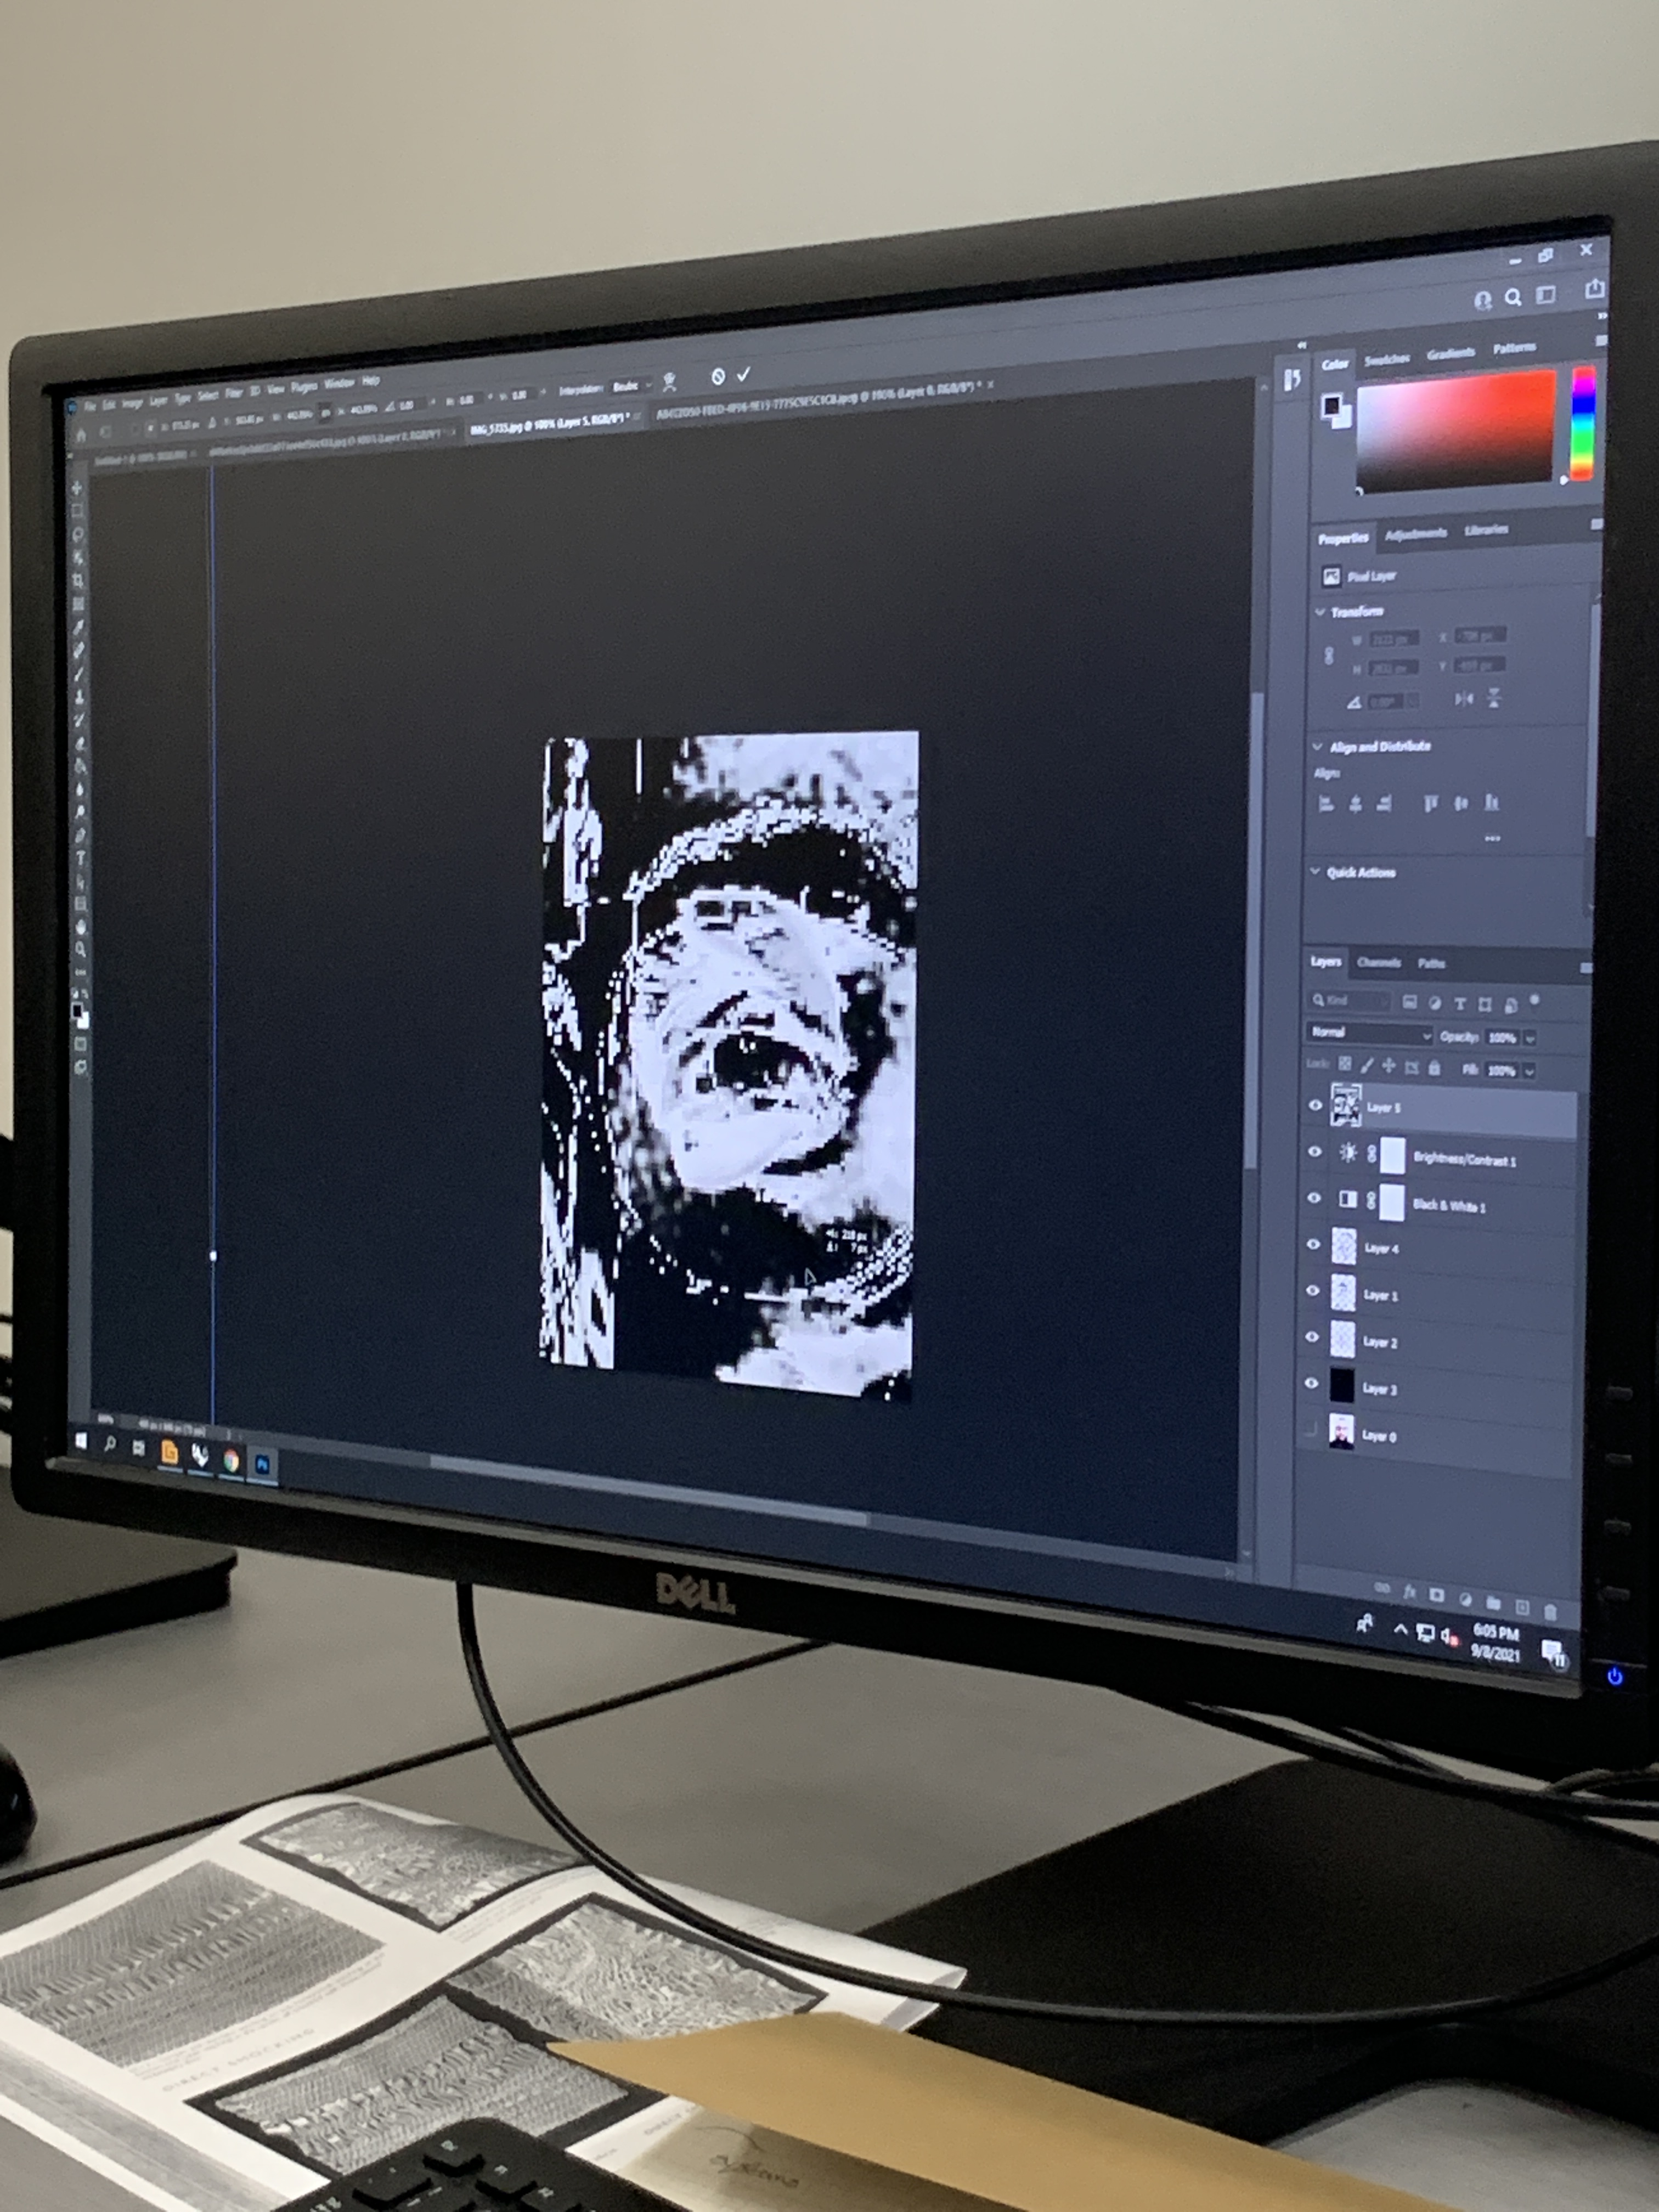
After creating new shapes for mapping purposes, we next played with the settings in Grasshopper in order to get an image that was interesting to us. After choosing an interesting image, we “baked” the file and then printed it on the plotter, which I had never seen in action before. It was cool to watch the lines we drew on screen be drawn with an actual pen by the plotter.
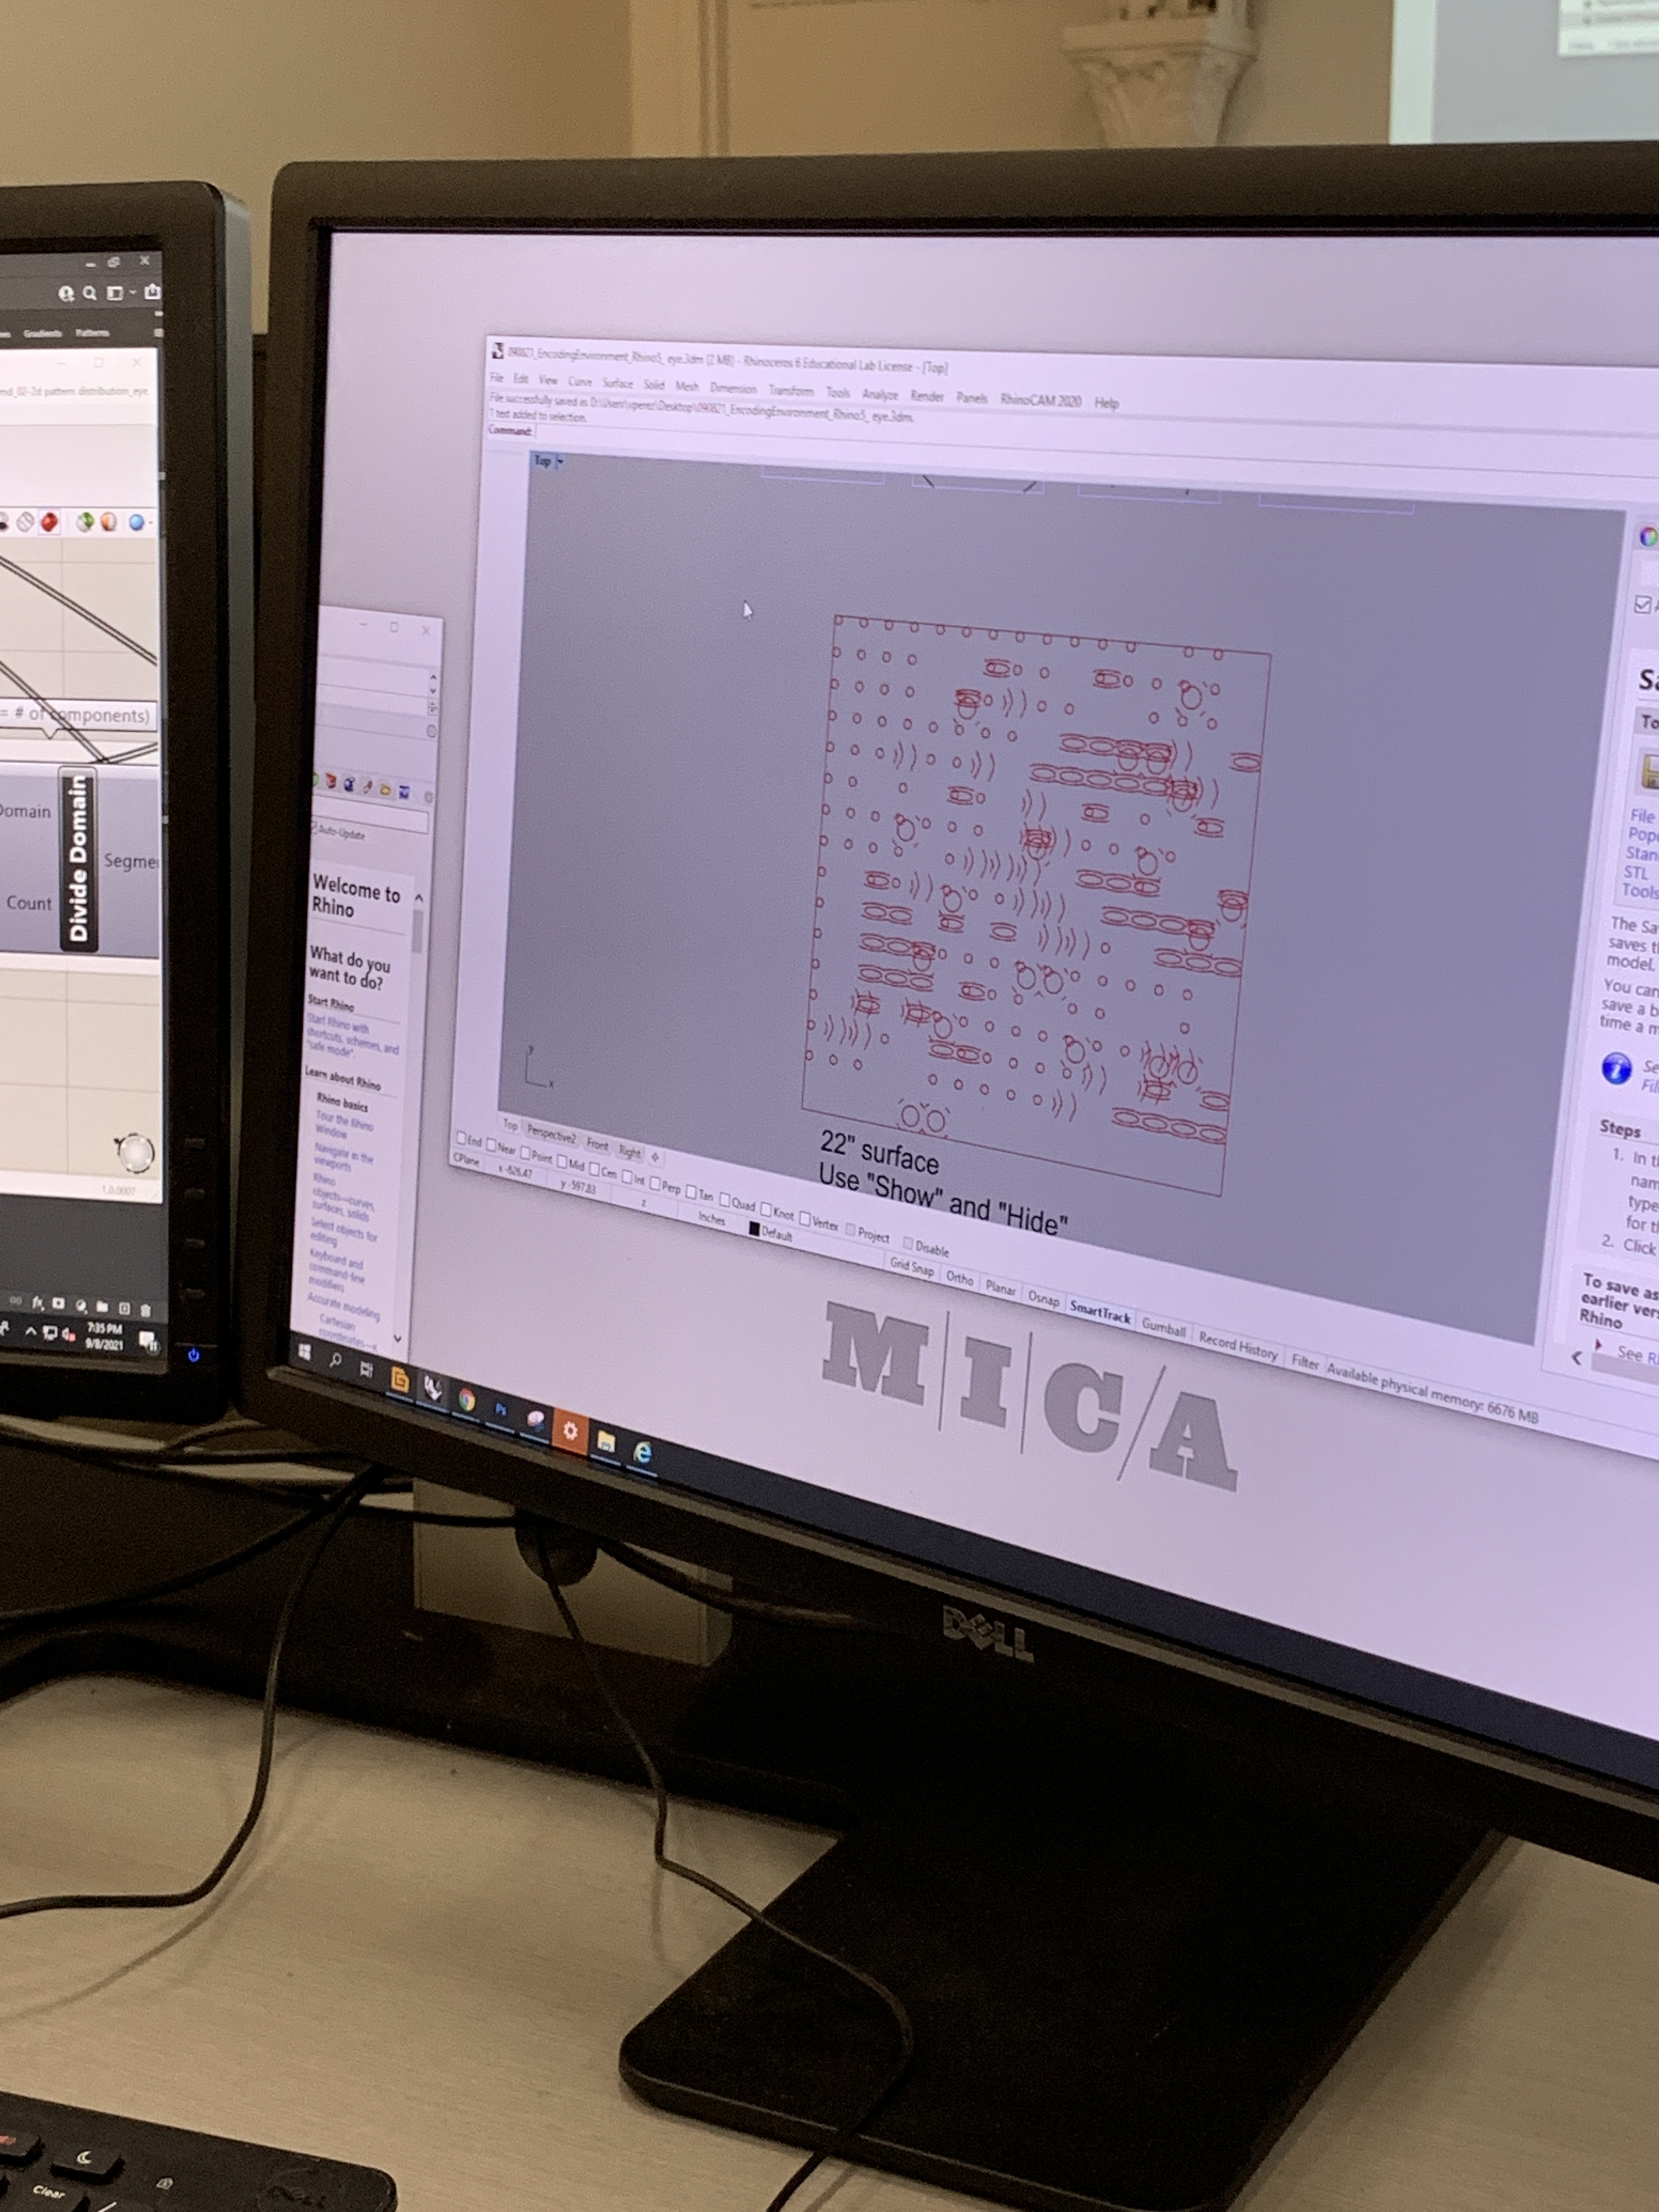
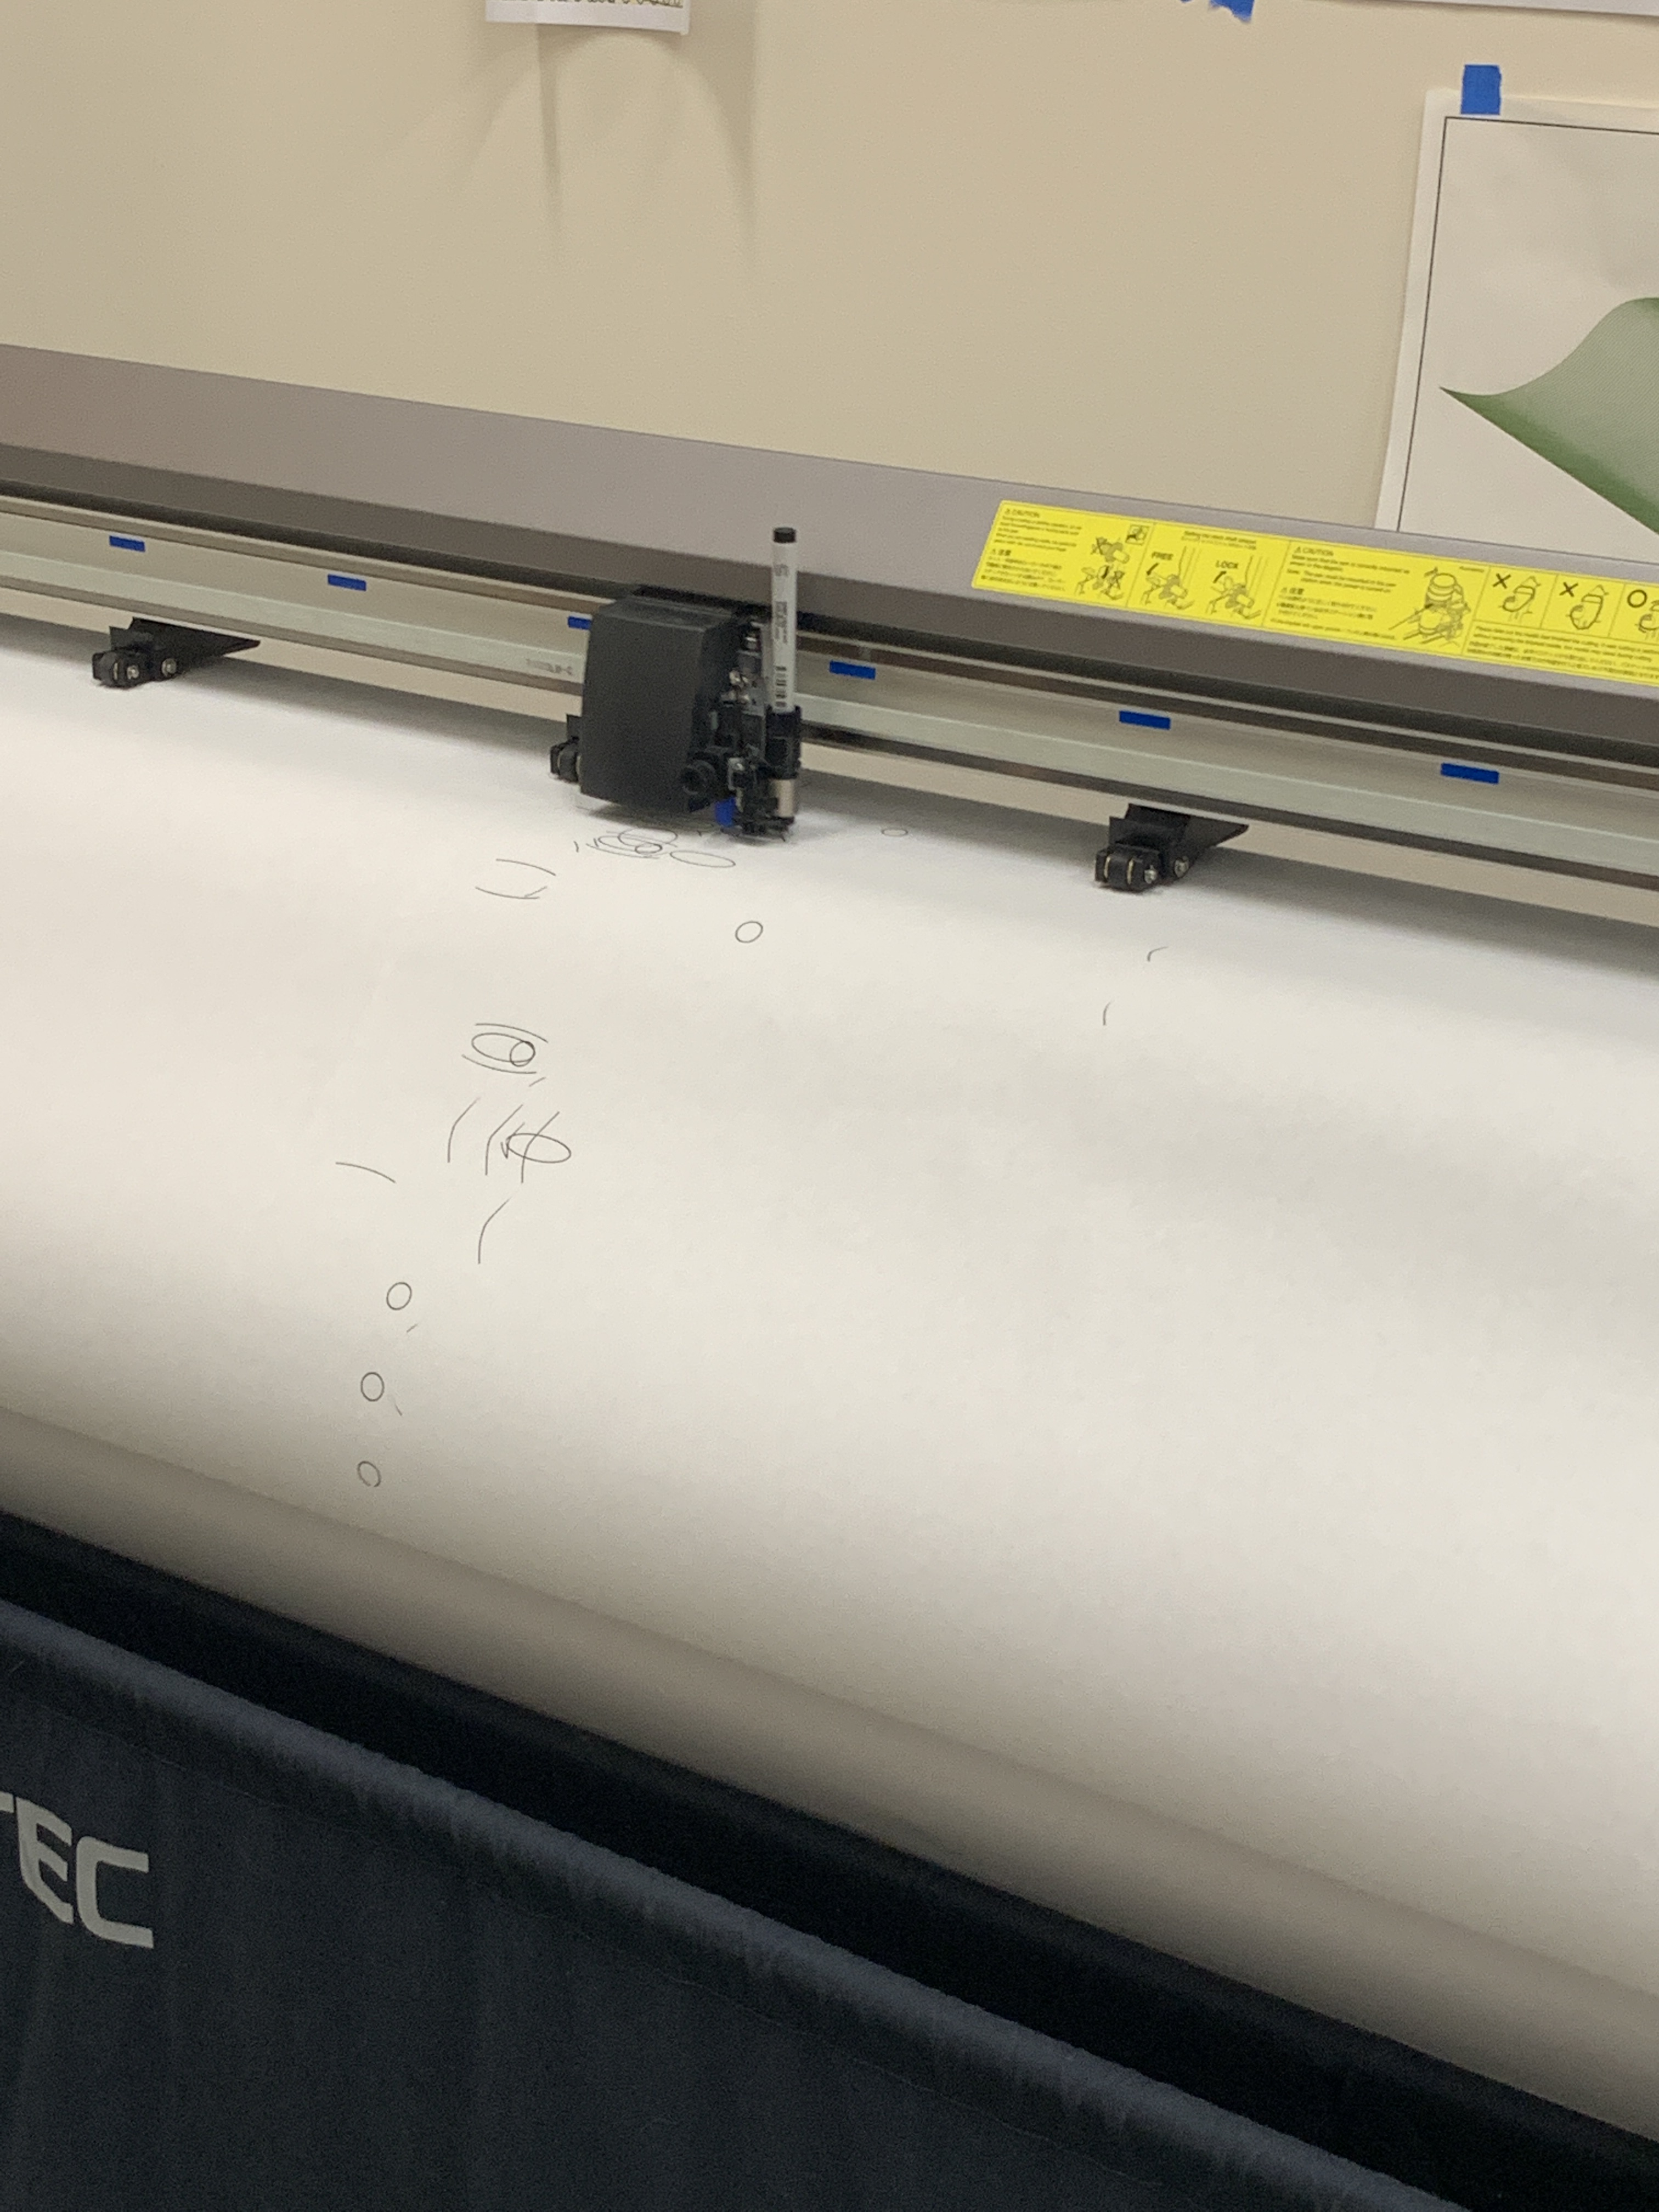
Much more interesting than watching paint dry, it still took a while for the plotter to be finished with our image. After stapling our image to what felt like an old drop ceiling tile (the ability of this material to compress slightly actually made the staples easier to remove when we were done, which was much appreciated), we stretched our fabric over the top and stapled it in place. We stretched it as tightly as possible, with one of us stapling while the other two helped hold the fabric taut.

Now, onto the hot gluing. I can’t remember the last time I used a hot glue gun, but this is certainly the first time I used it as part of a workshop that utilized modeling software. It was nice to make something physical with my hands! That was a thing I missed during the pandemic. We each started in our own section of the image and starting following our drawing, letting one shape dry before returning to add any overlapping shape that was needed. We thought this might help keep the glue lines cleaner. It didn’t take us too long to finish gluing, and I was certainly excited to see the results!

I am not sure what I was expecting to see when we loosened our fabric, but it was definitely weird looking! It was very interesting to see the effects certain types of lines created; our ‘parentheses’ gave the fabric a weird, cupped look where the glue followed the curves. Between that and the circles/donuts, it had a very alien, almost skin-like appearance to it, and it was awesome! I wondered out loud if there was a way to use these techniques and provide a tactile map that one could feel with their hands. Granted, the size that would need to be would be staggering, and the lines would need to be much more precise to be off use, but it was still cool to think of possibilities.


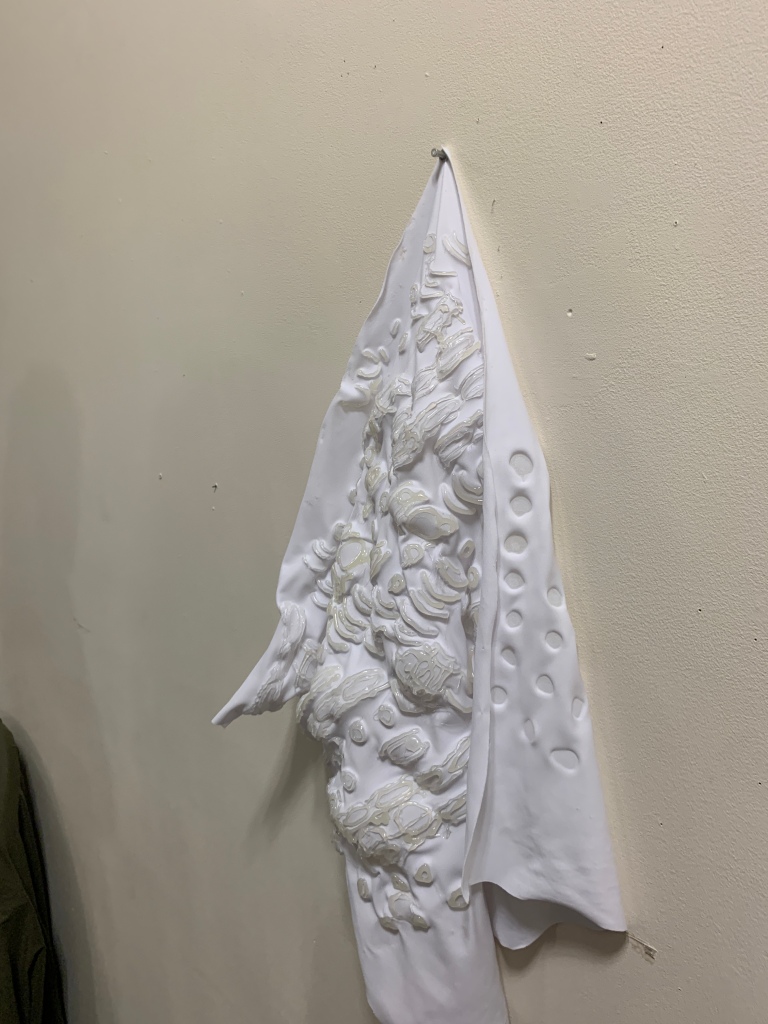

Admittedly a bit enamored with the results of this project, Annette gave me a couple extra pieces of fabric to experiment with at home. Feeling a bit stuck in my personal practice lately, I mind mapped/impulse wrote some words that have been at the forefront of my mind lately. I was merely curious what it would look like if the image was words instead of shapes/lines (though, what are letters but a bunch of lines?). It was fun to try a couple different line techniques and note the different results. I suspect I am not done experimenting with this yet, I am still thinking about that map idea…But need more glue sticks, first!

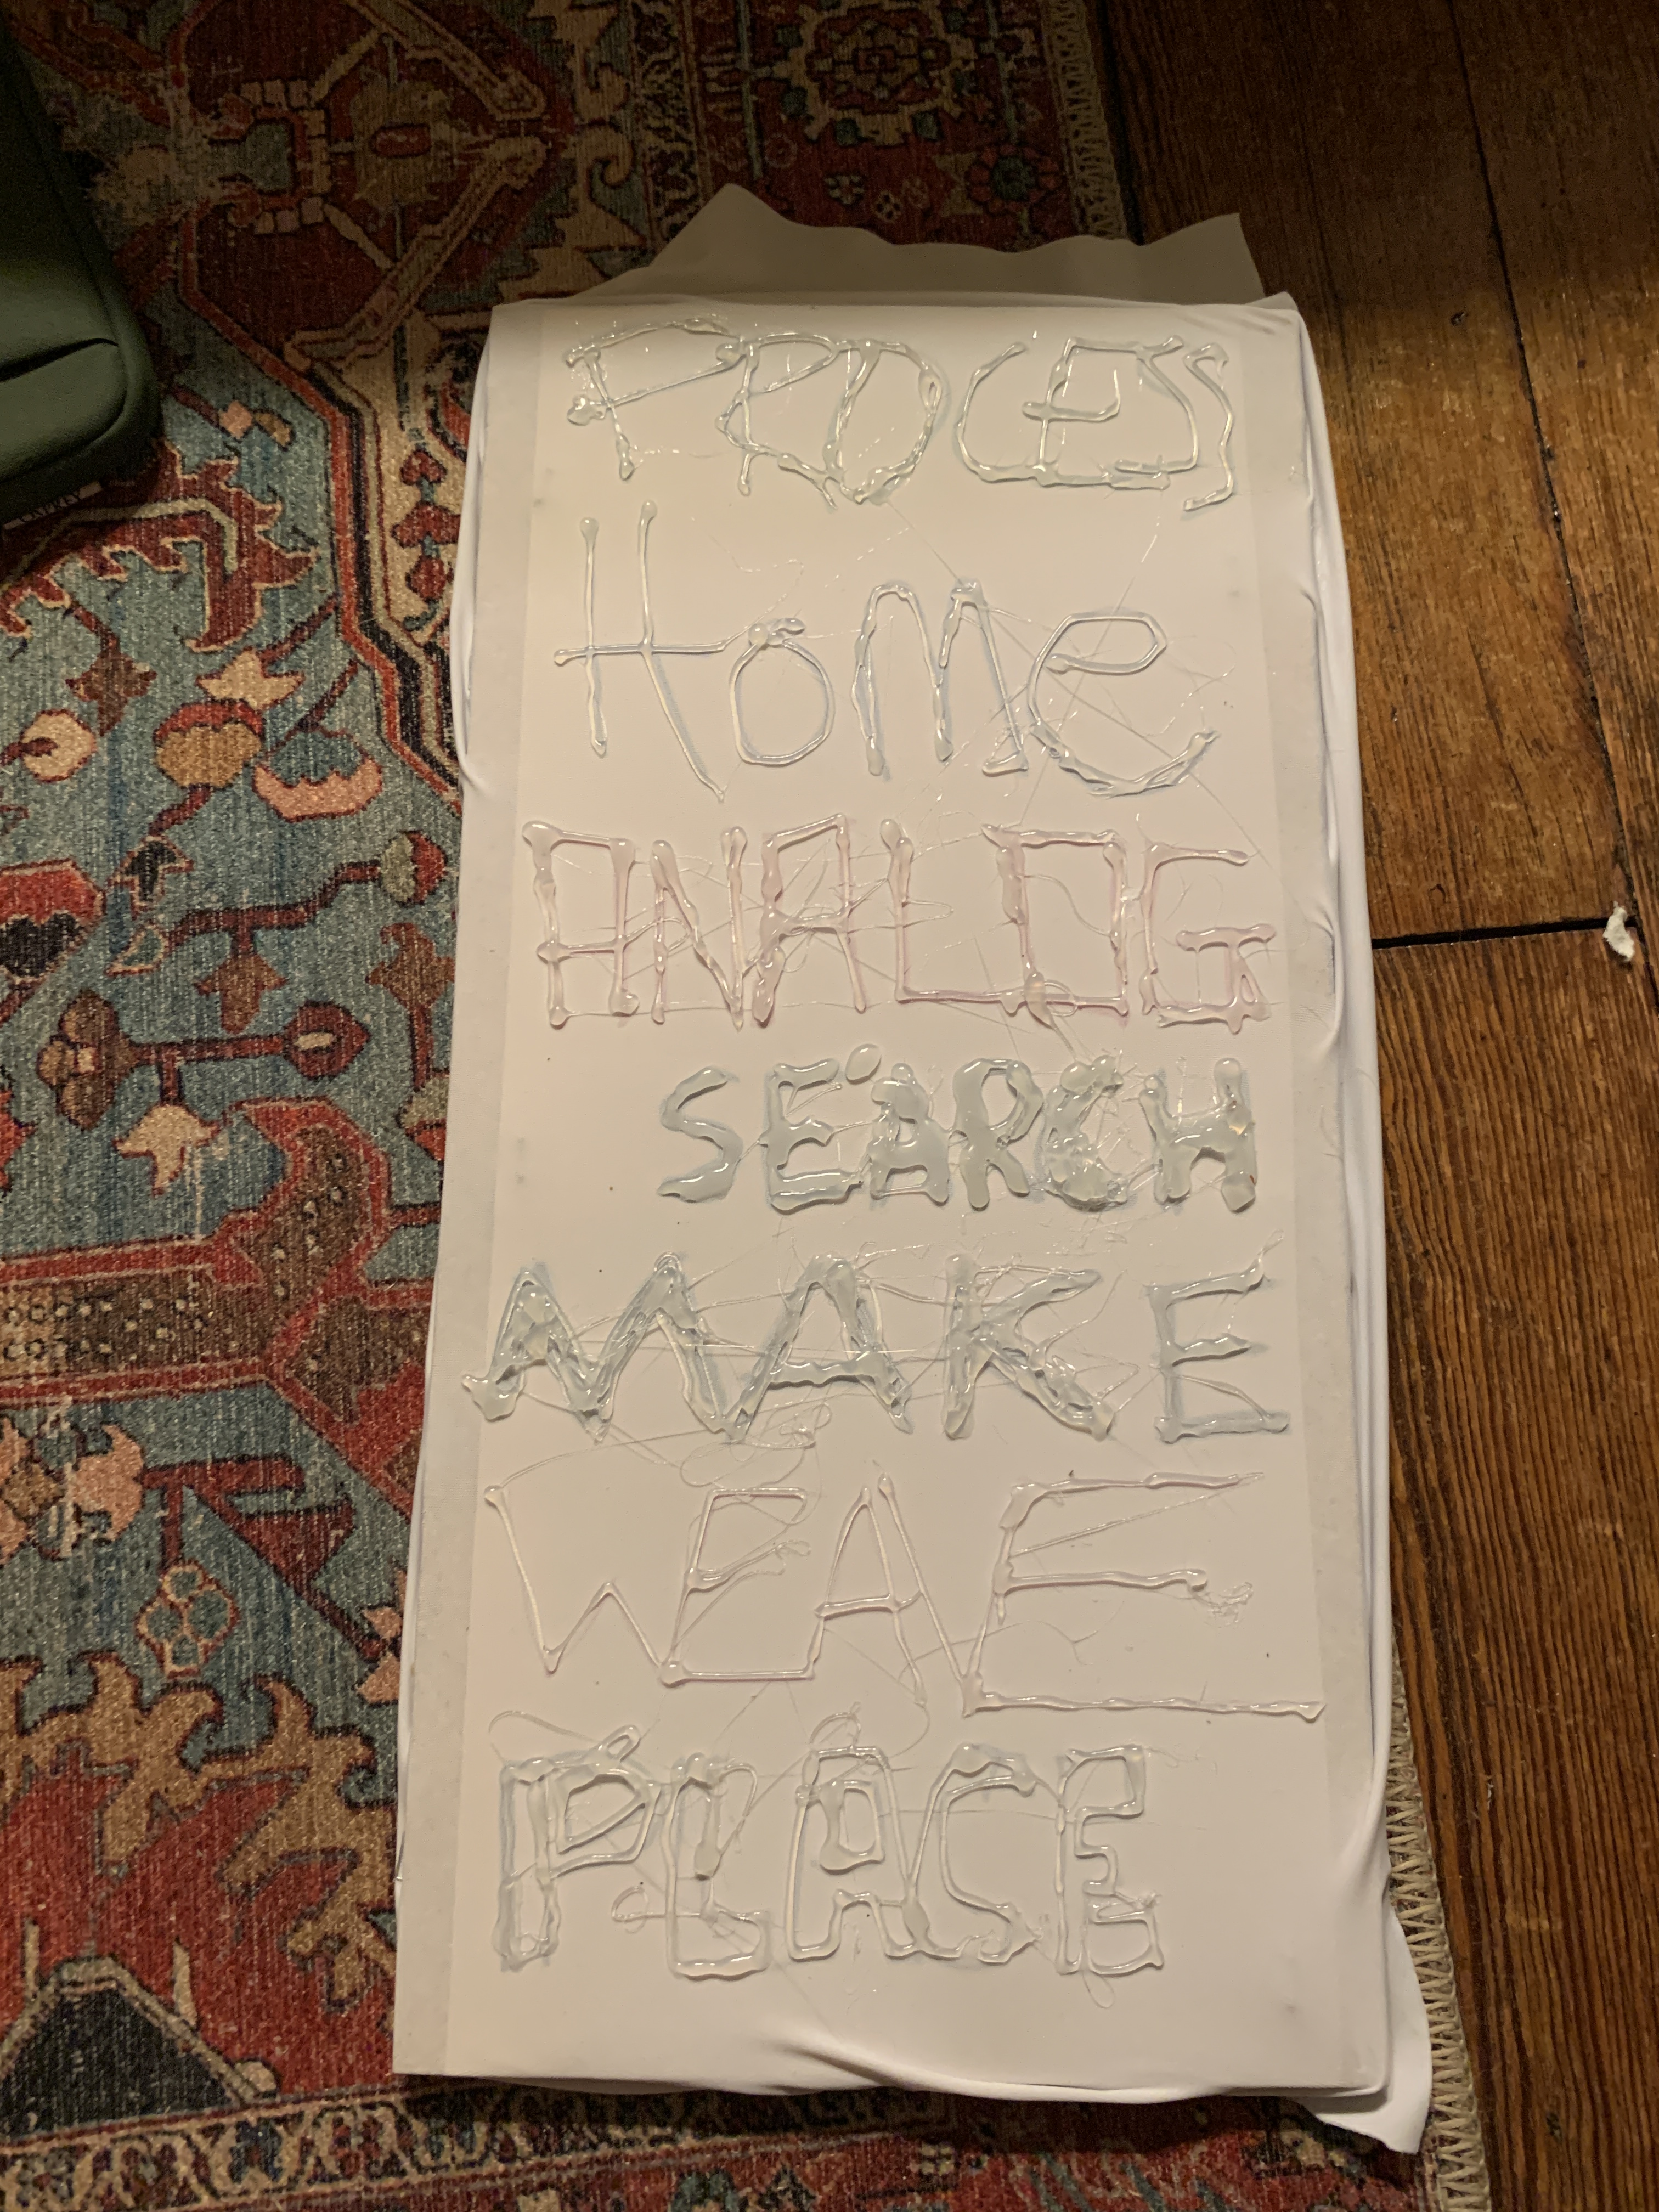


My interests revolve around robotics and digital fabrication (still learning), and I'm curious to learn what is out there for me to learn and explore.
]]>

September 8
2D Production
For our first workshop, we were visited by a talented artist and designer (Marantha Dawkins). She introduced many of us, myself included, to the many uses of the software Rhino to map, analyze and explore the environment around us.
In small teams, we selected a photograph of an environment (my team decided to use a solar flare that we adjusted a bit in photoshop). We inserted the photo into Rhino through a Grasshopper algorithm. The algorithm mapped the image based on brightness, generating data points across a grid. Together as a group we designed four unique shapes and used another algorithm that connected the shapes to each corresponding square of the grid creating a unique pattern. From there we sent the file to the plotter to be printed out onto paper.
3D Production
With the printed pattern in our possession we moved onto the 3D production part of the workshop. First we stapled it to a square board of homasote using a manual staple gun Then we stretched white fabric over the front of the board and stapled it into place. The last step took almost an hour. We carefully traced the outlines of the shapes that were visible through the stretched fabric using hot glue guns.
Then the final reveal…
Once all the glue was dry, we carefully pried all the staples from the board. The fabric gradually shrunk as we removed the staples, revealing a unique pattern on both sides, reminiscent of more traditional pleating. What were originally stars morphed into flower shapes. Sections that were stretched tighter, bunched closer while sections with more give barely moved at all. The unique texture and pattern invited passersby to run their fingers over the fabric.
Thoughts on the Process:
If I were to do this project again, I think I would have taken more time to assess the pattern and the sizing. As a team we rushed though this part which led to parts of our fabric having very little texture which was not our intention. I think stretching the fabric a bit tighter could have helped too.


 LE / 1957
From The Immense Journey
A billion years have gone into the making of that eye; the water and the salt and the vapors of the sun have built it; things that squirmed in the tide silts have devised it. Light-year beyond light-year, deep beyond deep, the mind may rove by means of it, hanging above the bottomless and surveying impartially the state of matter in the white-dwarf suns.
LE / 1957
From The Immense Journey
A billion years have gone into the making of that eye; the water and the salt and the vapors of the sun have built it; things that squirmed in the tide silts have devised it. Light-year beyond light-year, deep beyond deep, the mind may rove by means of it, hanging above the bottomless and surveying impartially the state of matter in the white-dwarf suns.
 Yet whenever I see a frog’s eye low in the water warily ogling the shoreward landscape, I always think inconsequentially of those twiddling mechanical eyes that mankind manipulates nightly from a thousand observatories. Someday, with a telescopic lens an acre in extent, we are going to see something not to out liking, some looming shape outside there across the great pond of space.
Whenever I catch a frog’s eye I am aware of this, but I do not find it depressing. I stand quite still and try hard not to move or lift a hand since it would only frighten him. And standing thus it finally comes to me that this is the most enormous extension of vision of which life is capable: the projection of itself into other lives. This is the lonely magnificent power of humanity. It is, far more than any spatial adventure, the supreme epitome of the reaching out.
]]>
Yet whenever I see a frog’s eye low in the water warily ogling the shoreward landscape, I always think inconsequentially of those twiddling mechanical eyes that mankind manipulates nightly from a thousand observatories. Someday, with a telescopic lens an acre in extent, we are going to see something not to out liking, some looming shape outside there across the great pond of space.
Whenever I catch a frog’s eye I am aware of this, but I do not find it depressing. I stand quite still and try hard not to move or lift a hand since it would only frighten him. And standing thus it finally comes to me that this is the most enormous extension of vision of which life is capable: the projection of itself into other lives. This is the lonely magnificent power of humanity. It is, far more than any spatial adventure, the supreme epitome of the reaching out.
]]>
 ]]>
]]>
 UKG / 1974
From The Author of the Acacia Seeds
and Other Extracts
And with them, or after them, may there not come that even bolder adventurer — the first geolinguist, who, ignoring the delicate, transient lyrics of the lichen, will read beneath it the still less communicative, still more passive, wholly atemporal, cold, volcanic poetry of the rocks: each one a word spoken, how long ago, by the earth itself, in the immense solitude, the immenser community, of space.
UKG / 1974
From The Author of the Acacia Seeds
and Other Extracts
And with them, or after them, may there not come that even bolder adventurer — the first geolinguist, who, ignoring the delicate, transient lyrics of the lichen, will read beneath it the still less communicative, still more passive, wholly atemporal, cold, volcanic poetry of the rocks: each one a word spoken, how long ago, by the earth itself, in the immense solitude, the immenser community, of space.
 001a
001a
 001b
001b
 001c
]]>
001c
]]>
 WP / 1873
From Studies in the History of the Renaissance
Like the elements of which we are composed, the action of these forces extends beyond us; it rusts iron and ripens corn. Far out on every side of us those elements are broadcast, driven by many forces; and birth and gesture and death and the springing of violets from the grave are but a few out of ten thousand resultant combinations. That clear, perpetual outline of face and limb is but an image of ours, under which we group them - a design in a web, the actual threads of which pass out beyond it.
WP / 1873
From Studies in the History of the Renaissance
Like the elements of which we are composed, the action of these forces extends beyond us; it rusts iron and ripens corn. Far out on every side of us those elements are broadcast, driven by many forces; and birth and gesture and death and the springing of violets from the grave are but a few out of ten thousand resultant combinations. That clear, perpetual outline of face and limb is but an image of ours, under which we group them - a design in a web, the actual threads of which pass out beyond it.
 001a
001a
 001b
]]>
001b
]]>
Biomorphic and algorithmic design have always been a part of my practice, though often in the sidelines and primarily existing in a digital space. As my practice has evolved it has come to encapsulate not just the mathematical properties of nature but also its material knowledge. Pixels can only hold a limited amount of data, whereas materials such as fabric or thread or paper hold a long line of embodied natural knowledge that begins with the plants harvested to create the materials. During this course, I am looking forward to finding techniques that integrate digital and physical fabrication in new ways.
]]>The Generative Algorithms reading was a lot of technical information. While most of that went over my head, I still found this reading to be informative. First, Khabazi completely digitizes weaving with no immediate intention for there to be some “physical result”. Second, I was unfamiliar with the history of weaving. While the history portion of this writing was brief, it still contained a lot of new information for me. I particularly liked the portion about the punch cards used for Jacquard looms.
]]>
For our first week of class, guest lecturer Marantha Dawkins taught us how to set up a Grasshopper script to translate images in different ways. Each group was tasked with taking an image and transforming it into an image made of patterns that we designed. We then printed that image using a plotter and traced it with hot glue onto an elastic fabric. The idea was that the hot glue would create a structure to the fabric in the same way that smocking does. My group (Julian Gagnier, Augusto Corvalan, and myself) chose an image of the moon. We made four patterns.
This was my first time using Grasshopper. It seems like there are a lot of ways to use the program. I’m not sure if I will incorporate it into my main artistic practice, but I’m glad that I at least have a basic understanding of what Grasshopper does. I think having this experience will make talking to people (architects, designers, etc.) easier. The class will also inevitably change my thinking, at least for a bit.

It is then, no surprise to think that practicality and aesthetics merge without intent in this practice, since it comes from repetition, equal forces acting together, and a framework which creates a barrier between the pleasure of beauty and the mess of uncertainty, with the process even defining the use of color, contrast, and pattern, but broad enough to have uneven structures, and remain with the softness of synchrony.
*
]]>Using Rhino, Grasshopper, and an image, it is possible to transform pixels into pattern data which can be used to determine concentrated points of certain information, and use them as a mean to a visual end.

Then, the pattern is printed and placed behind a stretched canvas, where using hot glue, it is traced into the fabric.

After finishing the process of tracing, the canvas is set loose, and we found ourselves with the end result.

It is interesting to see how the end result is a combination of both variable, and invariable elements, which come together to give sense to an abstract piece.
*
]]>I was particularly drawn to a notion she discussed with us of blending the body with the environment, in relation to my own work that centers around touch. It made me question how can we respond to barriers on touch, especially during the pandemic as touch became increasingly taboo, but altogether still an essential part of the human experience?
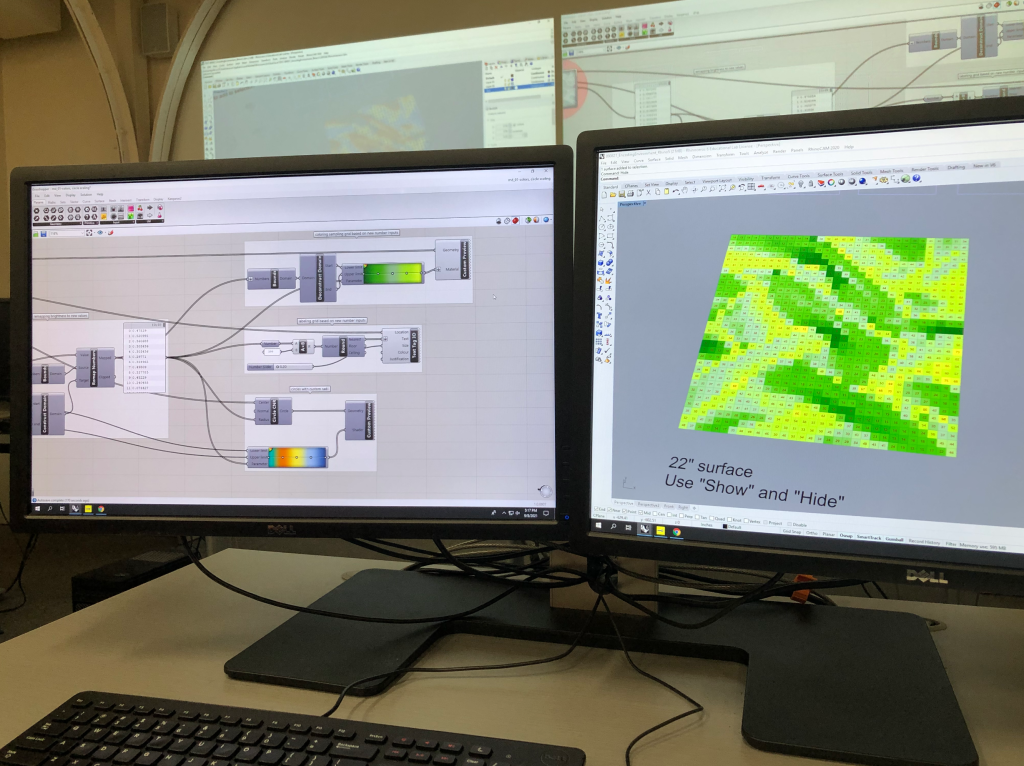
For the work shop itself, the class had an instructional introduction to Rhino and Grasshopper in small groups where we translated a photograph into pattern variations that were in turn printed using a pen plotter. We then used the pattern as a stencil for hot gluing onto stretched elasticated polyester fabric. Once the fabric was freed of the staples keeping it in place, it contracted in areas that were glued creating a variation in surface, producing entire landscapes in the fabric. These variations were interesting from the front (very organic and glossy) as well as the back (very lunar and matte).

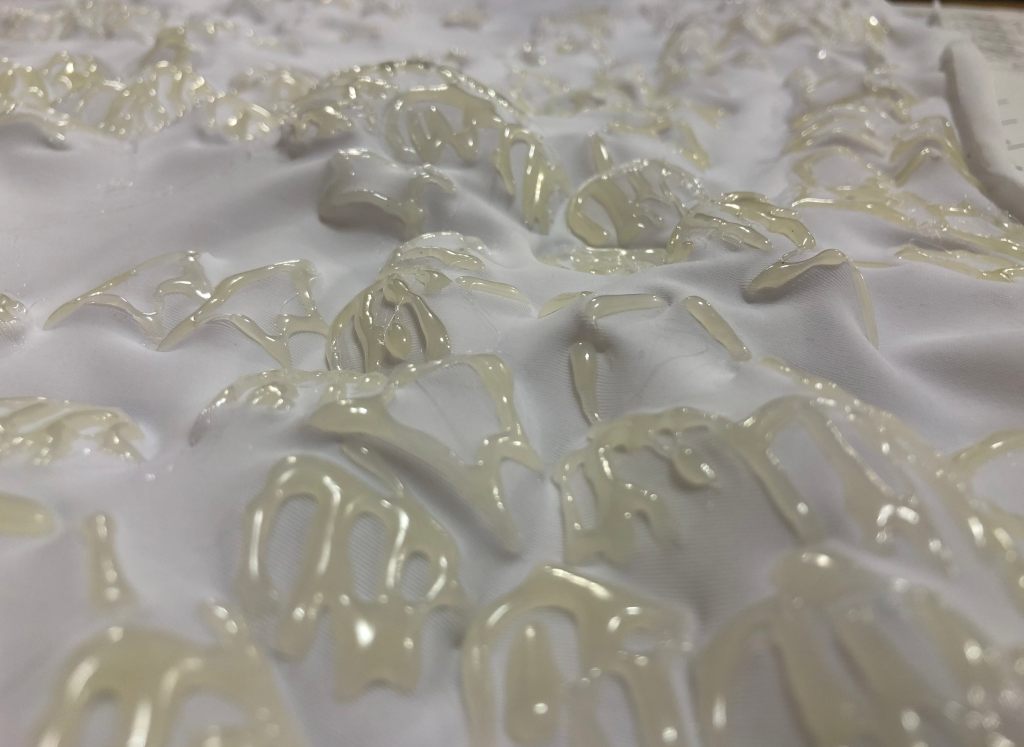
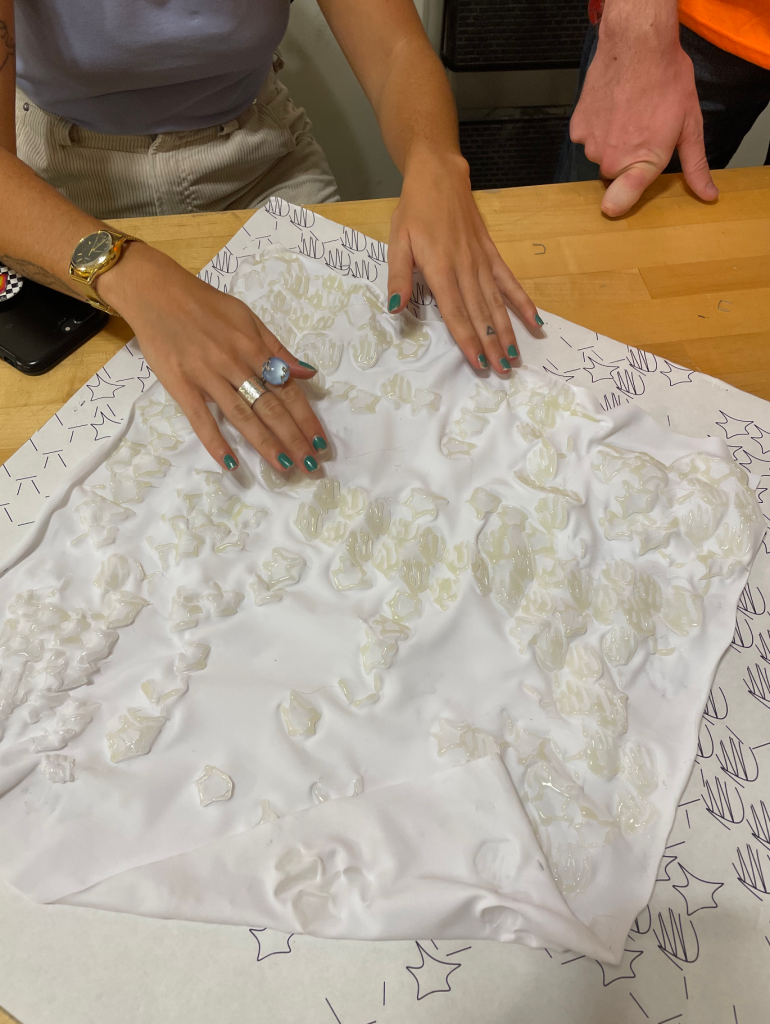
Additionally I had a one to one chat with Marantha about her experience with bioplastics and shared my intention to create thermachromic bioplastic samples to explore my previously mentioned question of how we can make barriers of touch more human to restore elements of intimacy?
]]>This first reading was a stark introduction back into academic reading…it felt like jumping off the deep end into icy cold water. You are instantly awake and memories come rushing back. Academic reading often feels outdated with uncommon language, over-explanations and over-analysis of everyday things. Even as an industrial designer, familiar with John Ruskin’s ideologies, it was a bit of a tough read. The following are some notes & my thoughts will be updated once I’ve had some time to reflect further.
]]>However, the text is extremely verbose. For example Spuybroek often draws in contemporaries of John Ruskin for comparison. This would be helpful, except that Spuybroek seems to provide either too much context (to the point of going on a tangent), or too little context (requiring outside knowledge). As this is clearly a persuasive and editorial text, clarity would be nice. Simultaneously, as Spuybroek is trying to bridge the gap between two concepts that have been traditionally been separate, because of his circuitous writing, his points sometimes get lost in the exchange of precedent and contemporary ways of thinking.
]]>First we have this strange relationship with machines. Are we controlling them or are they controlling us? They definitely have changed the way we live on a daily basis, permeating our actions like an invisible hand moving us. We believe in pragmatism, although we may be suffering negative and positive effects of the “extensions/amputations” theory. The bright part is, machines work as an extension of what we are, they eliminate tasks which take time, and they help us navigate through a competitive world. On the other hand, they may also be taking abilities from us, like literal navigation or writing on paper in a clear way.
There is an important part, I believe, of taking a break and thinking about how we use the tools around us, ‘cause that’s what they are tools, and what we make of them, what we let them give us, what we let them take from us, depends on our decisions.
Strictly speaking about design and art, technology gives us the big advantage of trial and error without much effort or consequences. We can now proof colors, compositions, styles, brushes, patterns without going through handmade-long processes just to find out at the end what wasn’t working. The issue with this, is getting so used to most of our problems as artists being solved through technology, we lose the ability to grab a brush and hands-on mess things up, and solve them, since there are abilities learned only through handcraft, and abilities learned through technology, it should become a cyclical process going from one to another in order to get the most of both parts. I don’t believe we can just stay on one side anymore, it would be irresponsible for us as artists. We should try to converge, craft and technology, to a point where they not only complement each other, but the line that divides them starts to blur and even disappear.
It’s funny how now we admire the crossover between artist and machine, how we admire when an artist can create realism in a way that seems machine made, and we admire the artistic mistakes a machine makes like the ones in risograph printing, like getting amused at a dog for walking with two legs, ‘cause that’s not how dogs are supposed to walk. We should start thinking less about how a human or a machine “should” work, and more about the process of creating independently of where results come from, for example with coding, I truly believe that a person coding an AI that will, in the end, make a work of art, is an artist, this way the concept of “artist” varies from having a brush in hand, and becomes someone who makes packages of information that are activated in a “if this, then that” relation. The way to move forward taking this in consideration, would be about the flexibility in the things we create, the concepts we come up with, the techniques we use, and our style, since the ability to change is what will permeate our future as creators.
So, how can we define what’s natural and what’s not in the design and art world?
Since it’s natural for us, as humans, to create tools and use them, but technology might feel far from an organic way of creating, and it all rests, I think, in the individual way of converging tools, wherever they come from, and understanding that there is an intrinsic naturality in the way everything works, from a computer to a brush, since it all comes from what we’ve learned in the past, nothing is completely new (otherwise we wouldn’t understand the screen of our phone for example), and understanding, also, there is a natural path to material, algorithms, machinery, and human mind that depends on the context. Patterns paint a perfect picture of this, they will always move depending on their context, depending on material, on coding, on purpose, so I believe that is something we should take from them, how to adapt and move as creators through the changes we encounter.
*
]]>Finding new tools that agree with me, force myself to look past conventional canvases, and learn new processes that can be adhered to mine are my main interests. I’m not looking to become an expert on 3D, or on weaving, but maybe I will, I want to let myself be taken by workshops, techniques and findings, with no prejudice.
*
]]>As I began my journey through the chapter, it was especially hard for me as a craft enthusiast who has spent the last two years working intensively with communities whose livelihood depends on craft. The immediate thought that jumped to my mind was Spuybroek’s piece not only diminished the importance of craft in culture and heritage, but it also neglected a wide strata of communities that have extensively practiced, for generations, their familial art and craft. Impacts of detaching the man from the practice, whether partially or wholly, are seen, in one way, in the form of loss of jobs which furthers depletes the economy of a country.
Coming from India, home to about 200 million artisans, I have experienced first hand the withdrawal of households from crafts, leaving them untarnished yet unsuitable for jobs beyond craft.
50% of household heads of craft producing families have no education with 90% of the women in these families being completely uneducated. – ‘Crafting a Livelihood’ report by Dasra
This leads to overall dissatisfaction amongst a huge segment of the population, and a significant decline in the economy. Losing faith in a culture’s craft practices in turn reduces the very force of binding a community together, given how generations and families of the many revolve around their craft practice. It is when reform needs to step in, people in power need to generate policies that support such practices, and awareness that is widespread among audience.
Awareness goes a long way, take the Bhutanese craft sector for example. The Bhutanese are drenched in their culture in every aspect of their lives resulting in a strong sense of belonging, culture, and identity, which leads to overall increase in the gross happiness index of a country.
Craft is about People. Communities. Culture.
Not Machines. Not Robotics.
In Spuybroek’s book, the idea that ‘As all craft moves to design, all labour must move to robotics’ is not only devaluing human intervention in craft and design, but also comes from a place of privilege – the thought that equitable distribution of wealth, machinery, and access to same is being taken care of.
As I worked with the bamboo weavers of Orissa, I witnessed many of the machinery that was provided by bodies of support, lying barren, lying untouched, and lying in the cold shadows of fear amongst the artisans. Lack of education lead to lack of confidence in operating machinery that makes tasks simpler. So while Spuybroek is right in his thought of reducing manual labour, it is rather idealistic to impose this task as a necessity, and disregard the many lives that are going to impacted by doing so.
Although, in many a scenarios, the author contradicts himself by communicating the value human intervention and the importance of intellect in material play. He talks about how ‘variable modulation liberates the mold from boring repetitions’, and the inherent danger in splitting crafts into design and robotics. I have to strongly agree with the author when he speaks of the need for material to talk back to the creator, the need to prototype, the need to use our hands, and the need to play with the material in order to build with the material.
Upon closing the chapter, however, my mind shifted into being in support of the author when he mentions ‘we want to go back to craft, but not via history’, making this the very core of my thesis study.
However, before we begin to discuss revival techniques for crafts and craft practices, and the craftspeople associated with it, it is important to question the role of craft itself. As Spuybroek talks about automatic, or mechanising most practices and processes, it is important to know that the purpose of craft was never to serve the layman, was never mass production, was never to compete with machine goods, and was always focused towards maintaining royalty a class apart. As the author correlated crafts to ‘ornamentation / decoration’ it is important to realise the value of intellect, the value of human labour, and the value of imperfections and variation caused by human labour – a concept strongly understood as wabi sabi.
On this note, I would like to end by saying that the purpose of craft itself, and the audience it caters to, keep the value of craft alive only at the marvel of it being handmade. It is important to note the value at which an article is priced, cherished, and used as an ornament, and the sheer shock one feels, upon realising the product is handmade. As I leave, I leave with a few incidents of many established individuals, likes of who will keep craft alive, regardless of the redundant ongoing fight between machine and craft.


My name is Julian Gagnier, I’m a Senior in the Architectural Design Department. I feel most comfortable in the digital realm, and a lot of my work is focused on both design, and technological usage. I use 3D modeling extensively, as I don’t draw very much, and a lot of my focus after the design phase is on the rendering of my geometry. Conversely, I also love designing and building things out of wood, whether that be in a full woodshop, or carving with a knife. While I don’t (haven’t) used digital fabrication as much as I would like, I am comfortable with employing various fabrication methods in my work.
I am an avid outdoors person, and while that affects my work and a lot of it’s theming, it does not intersect as much with my practice as I would like. Through this passion, I have developed additional interest in subjects like temporary structures, off-grid design and living, industrial design, ecologically-minded design, and others, all of which I hope to explore in some way in this class.
]]>Response to Generative Algorithms
A comprehensive introduction to weaving and the digitalization of the very traditional craft. Though I still feel alien to grasshopper, the chapter patiently leads me through the logic of how weaving can be realized in the virtual space. The reading also answers my question from last encoding the environment workshop that why some geometries are overlapped in pattern, which created unexpected dimensional texture in the outcome.
I think the reading serves as a nice handbook which breaks down the overwhelming script into small steps for people who are new to the area. It also shows how computer translate the schema of the human craft into a numeric way that creates a new language for both human and machine.
09/08/2021
Response to The Sympathy of the Things
I’ve been curious about the notion “self” recently, and thinking about how I am connected with myself through the time. The book has nothing to do about self exploration or theory about time, but the author’s definition of pattern, and his elaboration on how pattern comes out through the schema, turned out to be an inspiring metaphor for me to understand myself at this moment and the “selves” that stayed within the past that form the one now.
According to Spuybroek, “pattern is not an index of order but the expression of transfiguration. It’s all in the passage.” I feel a kind of similarity between the existence of self and pattern. Every time I look back at words I wrote before, it’s like conversing with a stranger, and that makes me feel I’m split from the past of the myself. But the “uniformity admits variation” within the patterns comforts me that I’ve been through the formation of myself rather than cutting the connection with myself, and my growth over time is just like patterns, which are “true expressions of formation as time-dependent”. Myself in every moment, unfolding with the changefulness, is the “spatial forms” as the final product that “carrying all the information as a graph of the process.”
]]>
Xinran is a graphic designer from Shenzhen, China. Her works mainly focus on branding, editorial design and motion graphic. She is exploring speculative design and multimedia storytelling.
Recently thinking about :
→ Xinran’s CPJ
]]>Spuybroek writes about the inherent variation involved with nearly everything, even something as simple as writing the letter ‘a’ ten times. Despite our best efforts, every single one of these letters will be slightly different, even if the steps we took to write them were the same. I love this notion, the idea that even as a copy something maintains an originality. Worringer refers to this idea of an “infinite variety of expression”:
“If we trace a line in beautiful, flowing curves, our inner feelings unconsciously accompany the movements of our wrist. We feel with a certain pleasant sensation how the line as it were grows out of the spontaneous play of the wrist.”
There were some moments in this reading that took me a few passes to grasp, specifically where Spuybroek relates computer code to handwriting in how different parts of code must related and interact with others, much like letters interact with each other when written in a word. He notes, “A computer is not a machine that replaces hand-drawing or handicraft; it is handicraft taking place at the level of drawing and design, a way of positioning any possible motor schema inside production itself.” I definitely had not thought of code in this way before, but I think it has certainly shifted my view and understanding of it going forward!
Somewhat similarly, the idea that code communicates with things just as humans communicate with humans has helped me to better understand what code actually does: it is much more than a string of characters, and while it might be a ‘simple’ language, its outputs can be extremely complex. Spuybroek writes, “As all craft moves toward design, all labor must move toward robotics.” What an interesting idea!
The idea of climate change and temperature change as factories that take matter and output products (such as precipitation) was…well, fascinating and a view I hadn’t considered before now, as the term “factory” generally conjures up smokestacks and metal and industry. I love the phrase “uniformity amidst variation” that was used to describe snowflakes; it is concise and accurate.
I am holding onto the definition of ‘iteration’ as: inexact repetition. Yet another thing that I haven’t thought of in this way, despite using the term iteration/iterative to describe large portions of my own creative process. The description of William Morris’ wallpaper design techniques was quite enlightening too, and how our captivation comes from us knowing it is a pattern without being able to SEE the pattern, thanks to complex axes of symmetry. In other words, the tiling/repetition is disguised, in a way. “Keep the edges dashed!” His designs are a cooperation of the “mechanical” with the “organic.”
The reading talks about the trend towards using “honest” materials (read: natural) that leave traces of the process. Though this initially seems like a good idea, Spuybroek argues against it, stating: “the material and not the design takes responsibility for the sympathetic relationship, leading to a naturalism without grammar incapable of connecting the pattern to the form of the object.” It makes it feel more natural and sympathetic without actually making the design be sympathetic. I also enjoyed the idea that ornament is a form of tenderness because it serves no function and is “perfectly useless.”
I will continue to mull over this point for quite some time, if not forever: “Digital technology indisputably means a move away from uniformity toward variation; the only question remaining was how to design with variation.”
“Let us seek a way to send our postmodern tools back to premodern times.” YEA!
Unravel the Code was initially recommended to me by my then program director, José Ruiz. I assume he suggested the class because it converges on a number of my interests—interdisciplinary collaboration, international exchange, design (conceptual, graphic, industrial, etc.), and visual arts. My passion for these subjects developed over a long period of time, but one of the biggest inspirations that I can remember was seeing the exhibition, Design and the Elastic Mind, curated by Paola Antonelli at MoMA.
It was 2008, and I was in NYC with my dad visiting Columbia University—a school that would certainly not admit me. As part of the trip, we went to MoMA where we saw Design and the Elastic Mind. It was a very different style of art exhibition than I was accustomed. It was more like a fancy science fair instead of the exhibits I had seen at the Nelson Atkins or the Kemper. The works ranged from the highly conceptual to the then operational. There used to be a really wonderful website for the exhibit, but it has since been archived due to the demise of Flash. Unravel the Code feels like it will be a lot like a mini version of Antonelli’s exhibition.
I am not exactly sure what my role will be with this group. I have little to no technological experience as compared to my peers, so I feel a little scared by the class. I am sure I will find a way to fit into the system though.
]]>
While I agree with Lars Spuybroeck’s overall premise, I found his writing to be extremely complicated to understand. His thesis that our machines should hybridize, forming grotesque entanglements aligns with my personal interests in non-duality, cyborgs, and non-delineation. Expanding on Karl Popper’s philosophy on clouds versus clocks, I would call this a cloud of clocks (one that is particularly cloudy). I think I had trouble following the writing for a few reasons. One, almost all of the references were new to me. I was unfamiliar with the majority of people, processes, and design terminology Spuybroeck uses in this book. Second, he writes in what I would consider to be a more traditional critical theory or philosophical style. This style of writing tends to speak in objective absolutes. I find this type of writing to be unrealistic, over confident, and often times self-defeating as a result of its hypocrisy. In other words, I don’t like when writers portray personal opinion, on what are obviously subjective issues, as facts. Lastly, he writes about a great deal of visual items, but the actual images of these items are limited at best. In the end, I appreciate his opinion, but I do not connect with the way in which he supports his argument. I bet some other people enjoy this type of writing more thoroughly than I do though.
]]>As for my ‘why’, I would like to start with an emphasis on what crafts mean to me.
As a kid, I have always watched my mother work with craftswomen in our living room, teaching them the art of embroidery, and embodying the expertise of design that benefited the art itself. These women were gifted, and they were exploited by many – given the absence of realisation that their art means so much more than just a familial line of practice,
As I grew up, I grew aware of how my mother indeed uplifted these women by making them believe into their heritage, while also being able to upskill them by providing the knowledge of design. Through the course of my professional journey, I have come to intertwine my personal passion, belief and love for the craft sector of India with my knowledge of ‘Social Design’.
Once such incident that struck a chord to preserving crafts for me was my visit to the remote villages in the beautiful state of Orissa, India. As I visited the artisans and bamboo + textile weavers, I witnessed their workstations saturate with machinery, great tools and technology gifted to them by many of the schemes that worked in their favour. However, technology as a language was intimidating to them.
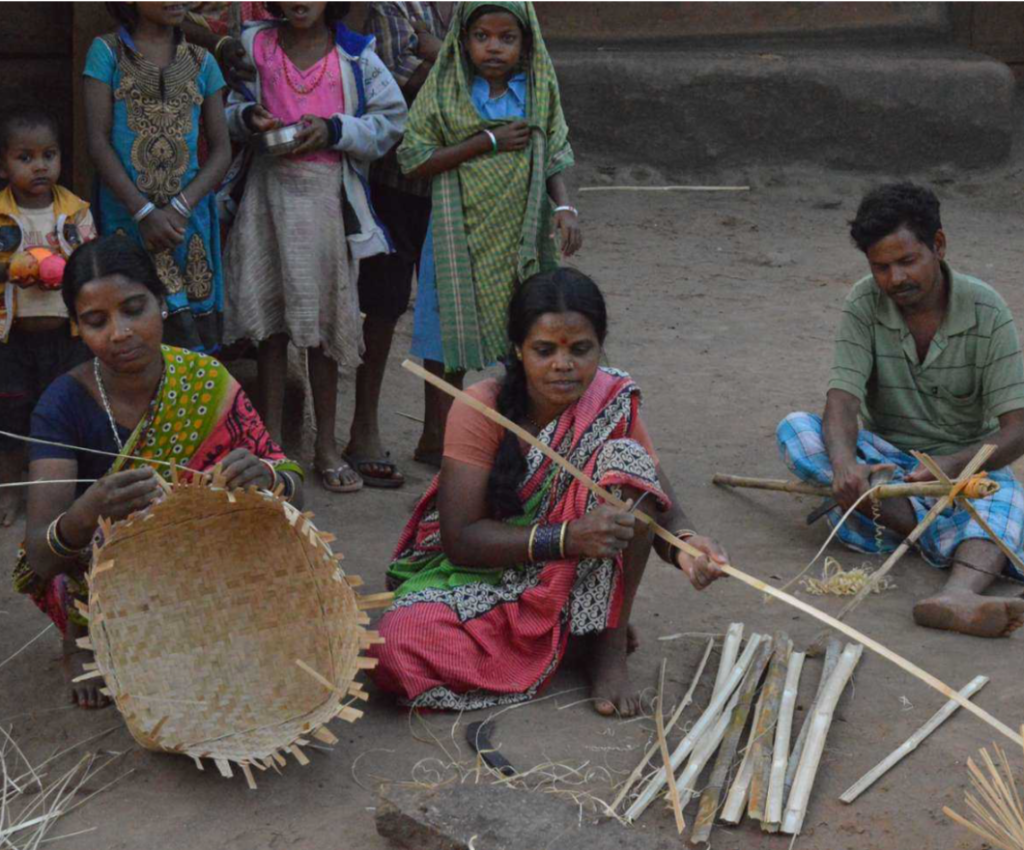

I then decided to find a synergy between the language they are used to, and the language of the modern day technology. This becomes my core reason for joining Unravel the Code.
My expansive work with cottage industries based both in India as well as the beautiful country of Bhutan has persuaded me to discover practices that can benefit a whole community of artists and handcrafters.
As I gained international experience of what crafts mean to communities beyond my recognised parameters, and I began to see how communal an activity it can be, I decided to pursue this passion for crafts not just within my known culture, but extending my understanding of what goes beyond that.
Today, I represent the many artisan lives that revolve around the Indian economy, and various other economies, and are being made to feel invisible with the onset of technology and globalisation. I look forward to learning how great craft can be ideated, created, and completed, and I wish to take this knowledge forward into the world to impart it to creators and artists that do not have the ability to grow and voice themselves.
]]>Welcome to my Creative Process Journal for the Fall 2021 Session of UNRVL The Code. The following are some areas of interest and methods of making that I am considering exploring throughout this session.
Topics of Interest:
Methods of Making:

Up until the previous semester, I’ve only taken Architecture and Graphic Design courses at MICA, besides my required FYE courses. After being exhausted by online classes and online HW, I decided to enroll in fibers and screenprinting courses. I was amazed at how much fun I was having, and how I was able to relate both courses to my interest in parametrics and other architectural themes to create art rather than design a structure.
I’m excited to further explore the intersections of design, craft, and art as well as how different mediums can come together in this course and am looking forward to absorbing information from people of all backgrounds.
]]>Start with
https://circuitpython.readthedocs.io/projects/circuitplayground/en/latest/index.html
The actual reference is:
https://circuitpython.readthedocs.io/projects/circuitplayground/en/latest/api.html
Programmers will be slightly annoyed, as it doesn’t follow conventions we are used to.
People, however, will appreciate the pictures, examples, and explanation.
]]>
That means you can program CircuitPython in it! You can also use Jupyter Notebooks for many other programming tasks, including processingJS.
In fact, you should go through the “classic notebook” tutorial in python. It runs in your browser, so nothing to install: go try it, click on Try Classic Notebook. Go through each link in the Outline of some basics.
Installation for CircuitPython is mildly tedious. But, even I could do it. If you are using linux, you probably should use the anaconda install (because it needs certain versions of python3). The adafruit tutorial has an outdated link for anaconda, use this anaconda link instead.
In the adafruit tutorial, the “CPX_Blinka” example shows off a few things about Jupyter. It mixes code and explanation, including a picture. This makes it nice to document your code. You should work through the adafruit tutorial.

That grey box is live, runnable code! You’ll want to use the keyboard shortcuts, see the Help menu, Keyboard Shortcuts.

Jupyter is really just talking to the REPL. So, your program won’t be persistent. But, you can easily export the .py file and drop it into the “circuitpy” drive. Use %softreset very carefully.
“JupyterLab” is a fancier version (also at https://jupyter.org), able to mix different notebooks, and more.
Adding the hooks to save a .py and .html may be useful.
github knows how to render a _static_ notebook. It will look right, but you can’t run any code. It may be possible to integrate github and jupyter using this thing.
Binder can make a notebook runnable (but not editable). For example, it can run a notebook in github. But, it can’t do CircuitPython.
Google Colab lets you put the notebook in a google-drive, and run it, edit, share. You can use normal google-drive access control. No version control. Can’t do CircuitPython
]]>